Adventures
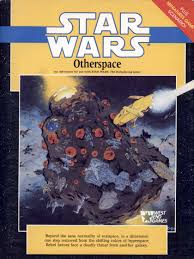
Otherspace
Otherspace
A Star Wars Adventure for use with Star Wars: The Roleplaying Game
by Bill Slavicsek
Beyond the sane normality of realspace, in a dimension one step removed from the shifting colors of hyperspace, Rebel heroes face a deadly threat from another galaxy.
Development & Editing: Greg Gorden. Development Assistance: C. J. Tramontana. Art Direction: Stephen Crane. Graphics: Bernadette Cahill, Rich Hawran, Sharon Wyckoff. Cover and Interior Art: Jeff Dee. Map Art: Stephen Crane. Production: Steve Porpora. Rules Upgrade: Greg Gorden, Bill Slavicsek.
West End Games, RD 3 Box 2345, Honesdale, PA 18431.
Introduction
The theater darkens. Anticipation builds as the curtain slowly rises. Light splashes onto the silver screen, projecting images and shadows that will captivate the audience for the duration of the show. The music intensifies, the credits roll by, and another action-packed episode of Star Wars: The Roleplaying Game begins...
Otherspace is a Star Wars adventure for two to six players and a gamemaster. Gamemasters should read the entire adventure before play begins so that the action and storyline can progress naturally, without a lot of page flipping and undramatic pauses.
Players, however, should stop reading this booklet now. The information contained herein is for gamemasters (GMs) only.
In This Adventure...
...a group of Rebel heroes fight in a place far removed from the galaxy they are struggling to liberate. A problem with their ship's hyperdrive engine deposits the Rebels in a galaxy beyond realspace, in a dimension past the shifting colors of hyperspace. They find themselves in — otherspace.
In this strange, unexplored dimension between the hyperlanes and realspace, the Rebels discover a harbor of lost ships — of both known and unknown origin. The abandoned, deserted vessels orbit a giant craft that resembles a decaying asteroid floating upon the ebony sea of space.
Something awaits the Rebels within the dark interior of the desolate vessel, something terrible. It has waited untold ages for their arrival, planning for its eventual escape from this in-between place. And when it reaches realspace, then the galaxy will die!
Adventure Materials
In addition to the adventure booklet, Otherspace includes:
- Star Wars Rules Upgrade. This four-page folder contains important additions and clarifications for Star Wars: The Roleplaying Game. Be sure to incorporate the new rules into your gaming sessions.
- The Pullout Section. This eight-page pullout section includes the adventure script, maps of the Alliance transport Celestial, the gamemaster's key to the full-color map, non-player character templates, the "red mist cards" that simulate the effects of the alien nightmare gas, and the battle map that is suitable for use with Star Wars Miniatures Sets.
- The Full-Color Map. This poster-sized map details the interior of the alien vessel Desolate, the locale of the major action in this adventure.
- The Battle Counters. This strip of cut-apart counters features PC markers and other markers that can be used with the battle scenario in episode five.
- Additional Materials. Other items needed to play this adventure include Star Wars: The Roleplaying Game, pencils, paper, and lots of six-sided dice. The Star Wars Sourcebook, The Star Wars Campaign Pack (which features an updated gamemaster screen), and Star Wars Miniatures Sets are useful but not necessary for play.
Difficulty Numbers and Game Balance
As GM, you must modify this adventure to fit your particular group of players. Use the Difficulty Number Scale found in the rules upgrade to accomplish this.
For example, if the text says that PCs must make Easy con rolls to perform a given task, turn to the "Difficulty Number Scale" in the upgrade. Assign a number between 6 and 10, depending on the level of skill of your PCs.
Note that, in the text, attributes are capitalized and italicized, skills are only italicized.
Also remember that the number of PCs and what template types they use affects the outcome of each encounter. This adventure is designed for six beginning player characters with a good mix of skills. If you have fewer PCs, you may need to scale down the encounters accordingly.
Adventure Background
Between realspace and hyperspace there exists another reality — otherspace. Here, space is slightly warped and light shines less brightly. It is a galaxy of things strange and familiar ... and deadly.
Otherspace has become a final resting place for ships that travel the hyperspace lanes and lose their way. Those that once inhabited this dimension are gone. Only the ships remain, floating silently like mausoleums in a star-filled graveyard. One such ship is the massive vessel Desolate. It epitomizes all that otherspace is: dark, compelling, dangerous.
Drifting like a massive castle in space, Desolate is a beacon silently calling to its fellow derelicts. It draws the lost vessels like a strong navpulse in the middle of an ion storm. Many of the ships are connected to the larger craft, forming a patchwork of damaged starships. Many more orbit Desolate, caught in its pull and decaying slowly, steadily.
Within the dark interior of the quilted craft, the Charon rule. These spider-like aliens sleep, waiting for their commander to lead them into the Void.
The Charon — violent, evil, and totally alien to the Galactic Empire — are ruled by the being named Ber'asco, he who bears the title "Final Prophet." Traveling from galaxy to galaxy, the Charon transformed every living world along the way, leaving dead and empty husks in their wake. Otherspace is the cumulative work of an ancient career.
The Void must be honored and served by destroying the living, says an old Charon proverb. The ships which circle Desolate have provided Ber'asco with the knowledge that other bastions of life still exist. It is to these contaminated realms that Desolate must go to cleanse them of the hated life. The long awakening has begun, and soon the mighty ship shall make another journey.
Recent Events
The Rebel transport Celestial, converted into a prison ship, held the Imperial agents Commander Bane Nothos, the bounty hunters Zardra and EL-434, the pirate Celis Mott, and Governor Moff Ravik.
The PCs were dispatched to meet the recently-loaded transport, their mission to pilot the ship to its destination and deal with any untoward incidents. But before they reached the vessel, things went wrong aboard Celestial. Bane Nothos broke free and released the other prisoners. The Imperials caused a power loss in the Rebel ship that damaged the Celestial's hyperdrive engine. The prison break turned into a mutiny when many of the Rebel crew, adrift with no immediate hope of rescue, submitted to the powerful leadership of Nothos and Ravik to see them through the crisis. Nothos promptly sent a distress call to the nearest Imperial base.
Celestial's captain, forever loyal to the Alliance, played her final gambit before the Imperial forces arrived. Plotting a jump through hyperspace, despite the obvious dangers inherent in operating a malfunctioning hyperdrive, she punched in the command code. An explosion rocked the ship as it plunged through the shifting corridors of color that mark the hyperlanes. But the ship didn't stop there. With a burst of bright darkness and a tear in the colored wall, Celestial was deposited into otherspace.
The Main NPCs
Here are brief explanations of the major non-player characters, including their plans and motivations. More information is available in the pullout section and in the various episodes in which they appear.
Bane Nothos: Once Bane Nothos was a District Commander with dreams of advancement up the Imperial ladder. But the event that should have been his greatest victory turned into his most bitter defeat. In the Roche asteroid field, Nothos was moving in to capture the Rebel leader Ackbar and his top-secret project when disaster struck. A group of Rebel agents actually used the secret weapon against him when Nothos ordered his flagship to attack before the rest of his blockade fleet arrived. Ackbar and the Rebels escaped, and Nothos was demoted to commander of an Outer Rim Territories patrol fleet. (See the Star Wars adventure Strike Force: Shantipole for more information.) Hoping to win back his position, Nothos again ordered his ship to move into a hostile situation without adequate support. He was captured and placed aboard Celestial for transport to a safe location.
Grand Moff Ravik: Imperial Governor Grand Moff Ravik has risen rapidly in the service of the Empire, but not quickly enough to keep pace with his ambition. Ravik coveted the position and influence of the late Grand Moff Tarkin. Ravik ruled Tolonda sector with a masterful iron hand. Fear kept his planets in line, and Ravik was a grandmaster of fear. But a Rebel strike team hijacked his shuttle on its way to an Imperial conclave. He was taken to Celestial for a different kind of meeting. While angered by the Rebels, he desires power more than revenge.
Celis Mott: Pirate leader Celis Mott commanded a loosely associated armada that operates along the Nanth'ri space route. Recently he took an Imperial commission, selling his armada to the Empire. In exchange for the freedom to plunder merchant ships without fear of Star Destroyer reprisal, Celis Mott agreed to turn over any and all suspected Rebels encountered in such raids. A Rebel fleet was dispatched to put an end to the pirate attacks, and Mott was captured. Now he seeks to bargain his way free and return to his fleet — which he knows will disintegrate without his leadership.
Zardra: Zardra, the mysterious bounty hunter who loves the challenge and danger associated with each hunt, has been busy since she took the job to find Adar Tallon (see the Star Wars adventure Tatooine Manhunt). She has continued to work for the Empire, but a branch of the Imperials decided to single her out as the reason for the failure to capture Tallon. Zardra has since found herself the target of several bounty hunters. She never trusted the Empire, but her need to continue in their employ and her bent for danger causes her to the see the bounty hunters as a challenge which keeps her sharp rather than as a threat. Her last assignment went sour when her informant turned on her and sold information to the Alliance. Zardra was captured by the very Rebel she was tracking. Zardra vows to find the informant again.
EL-434: EL-434 is one of the many assassin Droids now serving the Empire. EL-434 is nasty and enjoys what he does. His last mission was to invade a Rebel base and destroy everyone and everything. But the Rebels were ready for the Droid and subdued it. The assassin Droid overrode his self-destruct program, calculating that the Rebels will take him to an important base or safe-world. Then EL-434 will be able to accomplish his programming in grand style.
Ber'asco: The leader of the alien Charon and commander of the strange starship Desolate, Ber'asco leads the Charon's cult of death. He has awaited the enlightenment promised with the extermination of life, but the answers have not yet come. After a long thought-sleep in the silence of otherspace, life awakens the Charon. Ber'asco realizes his mission is not yet complete, and the word of the Void must be spread to another universe before his peoples' promise can be fulfilled.
Charon: Charon are spider-like beings from a far away portion of otherspace. Humanoid, these spider beings are tall and thin with multiple appendages. Sharp claws, used in combat, are coated with a poison that attacks an enemy's central nervous system. Charon venom progressively destroys nerve cells. Victims are first rendered helpless by pain and hallucinations, dying when every nerve cell crumbles. Charon are excellent climbers, using their powerful limbs and claws to move over most obstacles. They produce a sticky webbing employed in a variety of uses. Not all Charon hated life. But Ber'asco's cult found meaning and purpose in the destruction of the universe; the other Charon were the first victims of the cult's beliefs. In their crusade against life, the Charon have developed a technology that uses life and lifelike processes to create undead machinery of destruction. They developed death mist, a compound similar to their natural poisons, with which to wage war on living star systems. The Charon aboard Desolate believe Ber'asco to be their Final Prophet, for he led the last campaigns of the great crusade which destroyed otherspace. His followers entered death-sleep until Ber'asco found the answers for the Charon. But as more ships were lost into otherspace, select Charon awoke to investigate.
Episode One
The TIE Armada
Summary
The adventure begins with a group of Rebel heroes on their way to meet the Alliance transport Celestial. But when their ship comes out of hyperspace at the pre-arranged meeting place, the Rebels find themselves in the middle of a TIE fighter wing!
Read Aloud
A long time ago, in a galaxy far, far away... A small group of Rebels race across space to meet up with the Alliance transport Celestial. They have been ordered to take command of the vessel and its secret cargo, then see it safely to a hidden Rebel outpost in an as yet unnamed sector.
But the Empire has a special interest in the secret cargo, and even now Imperial agents comb the galaxy in search of Celestial. What awaits the Rebels at the end of the jump may be more than they bargained for, and more than the galaxy is ready to handle...
Start the Adventure
Locate the script in the pullout section. Assign each player a part, from "1st Rebel" to "6th Rebel." If you have fewer than six players, assign additional parts as necessary. Pass out the script. We suggest you make enough photocopies for everyone, but you can share the copy from the pullout if you don't have access to a copy machine. The player assigned the role of "1st Rebel" starts the script and the adventure is underway.
When the players finish the script, pick up the action with "TIE Attack" below.
TIE Attack
When the players finish the script, read the following passage out loud.
Dozens upon dozens of TIE fighters scream past your ship. A blaster bolt explodes off your starboard bow as two TIEs take up an escort position alongside you. A voice crackles over your ship's comlink. "Unidentified vessel. You have entered a restricted sector of space. By order of the Empire, identify yourself immediately and stay on your present course. Any deviation will be dealt with accordingly. Our next shot will not be a warning."
It's time for the PCs to discuss their choices and options. But they must be quick about it. Have the voice break in on their discussion with threats and questions to speed them up and keep the tension high. Here are the important options the PCs will most likely consider.
Fighting the TIEs
The Rebel ship isn't as fast as the Imperial TIEs, but it can sustain more damage and has good shields. The Rebels best course of action is to fight and defend themselves as they prepare the ship to jump back to lightspeed. They should quickly realize that they cannot take on a full TIE wing and an Imperial Star Destroyer. Here is the way the combat should progress.
Combat Round 1: As soon as the Rebels do anything that makes their ship deviate from its present course (speeding up, slowing down, turning), or if they refuse to identify themselves, or if they take a shot at the two nearest TIEs, then combat begins. The battle uses the "RPG Starship Combat" system. The two TIES start at short range to the Rebel ship. All other TIEs are considered to be at medium range, but none of these get involved until the specified round. The Star Destroyer is beyond long range this round.
Combat Round 2: Four more TIEs join the battle, starting at medium range to the PCs' ship.
Combat Round 5: Six more TIEs join the battle, starting at medium range to the PCs' ship.
Combat Round 6: After six rounds of combat, the Imperial Star Destroyer begins to move into attack position.
Combat Round 7, 8, 9: Two more TIEs join the battle each round, starting at medium range to the PCs' ship.
Combat Round 10: Eight TIEs attack, starting at medium range and using combined fire to their best advantage.
Combat Round 13+: On the thirteenth round, the ISD begins to fire its tractor at the Rebel ship from long range. If the Rebel ship is hit it is captured. Go on to the section entitled "Captured!"
The Rebels' ship is The Long Shot, the craft detailed in the Star Wars Campaign Pack. Its statistics are provided here for ease of play. The TIEs are standard TIE/ln starfighters.
Rebel Modified Short Hauler (The Long Shot)
Hyperdrive Multiplier: x1
Sublight Speed: 3D
Maneuverability: 1D
Hull: 4D
Shields: 3D
Weapons: Two laser cannons (fire separately); fire control 3D; damage 5D
These statistics are for The Long Shot, the short hauler supplied to the PCs by the Alliance. If the PCs have a different ship, use its stats instead.
TIE/ln Starfighter
Hyperdrive Multiplier: None
Sublight Speed: 5D
Maneuverability: 2D
Hull: 2D
Shields: None
Weapons: Two laser cannons (fire linked); fire control 2D; combined damage 5D
Starship Piloting: 3D+1
Starship Gunnery: 3D+1
Fleeing the Battle
The Rebels can attempt to flee the scene at any time, either as their first option or after a few rounds of combat. If they open up their ship's engine and try to speed away right from the beginning, use the combat round schedule above with the following modification; if the Rebels start the calculation for the jump to lightspeed before speeding away, there will be four rounds of combat before the jump to lightspeed can be made (Imperial sensor sweeps of the ship would pick up impulses from the nav computer as it made its calculations). If the Rebels are making a hasty jump, the Imperials have no time to react. Go to "The Jump" below. If they start making calculations after combat begins (assuming they fought from the start without trying to race away), they must survive for 12 combat rounds while they build up speed and make their calculations for the jump. They are, of course, free to try and make a hasty jump, which takes a round.
Surrender
If the Rebels decide that they cannot fight or escape such a large force, they may decide to surrender. If this happens, go to "Captured!" below.
Captured!
If the PCs surrender or are captured by the Star Destroyer's tractor beams you will have to improvise a storyline. So it is probably better to give the Rebels a break ... but make them earn it. If they are captured by a tractor beam, they could try to jump to hyperspace while in the beam; with such a screwy jump the players should not be too surprised to end up in otherspace. The Rebels could play chicken with the ISD, running full throttle up the beam. Captain Westen would turn the beam off rather than severely damage his Star Destroyer.
If the Rebels get dragged into the hangar bay, there could be a confiscated smuggler's vessel also in the bay. The Rebels could hide and make a run for the ship, or blaze away and make a run for it.
If the players get stuck in the detention block, you are on your own. The Star Wars adventure Starfall provides details on the inside of the ISD's cousin, the Victory-class Star Destroyer, if you really want to run a breakout adventure.
Sidebar: Cut-Away to Star Destroyer Bridge
As the PCs either fight or flee from the TIEs, pause the action in order to cut to the following scene. Read aloud:
EXTERIOR: IMPERIAL STAR DESTROYER RELENTLESS. The massive ship of war moves gracefully against the backdrop of space, turning to meet the camera as it zooms in to focus on the command tower. The scene shifts to reveal ...
INTERIOR: RELENTLESS BRIDGE. The vessel's commander stands before the forward viewport, watching the flashing battle-dance of TIE fighters. A lesser officer waits nervously beside him.
"Lieutenant, have you projected the Celestial's probable jump routes?" Captain Westen hisses.
"Sir, we have several possible coordinates to which they could have jumped, but none stand out."
Westen turns on the junior officer. "But this Rebel ship is here to meet the transport. When the crew is in detention, I shall question them. Perhaps they have better information than you do, Lieutenant. Parlan disappointed Lord Vader — I have no such intention. If I fail, I do not intend to fail alone. Understood Lieutenant?"
The Lieutenant swallows and nods, remembering to salute a fraction of a second late.
Cut to ...
INTERIOR: REBEL SHIP LONG SHOT.
The Jump
As the PCs prepare to make the jump to lightspeed, read the following passage out loud:
More and more TIE fighters close in on your ship as you finish programming your astrogation computer. The calculations have been made and a course has been plotted. Now all you have to do is punch home the command.
(Ask for an astrogation roll at this point to increase the suspense. Nod when the player informs you of his or her roll, then pick up the narrative.)
The hyperdrive makes a grinding, popping noise. For a split second nothing changes; your ship continues to hurl through realspace as dozens of TIEs pull steadily closer. Then, all at once, reality shifts.
Describe to the Rebels the different feel to this particular jump through hyperspace. As their ship moves faster and faster, the streaks of color begin to break up and drift away. Weird holes appear in the hyperlane corridor, holes that exit into pinwheels of light or maws of absolute darkness. The ship shakes, the instruments go wild, and suddenly they arrive at a place they have never imagined. They have reached "otherspace."
Otherspace
Read:
Your ship emerges from the strangest light jump you have ever experienced. But something remains not quite right. Instead of the ebony sea of space, you stare out into a storm-gray pattern of nothingness. Swirls of colored gases break up the ashy expanse like jagged bolts of lightning cutting through billowing thunder clouds. But the most alien sight of all is the stars. Not millions of pinpoints of dazzling light, but billions of holes of shining dark that pepper the storm-gray space.
Episode Two
Celestial Found
Summary
In this episode the PCs find the Celestial, floating quietly before a swirling cloud of fiery gas. Within the transport, the PCs try to discover what happened aboard the ship as they wander its deserted corridors.
Examining the Rebels' Ship
When the immediate danger of a squadron of TIE fighters is past, the Rebels may want to determine the status of their ship. Here is what they can figure out using their own skills and equipment.
Checking the Hyperdrive
Any PC with Technical skills can examine the ship's hyperdrive engine. An Easy starship repair roll or better indicates that the unit is damaged. An Easy Perception roll allows a PC to attribute the damage to the initial collision with the TIE fighter when they first came out of hyperspace to meet Celestial. It is apparent that the damage caused the hyperdrive to malfunction and burn out. It cannot be used again without major repairs, and the ship lacks the spare parts to make such repairs. A replacement hyperdrive motivator must be found or built — even cannibalizing the motivator they have, the Rebels are still short five parts: a hypercoil, an influx capacitor, a power coupler, a 4-axial stabilizer, and a realspace compensator.
Checking the Sublight Engines
The sublight engines work. While they cannot be used to get the PCs home, these engines do provide maneuverability in this strange environment.
Examining the Nav Computer
A Moderate astrogation roll allows a PC to gain information from the ship's onboard nav computer. The nav computer plotted a course through hyperspace that the hyperdrive was unable to match. Instead, the damaged drive unit shot the ship into hyperspace — and beyond into a different dimension. A course can be plotted back, but the ship can travel that course only if the hyperdrive unit is repaired. If asked to determine where the Rebels have ended up, the nav computer uses its semantics circuits to name a place that is not realspace or hyperspace. The computer names it "otherspace."
Attempting a Sensor Sweep
While clouds of charged particles obscure and block detailed sweeps, some knowledge can be gleaned. All sensor operations have +5 added to the difficulty number; sensor operations is a Knowledge skill. Successful scanning reveals a ship approximately 120 sublight units distant off the ship's forward right arc, but it is near a particularly dense energy cloud that masks further details.
Using the Subspace Radio
Scanning through the full range of communication bands turns up an almost totally silent galaxy. There is no traffic talk, no warning beacons, no subspace chatter, nothing. The only channel with anything of interest contains a carrier signal on an Alliance frequency. No message comes across the open channel. It's as though someone turned on his com unit and then stepped away from the controls. An Easy astrogation roll allows a PC to follow the signal to its source near the dense cloud picked up on the sensors. Following the signal leads the PCs to "The Nebula" section below.
The Nebula
As the Rebels approach the nebula, read:
There, against the steel-gray expanse, spins a rainbow nebula. The cloud of swirling colors throws out waves of energies of every type. You notice your ship's instrumentation acting strangely. Readouts randomize and screens blink off and on. The miles-long cloud produces static that obscures your sensor sweeps and limits visual perception. Between the cloud and your ship floats another vessel.
This is the Alliance transport Celestial, dead in space. Life support seems minimal. PCs making Moderate Perception rolls notice that several escape pods have been jettisoned but that the cargo racks are still full. The Rebel ship can dock with the larger vessel only at the airlock over the engines or at the docking station under the cargo pods. Docking with Celestial requires a Moderate starship piloting roll as the transport is drifting and tumbling, its engines cold and inoperable.
Exploring Celestial
The Rebel transport Celestial has two upper decks, and rows of cargo pod racks tucked snugly under the hull shell. The only noticeable damage is a dark scorch near the engines. A Moderate starship repair roll allows a PC to determine that the damage occurred internally. On a Difficult Perception roll a PC spots strands hanging from the lower docking platform; (Charon webbing). In the odd light of otherspace the strands have a crystalline gleam.
The Celestial is a dying ship. It is cold, dark, and its air is stale. Some rooms have no gravity, and emergency lights are all that shine in the dim corridors and chambers. Refer to the ship descriptions below for details as to what the Rebels can see and what they can find on Celestial.
Sidebar: Otherspace
Otherspace is a universe beyond the boundaries of realspace and hyperspace. Unlike the blue-black expanse of realspace, otherspace is a silver-gray void filled with clouds of energy and dark stars.
The charged clouds and swirling spirals of energy form storms which can wreak havoc with navigational computers, sensors, and communications equipment.
The dark stars appear as holes in the fabric of the gray expanse. While planets orbit these voids, all are cold, lifeless rocks. Many are shattered and blasted smooth, the result of the Charon's thorough violence passing through this galaxy.
Devoid of life, otherspace now serves as a way station for ships lost in hyperspace. Most arrive here damaged and adrift. The energy storms serve to further damage and confuse their remaining instruments. Many fall to the Charon. Only those recently arrived intrude upon the silence of otherspace.
Celestial Room Descriptions
Each room aboard Celestial is numbered to match the map in the pullout section. Please refer to it to aid your descriptions.
-
Upper Airlock. One of the two places where the Rebel ship can dock to Celestial, this standard airlock opens into an upper chamber. The chamber contains a locker, a ship-wide com unit, and a ladder leading down. The locker contains two vac-suits, two medpacs, a glow rod, and a rations kit. The ladder descends to a vestibule.
-
Rec Room. This chamber is dedicated to relaxation and exercise. Gravity gone, the Rebels see a small gym set, a holochess table, and a zee-gee table (a game popular among the Corellian traders) floating about the room.
Celestial's Tale 1: Imperial Escape
The following information is for you, the gamemaster, only. Do not reveal any of this data unless the PCs search the appropriate areas within Celestial and make the proper rolls.
Bane Nothos sat waiting, impatiently twisting his massive Imperial signet ring around the first finger of his right hand. He didn't like waiting. He hadn't liked waiting when he had been an Imperial District Commander. He liked waiting even less now, as a prisoner aboard the Celestial. What he was waiting for finally happened. The service Droid bearing Nothos's evening meal entered the cell and proffered the dinner tray. Nothos accepted the tray a bit more slowly than usual, allowing the guards to pass by his cell. He squeezed his ring between thumb and forefinger. The ring's single-charge laser proved sufficient to disable the Droid. Nothos reprogrammed the docile mechanical, watched it leave, and sat to eat his meal. One last time, he waited.
Nothos wiped his lips, placing his napkin on his empty dinner plate. The Imperial, plate, and napkin were thrown in separate directions amid the metallic shrieks and the tumbling throes of Celestial being torn from its course. Nothos smiled. The reprogrammed Droid had done its work. The unsynchronized engines had heated themselves to slag and brought the vessel to a halt.
In the confusion of the disaster and in the dim light of the emergency power system, Bane pushed at the nonfunctioning lock and left his cell. He moved to Grand Moff Ravik's detention cubicle and opened the door. Ravik was standing.
"Situation report, Commander."
Nothos blinked once before replying to Ravik's order. "The Celestial's crew is ordinary, Grand Moff. Ordinary men panic when their ship loses power and mobility. Survival becomes paramount."
"Scared men are easy to command," said Ravik, "given the promise of safety."
"Some will stay loyal to Gryphon."
Ravik saw EL-434 silently exit its detention cubicle. A smile twitched on the Grand Moff's face. "I am sure we will think of something, Commander."
-
Galley. Inside are scanovens, sonic cleansers, and a storage pantry. This room is strung with Charon webbing. They have taken what few stores were left for testing by their bioscientists. An Easy Perception roll reveals scratches and gouges on the equipment, signs of cursory Charon investigation.
-
The Engine Room. The engine room spans two levels, forming a large open area around the main engines. The gravity here is very weak. A series of catwalks and ladders connect the levels and the various stations, consoles, controls, and maintenance ports. Smoke fills this area, and scorched and shattered equipment is evident. PCs making Easy starship repair rolls can learn that something unsynchronized the engines, destroying them and knocking out power to the ship. Without power, the air circulation system, life support, sublight drive, and most computer operations are impossible. Backup batteries provide enough energy to the computers to maintain limited access and data retrieval. The hyperdrive is an unusable, fused hulk. Nothing from this unit is salvageable.
-
Tech Shop. The tech shop features a limited repair station that can also be used to fabricate some machinery. It is useless without ship's power.
-
Medical Bay. This rudimentary medical bay lacks most of the basic comforts. Two beds and a diagnosis computer make up the facilities. PCs searching here find that the ship's small bacta tank has been removed, with claw marks left as evidence of the Charon theft. Most of the storage lockers have been raided, and all have been webbed closed. Cutting through the webbing requires a Moderate Strength roll; inside the lockers are four medpacs.
-
Crew Quarters. These spartan chambers feature double bunks, desks, chairs, and storage lockers. A miniature asteroid field of crew memorabilia spins about the room. Some clothing has been taken, but much remains. With Moderate search rolls, the PCs uncover two medpacs, a glow rod, a coil of syntherope, a cube of detonite, and a blaster pistol.
-
The Bridge. Through the blasted door to the bridge the PCs see a deserted room made all the more eerie by blinking instruments and the strange light cast through the viewport by the nebula cloud. Battery power temporarily keeps the monitors and computers operational. A Moderate security roll allows the PCs to play back the ship's log. The final log entry pops up as a holographic image, placing transparent figures on the bridge beside the PCs. The holorecord plays out as follows. Read:
Ghostly holographic images appear upon the bridge as the ship's final log entry plays back. A thin man in a severe Imperial uniform is visible through an arched doorway near the com station; crew members and a heavily armed Droid stand next to him. "Imperial emergency code three-delta-delta," he says. "This is Grand Moff Ravik. I have taken command of the Rebel vessel Celestial and await pickup by the ISD Relentless. I am broadcasting our coordinates now. Request immediate response as the situation is still fluid."
Ravik's sentence is punctuated by an explosion at the bridge door, blaster fire pouring through the breach. A woman, wearing the rank of a Rebel transport captain, leads the attack. The Droid and nearby crew members fire at the attacking party as Ravik moves out of view. A voice crackles from an unseen com: "Celestial, this is Relentless. We have your signal and are on our way."
The Rebel captain glances out the bridge viewport and her face tightens. She then runs to the helm and hits a button. Immediately the hyperdrive is activated and the ghostly images fade into streaks of light.
The record monitor shows that the ship entered hyperspace cold, without any astrogation calculations. This further depleted the remaining power and ended any additional recording.
As the holorecord fades, the PCs see a new sight through the bridge viewport. A large ship emerges from the swirling cloud of color that fills the steel-gray expanse. It is huge, dark, and alien to all known ship-design theories. Around it, orbiting like tiny satellites, are hundreds of smaller ships. Each appears lifeless and dead, as still and cold as the giant craft.
- Communications Station. This sophisticated com station contains a subspace radio, a subspace monitor, recording controls, and other standard communications equipment. A PC can check the communications record (by making an Easy computer programming roll) to discover the last com transmission was to the ISD Relentless.
Celestial's Tale 2: Exodus
A mutinous crew member applied a medpac to Grand Moff Ravik as the smoke cleared the damaged bridge. Zardra and EL-434 herded the Rebel prisoners to the lower loading dock while Mott and Nothos retrieved what data they could. The pirate gave a long, dramatic sigh which annoyed Ravik nearly as much as his wound.
"She's dead, Moff," said Mott, "Celestial has had it. We couldn't build a solid system boat out of what's left."
"Nothos, what have you got on that asteroid or planetoid ... whatever ... out there," asked Ravik.
Bane Nothos looked out the viewport. He looked back at his sensors. Then back out the viewport, a pause, and then a slight shake of his head. "Grand Moff, I believe the object out there is a ship."
"Abandoned like all the rest? Signs of life?"
Nothos hesitated. "It is not abandoned. But the life scanners are giving confusing readings."
Ravik rose, waving off the aid of the crewman. "Your opinion, Commander."
No hesitation from Nothos this time. "If it's a ship, I can command her."
Ravik looked Nothos over. Celis Mott shifted his attention to a dead readout as Nothos met the Grand Moff's gaze. The pirate waited until he heard a soft noise from the Grand Moff, and then glanced up to see Ravik nod curtly.
"We now have a destination for the life pods. Get us there, Commander."
-
Captain's Office. This well-appointed room contains a desk, chair, and couch. One wall is made of transparisteel, providing a breath-taking vista. Data pads and other records here show this to be the office of Captain Alain Gryphon, commander of the transport Celestial.
-
Captain's Quarters. This stateroom contains a large bed, a private bath area, and a locked storage bin. It takes a Moderate security roll to open the bin. Inside, the PCs find a data pad with coded information. A Difficult security roll breaks the data pad's code and reveals Gryphon's mission. She was to pick up a group of Imperial prisoners and prepare the transport for a two-month journey. She was to meet a group of Rebel agents who would take responsibility for and command of the transport for the duration of the journey, which was to take them on an evasive course to an Alliance safe-world. There the prisoners would be turned over to Alliance authorities, and command of Celestial would be returned to Gryphon.
-
Storage. Clothing, sleep gear, food, water, and other essential supplies for the long trip Celestial was undertaking drift throughout this chamber.
-
Detainment Cells. These storage rooms have been converted to detainment cells in order to transport the prisoners safely. While not as escape-proof as an Imperial detention block, these sealed chambers are designed to hold most normal prisoners. Unfortunately, without power for the magnetic seals, the doors can be pushed open with little trouble. Each cell is a bare chamber containing a bench/sleeping platform along the far wall. Only five of these cells were occupied: Celis Mott in A, Nothos in B, Ravik in E. C and D still have traces of their recent inhabitants.
Cell C. This cell, once occupied by the Droid EL-434, shows signs of damage. Long scrapes and gashes in the metal walls indicate something with a lot of strength was attempting to escape from the confining chamber.
Cell D. The air of this cell is redolent of a heady scent, with an underlying touch of Togorian belladonna. This was Zardra's cell. Any PCs who met her in Tatooine Manhunt will recognize her exotic, deadly scent.
- Loading Area and Lower Docking Platform. The Charon entered through this platform. Charon warriors immediately set up a defensive position — the hundreds of strands of webbing are the result. Some of the strands are thinner than a man's finger by half; these resist damage with a Strength of 2D. Others have been braided together to form supporting cables thicker than a Wookiee's thigh. These last are tremendously strong and resistant to damage; a direct hit from a blaster pistol usually results in a scorch mark and a small divot in the webbing (they resist damage with a Strength of 9D+2).
Celestial's Tale 3: Probe
A voice awoke Ber'asco from thought-sleep. Not the deep, reassuring voice of the Void, but the vibrating rasp of one of the bioscientists. Ber'asco focused most of his eyes on the speaker, now hearing words as well as sound.
"...again. The disease has even invaded our vessel. Our numbers are few enough that —"
Ber'asco's synchronized three-limbed motion silenced the bioscientist. "Pull warriors from death-sleep. Have them report on the pathology of the disease within our vessel. Take warriors and your brethren to their ship. Determine metabolism, biodefenses; form evaluation for resistance to treatment. Prepare the mists. Pull me from thought-sleep when you have or need answers. Now leave me."
The bioscientist prostrated herself, genuflecting on all limbs. Before she had righted herself, Ber'asco sank again into thought-sleep.
The floor of this open area is made up of divided lift platforms. Sections of the lift can be lowered to the docking platform, or the entire floor can descend to haul up larger loads; currently webbing binds together all but one of the sections.
A computer access port in one corner shows signs of damage, and a Droid lies nearby. An Easy Droid repair roll shows that its power center was disabled using a low-powered laser of some sort. Its programming was altered and its computer access jack has suffered a power feedback surge that melted the Droid's circuits. A Moderate Droid repair roll allows a PC to get the Droid to talk for a few brief seconds. It repeats back its last programming. "Find computer access port. Plug in. Relay signal to power cells to fire simultaneously." The Droid then shudders, and its memory circuits short out.
The lower docking platform is surrounded by five escape pod berths. Four of these berths are empty. Should the Rebels want to use the last life pod, they have to free it from the criss-cross of webbing which secures it to the floor (the net of webbing resists damage with a Strength of 5D+1).
Sidebar: Cut-Away to Desolate
Read aloud:
EXTERIOR: SWIRLING NEBULA. The camera pans across the expanse of color and drifting mist that makes up the swirling nebula. It moves closer, passing drifting ships that have become nothing more than space debris, to settle upon the huge, dark ship that emerges from the nebula cloud. Alien in design, the ship appears as just another dead wreck in the galactic sea of otherspace.
Then, without warning, eerie lights begin to flick on. The dead ship begins to stir ...
-
Guard Station. This control room contains detainment cell monitors and other security equipment. There are four dead guards here. The Charon have taken two others as samples, and a PC making a Moderate Perception roll can see that two bodies were dragged from here. A PC making an Easy computer programming roll can access the prisoner roster. The following information scrolls across the monitor screen. "Prisoners: Extremely Dangerous: Grand Moff Ravik; Imperial District Commander Bane Nothos; assassin Droid EL-434; the bounty hunter Zardra; Nanth'ri pirate leader Celis Mott."
-
Guards' Quarters. Six bunks and six storage bins are all that make up this chamber. Nothing of interest can be found in the personal effects.
-
Sensor Suite Station. An open archway leads from the guard station to this area, and a ladder ascends up to the communications station. Charon cannibalization has made this equipment unusable.
The Next Step
Before the Rebels travel to the Desolate, present the read-aloud section below.
Episode Three
Desolate Awaits
Summary
This episode takes the Rebel PCs through the sea of abandoned starships and into the alien craft Desolate. On the first level of the giant vessel they explore Desolate's strange architecture and technology, discover the fate of Captain Gryphon, battle the pirate Celis Mott, and experience the mind-altering effects of "death mist."
The Sea of Dead Ships
The approach to Desolate takes the Rebels through the myriad wrecked spacecraft orbiting the alien ship. Read:
You maneuver your ship through an armada of derelict craft. The scene reminds you of a busy spaceport with one important difference — the silence. These vessels are deathly quiet. No subspace chatter fills the void, no engines flare to adjust courses, no running lights glow warmly on these empty hulks. There floats a startug. There a freighter spins wildly. And there, beyond the blast boats and cruisers and transports, awaits the largest of these desolate vessels. As you watch, strange domes on each end of the unusually designed craft begin to glow with an otherworldly light.
The wrecked ships loosely orbit the giant craft. As the PCs' ship gets closer, the congestion thickens. The Rebel pilot must make three Moderate starship piloting rolls to navigate safely through the field of wrecks. Every failed roll indicates a collision with a wreck. Crashing into wrecks causes 3D damage against the Rebel vessel.
Entering a Wreck
If the Rebels want to investigate any of the abandoned ships, they must make a Moderate starship piloting roll to dock with a wildly spinning wreck. A failed roll means that the Rebel ship collides with the wreck (taking 3D damage) and careens off it.
Inside the wrecks, the PCs find similarities between these ships and Celestial. The vessels were all deserted quickly, and only essentials have been taken. Strange strands of sticky webbing can be found, most frequently in medical and engineering sections. In the engine room, the PCs discover that the engines — specifically the hyperdrives — have sustained damage. Moreover, the equipment has been torn apart and major pieces of machinery are missing.
Entering the Unknown Ship
Refer to the full-color map and the gamemaster's map key in the pullout section when describing the interior of the alien vessel.
There are four obvious entry points on Desolate's exterior. These openings are evenly spaced along the outer hull, each near a concentration of patchwork wrecks. One opening contains the four crashed escape pods from Celestial, and the details that follow assume this to be the entry point the Rebels choose to use. If they opt for a different entry point, adjust the descriptions accordingly.
The cave-like opening looms before you as you guide your ship toward the massive vessel. The opening is big enough for your ship to enter, and the area inside is suitable for landing. You pass through the cave mouth and meet resistance. A transparent membrane of some sort covers the opening, but your ship passes through it unharmed.
The membrane maintains the vessel's atmosphere. Ships may pass through it, as the membrane automatically seals itself when breached. Inside the cave is a large, flat landing deck within a rocky pod. An opening in the pod wall leads further into Desolate's depths, but the ship cannot fit through this passage.
Sidebar: The Alien Vessel Desolate
The Charon craft Desolate is an amorphous mass rising over 450 meters from base to summit. Domes of eerie light cap each end of the massive vessel, and a smaller dome engraved with a weird, weblike design, tops one rocky outcropping. Weapon pods dot the hull, growing from the surface material. These pods open to reveal huge, oddly-angled projectile weapons, but when closed they appear as disfiguring lumps upon the vessel's rocky exterior.
Hundreds of wrecked craft orbit Desolate, but many of their kin have been meshed with the amorphous vessel. These ships cling to the jagged surface, connected by thin, sticky webs and in some places even fused with Desolate's outer hull. These wrecks form a patchwork of damaged ships that cover the exterior surface. Near a large concentration of these quilted vessels, a cave opens into Desolate itself.
Inside, Desolate is a hollow cavity formed around a thick, central power core. The core pulses with inner energy and has some disturbing qualities. Created to be a living ship by an unknown race, the Charon have taken Desolate and made it their own. In doing so, however, they "improved" upon the vessel. Now Desolate is dead — or, better yet, undead — warped into the very essence of the Charons' beliefs. The ship does what living things do; it absorbs material for energy, it grows, and it repairs itself. It should be alive — but it isn't.
Thin strands of hollow tubing connect the undead core to the cavity walls. The energy that runs through the tubing creates beads of light that give the interior a golden glow, much like sun-sparkled dew upon a spider's web.
Four overlapping decks surround the central core, each connected by crawl tubes. The bottom area of the ship is filled with thick extensions that branch off the power core and attach to the cavity wall like the roots of some massive tree. Around these extensions swirls a red-tinged mist.
If the PCs land in the same area as the escape pods, they can tell all of the escape pods arrived intact. The atmosphere within Desolate is thick and wet, but breathable by the PCs. They do not need breath masks or vac suits.
The PCs find a common shipboard pet wobbling about the cave. A Very Easy alien races roll identifies the pet as an Adoris Feline, a small catlike animal favored by many freighter and long hauler crews. But something is wrong. Force users making a Very Easy sense roll detect no life within the creature. In fact, the feline registers as a total absence of the Force. Easy medicine rolls determine that while the creature mimics life functions, it has been altered and is no longer alive. Most of the nerve cells are destroyed, some replaced with micromechanical switches, circuits and fibers.
Platform One Encounters and Events
The Connecting Ramp
Another nearly-invisible membrane stretches across the portal that leads further into Desolate. The Rebels can feel it reseal itself as they pass through it. On the other side of the membrane a long, three-meter wide ramp stretches from the entry pod to a series of platforms that appear to float within the inner cavity. Thin tubes of light extend in all directions, connecting the central power core with the cavity walls. Far below the ramp, barely discernible in the deep gloom, is a thick, red mist. The ramp leads to platform one and the great hall.
The Great Hall
This irregularly-shaped chamber features a wide, open area nestled between three-meter tall organic-rock walls. The smooth floor is engraved with an unknown star map overlain with a constricting web pattern.
The Growing Chamber
This large area, built around the pulsing power core, is filled with pods that grow from the chamber's floor and walls. These pods have stony peels and thorny tendrils that form canopied paths between the irregularly spaced rows. Force-using characters can detect no life within these growths (see the sidebar on "Desolate and the Force").
The hard outer peels can be broken to reveal thick yellow paste that bubbles out of the breached pods. Near the power core, broken pods are scattered everywhere. The paste from these pods forms pools around the core. Thin tendrils twist and wind from the core into the pools, sucking the paste back into the pulsing column.
Event One: The Fate of Captain Gryphon
As the PCs explore the growing chamber, read:
The area ahead has been disturbed. Tendrils and pods have been crushed by reckless passage, and others show deep scarring from blaster fire. Scraps of torn cloth hang from thorny roots. A blaster lies discarded to one edge of the path, and more of the weblike material covers specific patches.
After some moments of examining this site of conflict, the PCs hear a low moan. It comes from a thick clump of overgrowth a few meters off the path, where a mortally-wounded Captain Alain Gryphon lies. An Easy medicine roll reveals that she has suffered grievous injuries from sharp, poisoned claws. She doesn't have long to live.
A Moderate medicine roll, or an Easy control pain roll, can be made to alleviate some of her pain and make her coherent enough to speak. She says:
"This mission hasn't gone so well, has it friends. My crew? Did you save my crew? The shadows stalked us from the moment we entered this abomination. We took precautions, but it's hard to see shadows in the dark. And their bite! A shadow dragged off Conners, and then the darkness itself attacked. Ravik and the others ran, leaving me and my men to fight alone. But you can't fight shadows, not in the dark ..."
Captain Gryphon shudders as the poison finishes her. No trace of the rest of her crew, Ravik, or the "attacking shadows" can be found in this area.
The Overlook
The growing chamber gives way to an area that overlooks the ship's lower cavity. Read:
The growing paths lead to a flat expanse. Some jagged rocks rise from the chamber floor, but these are not tall and do little to alter the stark contrast between this area and the overgrown one you just left. But the stony floor is not perfect. A large, gaping hole fills the middle of the chamber floor, and great cracks run from it to create canyons that fall deeper into the craft. Glowing light spills from the cracks, painting the chamber in arterial red.
The lower cavity can be seen if the PCs get close enough to either a crack or the large hole. Looking into these pits reveals an area filled with clouds of blood-red mist. A membrane separates the lower area from the rest of the cavity. Periodically, thick clouds of red bubble up through the barrier to send wisps of death mist into the upper area. Every so often the swirling mists part to show the pulsing, interconnected roots of the power core.
Sidebar: Desolate and the Force
Force-using player characters find the alien ship Desolate disturbing. The Charon have taken what was once a living being and removed the living spark. Now it is nothing more than an automaton whose very existence disturbs the natural order.
Those characters sensitive to the Force feel uneasy as they wander through the craft. The deeper into the craft they go, the worse the feelings get. Here is something that is dead, yet it has not been allowed to die. That is not the way of nature, and the resulting disturbance in the Force is almost painful to sensitive PCs.
Desolate registers as an actual absence of Force. Like a black hole, the craft sucks in Force but does not return any of the energy that binds all living things together. It is an abomination that goes against all Jedi training.
Charon History and Beliefs
The Charon's home star was caught in the influence of a huge black hole. The Charon death cult grew from attempts to explain what the Charon saw as the futility of their existence — the eventual death of their entire system. The cult was dangerous but small — until the Charon developed sublight drive. Given a grand purpose, the philosophy of the death cult spread through Charon culture like radiation from an uncontrolled reactor leak. The first world to fall victim was their home system. As the vast majority of believers had left the world, it was fitting that the unbelieving among the chosen race be the first to join the Void. For millions of years the Charon have brought death to otherspace. The following document is taken from the holodocs in Ber'asco's computer. It gives an overview of the beliefs of the death cult.
"The Void is the way of the universe, the fate of the universe, the truth of the universe. All shall go to the Void. Such is the natural order of things.
"The Void consumes all, yet we issued from the Void. The Void calls to us to return, and return we shall. But why has the Void issued us if only to consume us directly? Order guides the Void. Such is the natural order of things.
"The Void has chosen us. We, children of the Void, exult in this knowledge. For the Void is opposed by Life. Ever changing, ever growing, Life seeks to triumph over the Void. Life refuses to acknowledge the primacy of the Void. Such is unnatural.
"We are humbled by our responsibility. For only the Charon are chosen. Among all the living, only we understand that Life is not natural. We must return Life to the way of the Void. Such is the natural order of things.
"Among us shall arise the Final Prophet. This Prophet shall lead us to the final victory over Life. This done, the Void shall be pleased; the Void shall answer the Prophet and the way and the order of the eternal universe shall be revealed to the Prophet. The Prophet shall speak to us. Once we have heard, we shall all be free to return to the Void, to take our part in the Forever. Such is the natural order of things."
Sidebar: Stun Damage
When blasters are set on stun, or when characters are attacked by weapons designated as "stun only," these rules are used. Note that these rules replace "Setting Blasters on Stun" on page 48 of Star Wars: The Roleplaying Game. Also note that weapons set on stun retain their normal damage codes, but use the table below for the effect of the damage.
Stun Damage Summary
| Damage Roll vs. Strength Roll | Effect |
|---|---|
| DR < SR | No effect |
| DR ≥ SR | 1D Stun |
| DR ≥ 2× SR | 2D Stun |
| DR ≥ 3× SR | Unconscious |
All die codes (except Strength for purposes of resisting damage) are reduced by 1D for each stun. Stuns are cumulative within a round. For example, a character hit twice for a "2D stun" result each time would lose 4D for all actions in that round and the next round.
If the number of stuns taken in one round equals or exceeds the character's Dexterity, that character is immobile. Immobile characters are not unconscious, but they can take no DEX skill actions while immobile. If they have dice remaining in any other attributes, they can take actions which do not require movement. For example, if a Scout character received 3D of stun in a round he would be immobilized, but he could still use his Knowledge skills (at a 3D reduction).
If the number of stuns ever exceeds a character's stamina, the character is knocked unconscious.
Event Two: The Mad Pirate
Celis Mott, scourge of the Nanth'ri space route, has gone mad. The first Charon attack drove him into a swirl of red mist which made him insane. He vacillates between the cunning cutthroat he is and the dashing pirate he believes himself to be.
Mott has claimed the overlook as his territory, along with three equally-mad members of Celestial's crew now serving as loyal henchmen. When the PCs enter this area, Mott sees them alternately as loyal crewmen to be commanded with braggadocio and Rebels to be looted and then sold to the Imperials.
Mott starts this meeting in "shrewd cutthroat mode," ambushing the Rebels with hopes of plunder. The pirate and his three assistants attack the PCs from behind jagged rocks, firing warning shots and calling for them to throw down their weapons and supplies. The rocks provide medium cover (+2) for Mott and his men. If the Rebels comply with his orders, he sends the crewmen out to collect their belongings. But before the crewmen reach the PCs, Mott switches to "dashing pirate mode."
In "dashing pirate mode," Mott is amiable and apologetic for not having recognized the Rebels sooner — they are obviously loyal pirates. Mott tries to calm the Rebels, reacting with jocular patience to even blaster fire from the PCs (after all, he accidentally opened fire on the PCs first, and no true pirate would take that sort of thing quietly). The crewmen's moods follow that of Celis Mott.
Sidebar: Medpacs
Medpacs may be used more than once a day. Each medpac use beyond the first has less chance of being effective, due to negative synergy of the drugs and diagnostics programmed with the assumption that only one medpac is being used. Each medpac beyond the first used in a day increases the difficulty number of the healing by 3.
During this event Celis Mott switches between "shrewd cutthroat mode" and "dashing pirate mode" as many times as you can get away with.
Celis Mott has not been exposed to enough mist to kill him, but he will not be free of its effects in time to matter for this encounter. If the Rebels knock Mott unconscious, he awakens back in his normal frame of mind and agrees to help them until such time as they no longer serve his purposes. If they kill him in combat and check his body, a Moderate medicine roll determines that Mott had nerve tissue damage, but not as extensive as that suffered by Captain Gryphon.
Celestial Crewmen
DEXTERITY 2D+1
Blaster 3D, dodge 2D+2
KNOWLEDGE 2D
MECHANICAL 2D
PERCEPTION 2D
STRENGTH 2D
TECHNICAL 2D
Equipment: Blaster (damage 4D)
Cargo Hold
This chamber serves as a cargo hold for the Charon ship. Remnants of equipment from the many vessels stranded in otherspace have been stored here for use by Desolate's crew. Read the following out loud when the Rebels enter this area.
Within this odd-shaped chamber, dividing columns rise to a ceiling some 20 meters overhead. The columns are long and thin, made from the rocky material used throughout the ship. But stuck into the column are thousands of hexagonal pods, jutting out at various angles to form canopies above the narrow spaces between the column rows.
Sidebar: Cut-Away to Ber'asco
After the scene with Mott, read aloud:
EXTERIOR: THE ALIEN CRAFT. Strands of webbing reluctantly part as the camera gains speed. Soon it passes openings quickly, giving you brief glimpses of shadowy movement. Weird light begins to spring on off-camera, just out of sight, causing the barely-seen shadows to move faster.
A passage opens and the camera turns, traveling up through a vertical tube, up to a higher level of the ship. Then, abruptly, the camera stops.
The scene is dark, yet the light of otherspace filters in from somewhere above. Undefined shapes loom in the blackness, barely visible in the dim light. The scene gets brighter, the shapes become clearer, more distinct. But before you can focus on any particular thing, a shadow snaps into the frame and a multitude of alien eyes look directly at you.
"The illness has returned, my children," whispers a frightening voice. "Let us cure it."
Wipe to ...
INTERIOR: THE ALIEN CRAFT. Where a group of Rebel heroes continues to explore ...
As the Charon are not familiar with much of the technology used by the Empire and the Alliance, many useful items can be found in this chamber. If the Rebels search around and open a few of the pods, they discover common items carried on spaceships. One pod contains cartons of supplies for a mining colony. Another is filled with spare Droid parts. Yet another has survival tents shoved into it.
If the Rebels search more pods, allow them to find items that could prove useful but do not provide them with an undue advantage. So, they may find syntherope, glow rods, power shovels and protective vests, but not weapons, explosives or complete hyperdrives.
However, if the PCs make a Moderate search roll, they find one important piece they need to repair their hyperdrive unit. They find a brand new hypercoil, one of five components that make up a hyperdrive motivator.
Mists of Death
When the PCs reach this area, they meet a more resistive membrane. They must make Easy Strength rolls to pass through this doorway, or slice open the transparent covering with lightsaber, vibroblade, or knife (this membrane has a Strength of 2D). Blasters can only poke holes in the membrane, and these repair themselves immediately.
Once the Rebels are through the membrane, read:
Wisps of red mist hang low in this chamber, obscuring the floor and making it difficult to judge distance and size. Clouds of the crimson fog float freely, hiding and revealing other areas as they drift by. In the distance you occasionally catch a glimpse of a tube-like column rising into the ceiling, but the drifting fog encloses it before you can determine more details.
While the mist obscures vision, the room is flat and unadorned. A crawltube stands across the chamber, leading up to the second level.
The red mist is the Charon "death mist." It is their primary tool in their mission to eradicate life from the universe. In small doses it causes pain, madness, and hallucinations as it first attacks the nerve cells in the brain. Larger doses lead to death.
Event Three: The Death Mist Cards
Within the death mist, the Rebels must fight off the affects of minimal exposure to the gas. Even breath masks offer little protection, as the mist clings to exposed flesh and enters a person's system through pores. Only a sealed vac suit provides complete protection, and a PC wearing one crosses the chamber with no problem. Others must make stamina rolls to fight off the poison mist.
In the mist, even Rebels close to each other feel separated and alone as visibility constantly shifts and worsens. Each Rebel must make three stamina rolls as he or she crosses the room to determine if the death mist has affected him or her. The first is an Easy check, the second is a Moderate difficulty check, and the third and final stamina roll is a Difficult check. If any roll is less than the needed number, the mist's effects manifest in frightening hallucinations.
Locate the "Red Mist Cards" in the pullout section. When a player character fails a stamina roll, hand the player a "Red Mist Card." He or she must read the card. Leave that player in suspense until all other PCs have reached the crawltube or read a card. After reading a "Red Mist Card," the PCs find themselves at the crawltube.
After all PCs have made it to the crawltube go on to "The Way Up."
Death Mist Effect Chart
| Failed Roll | # of Effects |
|---|---|
| Easy | Three |
| Moderate | Two |
| Difficult | One |
Each effect temporarily lowers an attribute by 1D. Have each PC roll a six-sided die to determine which attribute is lowered by 1D for the duration of the next episode. No attribute may be lowered by more than 1D; roll again if the same attribute is affected.
| Die Roll | Lower This Attribute by 1D |
|---|---|
| 1 | Dexterity |
| 2 | Knowledge |
| 3 | Mechanical |
| 4 | Perception |
| 5 | Strength |
| 6 | Technical |
The Way Up
The Rebels have successfully crossed the mists of death. Read:
The frightening images fade as clouds of mist part to reveal a column that rises into the ceiling high above. There is an opening in the column which leads into a hollow tube.
This is a crawltube. The hollow tube leads up to the second level of the ship. The handholds lining the tube walls are too wide for humans to use comfortably, and are thin and deep. The climb to episode four is clumsy.
Episode Four
Heart of Darkness
Summary
Desolate's second level is more challenging for the Rebels, whose abilities are reduced due to the death mist. They also learn more about the alien ship and its crew, and meet Bane Nothos.
Platform Two Encounters and Events
Vehicle Bay
The crawltube leads up to a cavernous, hilly area — hills which are actually huge, translucent pods. Dark shapes can be seen within them. One pod is split open, but nothing remains within the hollow shell.
An Easy search roll allows a PC to discover a small, round protrusion on each pod. A slit runs across the protrusion, forming a pocket. If anyone reaches into these pockets, they can feel three knoby growths. Moderate Technical rolls let the PCs manipulate the knobs to open the pod. Read:
The pod splits open, each side falling away with a wet, sticky sound. Within the moist interior you see an alien construct of some sort. It looks more grown than built, as though its genetic material was manipulated to form unnatural shapes for some unknown purpose.
A Moderate technology roll lets a PC determine that these constructs are ships. The technology leans more toward the biosciences than engineering. The ships appear to hold crews of two, like starfighters, but do not appear to use anything remotely equivalent to hyperdrive technology.
The PCs can figure out how to operate the Charon ships only on Very Difficult Mechanical rolls or better. None of these ships have been used in a long time.
Three portals lead out of the vehicle bay.
One small opening exits toward the computer room, while two large openings exit into the hangar decks.
Hangar Decks
Beyond the vehicle pods, through two large openings covered by more of the membranous material, are the domed hangar decks. These flat, circular platforms lie beneath rocky domes that can be opened to provide access to otherspace. Several alien ships rest upon one of the decks. One is the same as the ships stored in the vehicle pods, and was recently within the pod the PCs found split open.
If the Rebels examine the ship they can tell the craft was used not too long ago. The engine area, which resembles the power core within Desolate, is still warm. Web strands cling to the interior of the vessel, and stored within the webs is a power coupler whose markings identify it as having come from Celestial's engines. This is another necessary piece for rebuilding the Rebels' hyperdrive motivator.
Computer Room
The computer room is two connecting chambers. Within the smaller, circular room are pulsing fibrous coils that surround a central pillar. The pillar is covered with monitors and screens in the shape of insectoid eyes. Most of these eyes remain dead and lifeless, covered by a thin layer of membranous material. Others glow with alien writing that flashes across their convex surfaces. Some show scenes outside the ship, monitoring the derelict vessels.
The connecting room contains thick, translucent tubes that stretch from floor to ceiling. Dull-colored liquids bubble through these tubes, feeding the once-living brain cells that operate the computers. The Rebels cannot understand the language which plays across the strange screens, nor can they figure out a way to access these alien computers.
Chamber of Armor
Set off from the vehicle bay is a room containing examples of Charon bioscience at its best — Charon battle armor. Made from the same organic stone used throughout Desolate, battle armor is powerful and deadly.
Event Four: Charon Attack
As the PCs enter the chamber of armor describe the large, alien forms. Made of the organic rock, the suits appear to be alive even though they aren't moving. The dark interior heightens the tension of the scene. Then, one of the suits moves. Read:
The dark forms tower above you, giant figures that look as though they might move at any second. The stillness and quiet hangs ominously as you enter the chamber. Somewhere off to your right you hear a small, scraping sound. One of the large shapes turns, and an alien scream shatters the quiet as the shape moves toward you.
A Charon warrior has entered a suit of battle armor and has decided to eliminate these dreadful living creatures. Within the suit, the warrior feels supremely confident and may make tactical mistakes while battling the PCs. Once the suit is incapacitated, the Charon flees into the darkness, giving the Rebels only a glimpse of their enemies.
Sidebar: Darkness on the Battlefield
Darkness and other battlefield conditions can obscure targets, making combat more difficult. Firing at a fully obscured target adds +10 to the difficulty number; darkness in a cave would fully obscure a target. The darkness inside Desolate is partial, adding +5 to the difficulty number to hit. If the target has been spotted (if the attacker has seen the defender fire a blaster, for example) the environment acts as medium cover, +2 to the difficulty number.
Spotting an obscured character requires a Perception check, which counts as an action. If the obscured character is silent and did not move last round the check is Difficult; if the character made noise or moved last round the check is Moderate; and if the character fired a blaster last round the check is Easy.
The Charon are used to the gloom inside Desolate — their difficulty number to hit does not change.
Charon Battle Armor
DEXTERITY 4D+1
Dodge 4D+2, plasma cannon 4D+2
STRENGTH 5D
Brawling 5D+2, climbing/jumping 5D+1, lifting 6D
Weapons: Plasma cannon (damage 4D+1), armor claws (damage 6D)
Special Abilities:
Combat Limit: The armor can make no more than two attacks in a combat round.
Biosensing: Charon biosensing technology allows the battle armor to automatically acquire targets which are obscured by the environment, and to make a free 6D search roll against any hiding or sneaking character.
There are six suits of armor, each designed to fit and be controlled by the Charon. A Rebel can operate a suit if he makes a Difficult technology roll. As the suits are not built for non-Charon bodies, +2 is added to all difficulty numbers when using the suit to perform an action. While in a suit a Rebel is protected from Charon poison and the death mist until the suit takes damage to incapacitate it.
Chamber of Nutrients
Even though Desolate is not alive in the normal sense, it maintains organic systems. For this reason, parts of the ship need nutrients for power and material conversion. This large chamber is the main nutrient processing facility aboard the ship. When the Rebels enter this area, read:
Another membrane gives way to a large chamber that appears to be a storage tank of some sort. Completely sealed except for the membranous openings on each end of the tank, a thick green paste covers the bottom of this chamber. Translucent tubes run everywhere, distributing the paste to other parts of the ship as well as dumping more into the room. Large yellow floating globs drift lazily around the chamber.
The Rebels must cross this chamber to proceed further into Desolate. The paste rises almost a meter high, and the PCs must wade through it to reach the exit. Currents created by the distribution tubes make footing treacherous. Four Easy Dexterity rolls are needed to cross without incident. A failed roll means that a PC slips. Slipping is not dangerous, but falling in the gooey paste is annoying. The danger comes after the first round of movement in event five.
Event Five: Waste Conversion
After the Rebels have made one Dexterity check to move through the chamber of nutrients, read:
The warm paste pulls at you as you wade across the chamber. You notice the floating globs again, because a few of them have drifted closer. Long tendrils unravel from the bottom of the globs, ending in spiky balls that sway menacingly.
These globs function as waste removal units. They attach their tendrils to foreign matter and drag it up into their hollow bodies where acids convert it into usable paste. As Rebels are not normally within the nutrient chamber, the globs treat them as foreign matter. No more than one glob attacks a PC at one time. Once the PCs cross the chamber, the globs stop attacking. There are over 40 globs.
Floating Globs
DEXTERITY 3D
Weapons: Four tendril-maces (damage 4D), acid sac (damage 6D+1)
Special Abilities:
Multi-Attack: A floating glob gets an attack with each tendril-mace at the full 3D Dexterity; the multi-action penalty is not applied. If all four tendrils hit, that PC is entangled and dragged toward the glob's acid sac.
The Fuel Pods
Long, thin pods fill this chamber that surrounds part of the power core. Thin fibers stretch from the core to the walls of the room, running directly above the pods. The pods glow with energy and every few moments one explodes, sending streams of power along the fibers into the core.
Rebels in this area must make Moderate Dexterity rolls to avoid being caught in an explosion. Those that fail must roll against 5D+1 concussion (stun) damage. These pods can be removed for use as bombs, but as they explode at random intervals this may not work very well.
Ber'asco's Holopark
This area is made up of five flat platforms surrounding a circular display. The display is a holographic representation of an unknown galaxy, a galaxy with an absence of stars at the very center. PCs making an Easy planetary systems roll explain that the void at the center is a black hole. The display is set at a speed about one billion times faster than real time.
This is just the centerpiece of this display. As the PCs wander from platform to platform the following holoimages snap on.
The first shows a civilization inhabited by a spiderlike race. The planet orbits a star that is slowly being pulled apart by a black hole. As the civilization grows beneath this frightening spectacle, it turns to embrace the black hole as a powerful god that is eating its source of life.
The second platform shows the rise of a powerful cult upon this dying world. Instead of working to save the star and its planets, the cult calls for worship of everything the void represents — an end to existence, nothingness, death.
The third platform details the cult's leader, an armored spider-being who oversees the construction of an armada of crude spacecraft. Within the spacecraft are tanks of red mist. With these items, the cult leader makes his first sacrifice to his cruel god — he releases the mist over the planet and the people die in madness and pain.
The fourth platform shows the deaths of numerous other worlds, each flipping by at amazing speed. The spider beings incorporate the technology of each dead world into their growing armada. Then the images freeze upon a fleet of vessels much like Desolate, only these ships are vibrantly alive instead of dead and shadowy. The view zooms to a single craft, with spider-beings crawling upon its surface, using weird instruments to inject material into the ship. Then the scene speeds up again, and as the Rebels watch, the ship decays and deteriorates before their eyes. Its change to Desolate complete, the ship and the scene blink out.
The final platform shows Desolate crossing countless galaxies, leaving nothing but darkness behind it. The holoimages fade, leaving only the void display to continue its destruction of the universe.
The Living Hall
The Charon use this large hall as a common room. Webbing stretches everywhere, forming a canopy overhead where the Charon can hide and rest. Event six takes place when the Rebels enter this area.
Event Six: Bane Nothos Appears
Grand Moff Ravik is a master of manipulation. Since most of the group from Celestial was either captured or killed, it fell to Ravik and Bane Nothos to vie for command of those remaining. The bounty hunters wanted nothing to do with the military men and went off on their own. Ravik slowly eroded Nothos' command until the Grand Moff was in control of the remaining crew; Bane Nothos soon fell in line. As Ravik made overtures to the Charon, he instructed Nothos to remain behind to prevent any interference, although the trouble he expected was from the bounty hunters rather than the Rebels.
Nothos sees the PCs as a tactical problem to be solved. If he recognizes these Rebels from the Strike Force: Shantipole adventure he will be looking for a chance to avenge his defeat. When the Rebels enter the living hall, read:
Webbing presses down oppressively from above, and you are certain that something up there is watching you. Scuttling sounds overhead confirm your fears, but before you can act an authoritative voice calls out. "Members of the Galactic Empire. Throw down your weapons in the name of Bane Nothos!"
Whether the Rebels comply or not, four Charon warriors drop from above. They wield no weapons but their own deadly claws. From the shadows 20 meters away Nothos tries to convince the Rebels to surrender. He will stress the need for "new soldiers in this new era," but will refuse to elaborate except in cryptic ways.
If the Rebels do not agree to join him, Nothos orders the Charon to destroy them. The four warriors battle to the death. Nothos may not combine with the Charon as he does not understand their tactics or their language well enough to coordinate his efforts with theirs; what little he knows of the aliens is what Ravik taught him in a very hectic time. During the contest, Nothos pulls a thermal detonator from his belt and moves forward. If any PC blasts him before he can toss it, the detonator smashes into the floor near Nothos's feet and explodes, sending chunks of the floor cascading down to the lower level. The Imperial falls through the hole along with debris and webbing, disappearing from sight.
The Crawltube
In the corridor between the living hall and the fuel pods is a crawltube up.
Sidebar: Guidelines for Combined Actions
Use common sense when determining whether an action can be combined. Most actions can be combined. Things that cannot be combined include all reaction skills, movement rolls vs. terrain, beast riding, operation of a single vehicle (co-pilots don't combine, they perform other actions), climbing/jumping (although circumstances might make it possible to combine a climb), stamina, swimming (sometimes), and Force skills.
To figure out how many people can combine to do a single action, use the skill of the lead character. For example, if they are searching and the lead character has 4D, no more than three additional people may combine with the leader. In the case of combat use the command skill to determine the maximum number of combined fires rather than the blaster skill itself. Note that stormtroopers are not under this restriction — this is one of their advantages.
Episode Five
The Great Contest
Summary
Three events spur on this episode. First, the Rebels discover what befell the crews of the many derelict ships that orbit Desolate. Then they battle undead constructs in a contest staged by the Charon bioscientists. Finally, the Rebels witness the great awakening as the Charon warriors answer their prophet's call.
Platform Three Encounters and Events
Gamemaster's note: The effects of the death mist wear off once the Rebels reach this level. Their attributes and skills return to normal, not including any penalties for damage they may have sustained.
Food Storage Pods
The crawltube from level two deposits the Rebels inside a cool, moist area. Like the cargo hold on level one, this room has pods connected to dividing walls, forming stacks of stored items. But what is being stored here is not spare machinery, but the crews from all the wrecked ships. Read:
Thousands of pods are stacked high in this chamber, attached to tall dividing walls. The air is cool in here, and you can see your breath as you walk around. Within the pods you see familiar shapes, but you cannot quite identify them through the translucent shells.
If the pods are opened, the PCs find the crews from the wrecked ships. Humans, Wookiees, Mon Calamarians, and even unidentifiable races are stacked beside each other in this chamber. An Easy medicine roll allows a PC to examine one of the bodies. While the person isn't technically dead, enough toxin has been administered to destroy much nerve tissue in the brain.
As the Rebels watch, long tendrils drop from the ceiling and attach to one of the pods. They rip the pod free from the dividing wall and carry it toward the power core. Just as the pod reaches the core, the core opens to accept the pod — occupant and all.
The PCs cannot revive any of these people. If they continue to search, they find 10 crewmen from Celestial.
The New Engine
Beside the power column is a room where a Charon experiment is underway. Here, the bioscientists are working to combine the mechanical technology of the derelict ships with the organic technology of Desolate. Read:
An unsettling conglomeration of metal and organic material has been constructed in this chamber. Recognizable ship parts have been combined with the alien organic technology to create a hybrid of the two. The entire works connects to the power core, forming an instrument of unknown design and purpose.
A Moderate technology roll lets a Rebel recognize this as an alien modification of a hyperdrive engine. It is near completion and should soon be in working order.
If the Rebels search the chamber, they find a usable 4-axial stabilizer within the hybrid mess. This is another of the pieces they need to rebuild the hyperdrive motivator in The Long Shot.
Hall of Contests
A membrane-covered portal leads into this strange room. There is no floor, just small oddly-shaped platforms that hang suspended across the hall. Each platform connects to another by a short, fragile-looking web bridge. Here the Charon bioscientists conduct their favorite experiment. They pit living specimens against their constructs to learn how to improve their own creations.
Event Seven: The Great Contest
Find the map of "The Hall of Contests" in the pullout section. Also find the counter strip provided with this adventure and carefully cut apart the counters. Place the six counters labeled "PC1" through "PC6" outside the entry portal. Place the six construct counters, labeled "1" through "6", on the starting spaces marked on the map. Place EL-434 under a webbing marker on the square with the web symbol. The other counters are placed to one side for the moment.
This contest combines the roleplaying combat system with a visual setting. If you have any of The Star Wars Miniatures Sets, they can be used with this scenario as well.
The Rebels must cross the platforms to reach the exit portal. The Charon constructs stand in their way. These constructs are converted creatures whose life force has been subdued to create zombies for the Charon to command. Like robots or Droids, the constructs unerringly obey the orders of their masters. But unlike Droids, there is no personality or life-spark present.
Each square on the map represents two meters. Movement on the shaky, woven surface requires a movement roll, either a Dexterity roll or a climbing/jumping roll; the choice is up to the moving character. Walking moves a character two squares and requires a Very Easy movement roll. Running moves a character five squares and requires an Easy movement roll. The web bridges which connect the platform are difficult to cross — add the number printed beside each web bridge to the movement difficulty whenever a character moves across any portion of the bridge. Every square (or portion) jumped adds +3 to the movement difficulty. A failed movement roll results in the Rebel taking 1D of stun (from tripping and falling), stumbling at the end of the declared movement.
The Hall of Contests is as gloomy as the rest of Desolate. Remember the darkness modifiers when the Rebels are fighting in here — the Charon constructs are not affected by the darkness.
The Constructs
C1 (The Weaver)
DEXTERITY 3D+1
Dodge 4D+1
KNOWLEDGE 2D
MECHANICAL 1D
PERCEPTION 2D+2
STRENGTH 2D+1
TECHNICAL 1D
Special Abilities:
Web-Spinning: 5D (strength 5D when spun in a pattern, 3D+1 when thrown). The bioscientists constructed the weaver with a variation of the Charon webspinning ability. The weaver may use the web in one of three ways each round (see below).
1. Obstruction. The weaver spins a well-anchored web with solidly constructed strands within a square, blocking passage to any character who must pass through the square. The web has a Strength of 5D for the purposes of resisting damage, and provides light cover (+1 difficulty) to any character hiding behind it. The web must take damage equivalent to incapacitation or mortal wound before the web can be passed.
2. Entanglement. A melee attack which may be made at range. The base difficulty to entangle is 5, plus 2 for every square between the weaver and the target; thus the weaver needs a 5 to entangle an adjacent character. The attack may be parried by a melee parry. Once entangled, a character can do nothing until he or she has torn, blasted or otherwise damaged the web sufficiently to pull free. When the web has taken incapacitating damage or greater the character is free. An entangling web only has 3D+1 Strength — the strands do not have the same structural integrity when thrown at range and not spun in a pattern.
3. Shield. The web may be used as a reaction skill much like shielding — the web roll is added to the difficulty number to hit for a "web total." If the to hit roll exceeds the web total, the attack hits the weaver directly. If the attack hits but does not exceed the web total, the web Strength of 3D+1 is added to the weaver's Strength of 2D+1 for a total damage resistance of 5D+2. The web may be used to shield from all attacks on the weaver in a single round. The shielding is only usable by the weaver.
C2, C3 (Shootcrawlers)
DEXTERITY 3D+1
Blaster 4D+1
KNOWLEDGE 2D
MECHANICAL 2D
PERCEPTION 3D
Hide/sneak 5D, search 5D
STRENGTH 3D
TECHNICAL 1D
Weapons: Built-in blaster in right forward appendage (damage 4D, range of a blaster carbine)
C4, C5 (Jumpers)
DEXTERITY 2D+2
KNOWLEDGE 1D+2
MECHANICAL 1D
PERCEPTION 3D
Search 6D+1
STRENGTH 4D+2
Climbing/jumping 8D
TECHNICAL 1D
Weapons: Brawling attacks (damage 4D+2, stun only)
Special Abilities:
Jump-Attack: Jump-attacks may be made at range; the base difficulty is 5, plus 2 for each square jumped, up to a maximum of 15 squares (30 meters).
Jumping Movement: Jumpers may choose to use jumping as their normal mode of movement, at a difficulty of 2 per square jumped.
Jumpers were designed to collect "diseased" (living) specimens, doing as little damage as possible so the bioscientists could study the life processes of the captured beings. They are programmed to do only stun damage.
C6 (The Gatebeast)
DEXTERITY 4D+1
KNOWLEDGE 3D
MECHANICAL 1D
PERCEPTION 3D
STRENGTH 3D
TECHNICAL 1D
Special Abilities:
Gate Power: 5D. When the gatebeast targets a character, place the target marker underneath the character's piece. The difficulty to hit is Easy unless the character dodges — but dodging the gate power is unusual. A character's Knowledge or control skill is used to dodge the gate power. It is not necessary to run to do a "full mental dodge"; in other respects this mental dodge works the same as a physical dodge.
The gatebeast is constructed from a lifeform the Charon extinguished centuries ago. The gate power is not fully understood by the Charon, who programmed the construct to use it in very limited ways.
Knowledge is used to resist the effects of the gate power:
| Damage Roll vs. Knowledge Roll | Effect |
|---|---|
| DR < KR | No effect |
| DR ≥ KR | The target is gated back to the target marker; if the target has not moved there is no effect (other than a discomfiting tingle in the target's central nervous system) |
| DR ≥ 2× KR | The target is reflected to a point opposite his final point, as compared to the target point. For example, a character who has run two spaces down and three right of the target point would be reflected two spaces up and three to the left of the target point. If the target ends up off a platform, he falls. If the target wasn't moving, the energy surges through him causing 1D stun damage |
| DR ≥ 3× KR | The target is gated to any square of the gatebeast's choice. It chooses a square not on any platform |
Charon Bioscientists
Charon bioscientists are observing the contest from webs in total darkness 30 meters above the hall. They follow the progress of the battle eagerly, but quietly. If the Rebels lose, they summon warriors to bind the victims and take them to the construct chambers for further study.
Falling Inside Desolate
The interior of Desolate has been altered to suit the Charon. Consequently, webbing is everywhere, as rigging, support and crawlspace. When a character falls from a platform on any level there is a good chance he will snare (or be snared) by some of this webbing before he has a fatal collision. A character gets three Dexterity checks; the first is Moderate, the second two are Easy. If he succeeds at any of them he has maneuvered himself into some webbing. If the character succeeds the first time, he can climb back up to a platform in five rounds. If he succeeds on the second, it takes 10 rounds, and climbing back up takes 20 rounds if the character caught himself on the final try. If a character falls in the Hall of Contests and catches himself, he may resurface on any square of any platform within the hall.
The bioscientists retreat if they are fired on by more than one character (including EL-434), if two Rebels reach the exit portal, or if all the constructs are defeated.
EL-434
Inside of three entangling webs is EL-434, along with the mangled remains of a weaver who spun the first entangling web. EL-434 is tearing himself free of the multiple webs, a feat which takes at least three rounds. If the players are doing well in the battle, delay EL-434's liberation.
When the assassin Droid emerges from the web, he spends a round assessing the situation. While he enjoys the prospect of killing Rebels, he will not attack them in the hall unless attacked first. The Droid begins to fire into the darkness above the hall, aiming for Charon bioscientists. The bioscientists wish to disassemble EL-434 and find out how a mechanical, unliving being developed the ability to override its own programming. To Charon bioscientists, this development is akin to having a deadly virus spontaneously generate in a sterile container. It must be studied, then eradicated. EL-434 has other plans. Once out of the hall, EL-434 is at best a treacherous ally.
Zardra
Put Zardra in play when the battle is well underway. Zardra enters the hall from the exit portal. She is pursued by Charon warriors (one if the PCs already have more than enough competition, up to four if the PCs have a decided edge; use your own markers for the warriors). Ravik requested that the Charon hunt her down.
Zardra is fighting and fleeing with the hopes of rejoining Celis Mott or EL-434 and finding a way off Desolate. When she sees the Rebels her plans shift — after all, their ship cannot be any worse off than Celestial. If she can strike a deal with the Rebels (negotiated during the combat, involving transport off Desolate and at least 100 credits for her services, a mere honorarium for a bounty hunter of her caliber), she joins the PCs cause. Otherwise, she heads for the entrance portal alone.
Construct Chamber
This is the bioscientists' laboratory. Many bodies are stacked in preparation for the process that will turn them into Charon slaves. Eight bioscientists are here (less any killed in the hall of contests). They flee if possible, fight if pressed.
If the Rebels make an Easy search of this room, they find an influx capacitor; another part for reconstructing their hyperdrive motivator.
Chamber of Sleep
When the Rebels enter this area. Read:
Silence fills this web-covered chamber. Across the room you see another crawltube rising up to the next level. Because of the low-hanging covering of webs, you cannot see the ceiling of this room. As you walk toward the crawltube you hear a light scratching sound. It becomes louder, more insistent. Then you hear the sounds of tearing material.
The Charon warriors awaken from their sleeping pods as the PCs enter the room.
Event Eight: The Charon Awake
The Rebels see the pods above split open as the Charon emerge. The Charon warriors then lower themselves through the webbing to snuff the hated life-spark that each PC possesses.
There are 200 Charon awakening in this room, but only five are ready for battle on the first round of combat. If the PCs run toward the crawltube immediately, they escape these horrors. Otherwise, they have to fight their way to the tube. After every six rounds of combat, another five Charon emerge to join the battle.
The Charon can use the tube more efficiently than the Rebels. It is up to the PCs to somehow block off the lower level using either concentrated blaster fire or explosives. Either attempt causes the walls of the tube to collapse, sealing the army of Charon warriors below.
Episode Six
Into the Nest
Summary
In this episode, the Rebels have reached Desolate's summit. Here they confront Grand Moff Ravik and the Charon leader Ber'asco in order to save themselves — and the galaxy they left behind!
Platform Four Encounters and Events
The Ship's Brain
The crawltube opens into a chamber built around the power core. This is the ship's "brain," the organic computer that controls the ship's systems. A jumbled mass of coils grows from the core, and thousands of tendrils of varying thickness branch through the room to disappear into the walls. The chamber hums and pulses with energy. The noise, compared to the gravelike silence of the rest of the ship, is deafening.
The Altar of Death
This chamber is the Charon temple, dedicated to the black hole that destroyed their home world. In the center stands a solid black monolith. The monolith has an aura of death about it, and Force-sensitive Rebels dislike it immediately. This object epitomizes the total lack of Force the PCs have felt throughout the ship, and like a black hole it pulls at the Rebels' life forces. The effects of the monolith wounds all the Rebels; the wound disappears as soon as they leave this chamber. Medpacs or other healing can repair the wound, but it reappears two rounds after healing. A character who makes a Difficult control roll ignores the effects of the monolith.
Monolith
STRENGTH 7D+2
Special Abilities:
Aura of Death: Temporarily wounds living creatures other than Charon.
Event Nine: The Cathorn
The Cathorn is another Charon construct. Once a large armored cat creature, the Cathorn now has these features plus one other. Grafted to its undead body is the spiked tail of an Ithorian Barbed Flyer (captured from a lost ship), giving it an additional attack from this new appendage.
The Cathorn leaps into the altar of death chamber and battles the PCs to the best of its ability. It goes after Force-using Rebels first. The construct, not being alive, is not affected by the power of the monolith.
The Cathorn
DEXTERITY 4D
Weapons: Claw attack (damage 5D+2), spiked tail (damage 4D+1)
The Living Computer
This is another of the living computers found throughout the ship. Its description is the same as the one on level two. The computer has many brain nodes throughout this level, including the nest, which allow communication with the main systems.
Accessing a brain node is not difficult, but it is not for the queasy. A PC who thrusts his hand into a brain node feels a grinding at his fingertips as thousands of microincisions are made and minifilaments attach to nerve endings. Communication connection established, a PC may attempt to use the computer on a Difficult computer programming/repair roll. The computer net does understand Basic after Ber'asco had Ravik go through connection and translation. The computer will give information, but will not change the status of the ship in any way. Only Ber'asco has clearance for that, clearance established by thought and DNA pattern matching.
The Nest
Underneath an unusual web dome, the nest is Desolate's command bridge. The light from otherspace streams through the dome creating strange shadows in this area. A command center, built to accommodate the alien physiology of the Charon, fills the room. Through two alcoves the PCs can see smaller organic computers.
Event 10: Grand Moff's Gambit
Ravik learned much from the holopark, including the Charon language, and figured out how to turn the Charon to his side. Appealing to the spider-beings' lust for death, he negotiated with Ber'asco to lead the Charon to a new galaxy if they would help him destroy his enemies. The Charon ostensibly agreed.
Ravik is smart enough not to trust the Charon more than necessary. He hopes to recruit the Rebels to his cause, using them as envoys to the rest of the Alliance. He wants the Alliance to work with and act as a balance against the Charon until the Empire is finished. Ravik plans to consolidate his position after the victory, replacing the Emperor as the leading power in the galaxy. If the Alliance is destroyed in the process, so be it. Read:
You hear the faint rustling of Charon warriors as they move on strands far above you. Shadows seem to melt from a figure standing 15 meters away. As he steps into the light, you see that it is the tall, thin man from Celestial's hololog. "I am Grand Moff Ravik. I am hoping you have the sense and decency to join me in a grand and noble cause — the annihilation of Emperor Palpatine and the New Order."
The Grand Moff tries to play down the Charon's obsession with death and emphasize their usefulness in dethroning the Emperor. Ravik also overstates his ability to control the Charon in order to quiet fears about the danger the Charon pose to the Alliance and the free worlds.
Event 11: Meeting Ber'asco
Once they have accepted or rejected Ravik's offer, the Rebels meet Ber'asco. Read:
The Charon above you become a hurry of brushing, scraping motion, as waves of sharp clacking sounds roll back and forth across the canopy of darkness. Then they stop. A tall armored figure emerges from behind a mass of fibrous coils. The figure is one of the spider-beings you have been battling, larger, more ponderous than the rest. He pauses, and the diffuse glow of an activated computer node reflects in ripples off his armor. The being rasps his claws together in greeting. The dozens of Charon in the darkness above mimic the greeting in unison.
If the Rebels have made a deal with Ravik, use "The Speech" below. If they attack, Ber'asco plunges a clawed hand into the brain node to command the computer to defend him. As his armor deflects the first few shots, he has time to arrange his defense. Go directly to "Defense of The Nest."
The Nest Grave
Tangled within a large web are some 20 men and women, the last of Celestial's crew. Venom has destroyed their minds but left their bodies intact. Ravik offered the crew to Ber'asco as a gesture of the Moff's sincerity.
Neatly stored in the web, suspended near the bodies of the crew, are 10 Charon vac suits. While these suits are not built for humans, the Rebels can fit into them. They function as normal vacuum suits, providing an artificial environment for survival in deep space.
A final item can be found within the nest. It is the realspace compensator, the final piece needed for the Rebels to build a hyperdrive motivator. Ber'asco brought the piece to the nest to have Ravik explain the design of the compensator.
The Speech: If Ber'asco is allowed to speak, he sinks a claw into the brain node. The voice generated by the organic computer is in Basic, but sounds rasping and alien. "The disease rarely has vectored to Desolate, never before within The Nest. Your strain is most resistant. Ravik-culture has convinced me of your value in service to the Void. I am the Final Prophet of the Charon. I am Ber'asco. Submit to the will of Void; bioscientists can evaluate, cultivate your strain. Agree to construction; we shall cross you with finest of Charon warriors. You accept our offer?"
Ber'asco shows patience with the Rebels as long as they can convince him there is some chance they will agree to his proposal. If the Rebels stall for too long, or act aggressively, Ber'asco defends the nest. From Ber'asco's point of view, aggressive actions include trying to "infect" (move to) other areas within the nest.
What if the PCs join Ber'asco? The first step is to be injected with Charon poison; if the PCs go that far the adventure is over. Ber'asco has won. Let the PCs know that they become NPCs if they become constructs, as they lose their free will.
Defense of the Nest: Ber'asco activates the nest's defenses if the Rebels do not submit to his will. Six tendrils snap free and swing toward the Rebels. Each tendril is capped with a glowing sphere that fires plasma bolts once per combat round. In addition, each of these tendrils has two appendages of its own which it uses to capture and hold prey. Once this battle starts, Ber'asco moves into the darkness of the hall, commanding his warriors to evacuate the nest, but guard all membranous entrances from the other side.
Brain Tendrils
DEXTERITY 3D
PERCEPTION 2D+2
STRENGTH 2D+2
Weapons: Plasma bolt (damage 3D+1)
Special Abilities:
Grasping Appendage: If an appendage hits, it wraps around a PC and reduces Dexterity by 1D.
Once the Rebels appear to be on their way to victory against the brain tendrils, read:
Ber'asco is illuminated by the activation of several brain nodes. His armor shifts, drops over his eyes and seals completely, one limb connected to a node. Still translating, the computer says, "Cleanse the wound." The slow rending sound is lost as the dome tears open and a great howl of air escapes the ship. You don't have long before you too are pulled into the vacuum of otherspace.
The Rebels have six rounds to get into the Charon vac suits before they are expelled into space. Getting into an unwieldy Charon vac suit while being pulled by the force of the exiting air requires two rounds. Rebels must make an Easy Strength roll each round. Combined action is possible, with no more than two characters trying to cram a Rebel into a suit.
Very Easy Dexterity rolls let the PCs catch the outside of the dome. The sticky pads on the vac suit appendages provide adhesion to the outside of the ship. The Rebels must climb across the outer hull to reach their own ship and episode seven.
Episode Seven
Back to Realspace
Summary
The Rebels must make their escape under harrowing conditions. Not only must they climb across the outside of the alien ship while wearing alien vac suits, they must rebuild their hyperdrive engine while deadly Charon starfighters attack.
Escaping Desolate
The Rebels must make their way back to the entry pod where they left their ship. Crossing the pocked, irregular surface is slow work. Moving at a walk requires an Easy Dexterity (or climbing/jumping) roll, moving at a run (or while dodging) requires a Difficult Dexterity or climbing/jumping roll. Failure means loss of adhesion to the surface; the character begins to float away from the surface of Desolate, as the ship has an extremely low natural gravity.
The Rebels have to cross 100 meters of the craggy surface to reach the cave and their ship. The Rebels can see vac-suited Charon emerging from portals behind, slowly gaining on them.
Returning to the Rebels' Ship
When the Rebels enter the entry pod, they find their ship where they left it — but it is covered with thick layers of webbing! Four Charon warriors await the PCs, ready to stop them from entering their craft. As they finish off these warriors, they see dozen upon dozen upon score more warriors boiling across the floor, walls and ceiling toward The Long Shot.
What Happened to Zardra?
If Zardra went her own way in the Hall of Contests (or was tossed off a platform by a construct, to catch herself far down in the webbing), she made her way to The Long Shot before the Rebels. As the PCs engage the Charon warriors, read:
A warrior leaps for you — a gun turret on The Long Shot turns and fires on the Charon, reducing it to a burnt husk. A familiar voice crackles over your com unit, "Darlings, I am feeling most generous today. Forget my fee — kill those three pests to prove you are worth my trouble while I discourage our pursuit. When you are finished I shall open the hatch and we can leave. Do hurry. My marksmanship isn't good enough to kill all of those things."
Putting it all Back Together
The Rebels can take off under sublight speed as they begin to put their hyperdrive engine back together. They need all five parts: the hypercoil, the influx capacitor, power coupler, 4-axial stabilizer, and the realspace compensator. A Very Difficult starship repair roll is needed to rush the repairs and get it working perfectly — time is very short and not all the parts are in pristine condition. If the Rebels are willing to fuse their motivator for good, they can switch some parts around and get it to work on an Easy starship repair roll. Do not tell the players the difficulties of the initial repair attempt — let them try for the Very Difficult. If they fail the Rebels hear that awful noise as they try to jump to hyperspace. Then let them switch the parts, and make the jump.
The Charon Starfighters
While the Rebels repair the ship, the pilot notices two blips on the screen, a pair of Charon starfighters at long range. Another pair of starfighters engage the Rebels at long range after three rounds of combat. The Rebels must battle them until the engine is repaired.
More starfighters are erupting from the surface of Desolate, but they cannot reach the PCs before the hyperspace motivator is repaired.
Charon Starfighter
Hyperdrive Multiplier: None
Sublight Speed: 5D+1
Maneuverability: 2D
Hull: 3D+2
Shields: 1D
Weapons: Tri-laser pulse-cannon (fire linked, damage pulsed); fire control 1D+2; combined damage 7D
Crew Skills: Pilot — starship piloting 5D, starship shields 5D; Gunner — starship gunnery 4D+2
Realspace or Bust!
The Charon are closing fast, but the hyperdrive engine is ready to fire. An Easy astrogation roll to plot a course, an Easy piloting roll, and:
The storm-gray expanse shifts and expands as your ship leaps forward. For long moments only black stars streak by. Then you see light and color as your ship enters hyperspace. The instruments check out and you lean back to wait. Stars move by in colored rainbows, then they shift back to normal as you emerge into realspace.
Rewards
Give each player between 5 and 10 skill points for completing this adventure. If the PCs discovered what they could about the Charon, engaging Ber'asco and Ravik in conversation to uncover information rather than immediate gunplay, nudge the reward to the top of the range. Replace any Force Points used during the adventure and award additional Force Points for exemplary play. See page 94 of the roleplaying rulebook to refresh your memory on awarding skill and Force Points.
Sidebar: Cut-Away to Otherspace
Read aloud:
EXTERIOR: THE ALIEN SHIP DESOLATE. The camera pans the dark surface, sweeping up toward the web dome. Pan to ...
INTERIOR: THE NEST. Ber'asco sits within the command center, idly disassembling a Rebel blaster. Bioscientists scurry by carrying surgical instruments and things which look wet and unwholesome. He addresses someone we cannot see.
"The others of your strain have fled, running to hide in a place we cannot yet reach. The Void is disappointed. Ravik-culture is all we have left. We are taking utmost precautions in constructing you. When you are free of the disease you shall lead us to your strain. The Void is patient. Soon its patience shall be rewarded."
Cut to ...
CREDITS AND CLOSING THEME.
Appendix A: Adventure Script
Use the following script to start the adventure. The gamemaster will tell each player what part (or parts) to read.
1st Rebel: Hyperspace is so beautiful. The colors remind me of Kallakean rainbows.
2nd Rebel: We get a priority assignment from Alliance High Command and you think about rainbows!
3rd Rebel: Some assignment. So far all we got were jump coordinates and a holodisk.
4th Rebel: Speaking of the holodisk, it's time to play it and get our orders.
GM: A holo-image appears before you and Commander Avalon addresses you. "As you approach the end of your jump, be advised that you are to meet the Alliance transport Celestial. You are to take command of the ship and see it to its destination. Further coordinates will be provided in due course."
5th Rebel: How come they never tell us everything all at once? How can we work like this?
6th Rebel: Would you rather jeopardize a mission needlessly by knowing too much? That would work out great if an Imperial interrogator Droid ever got a hold of you.
GM (as Commander Avalon): "The transport carries cargo for an Alliance safe-world — supplies and the like. It also carries Imperial prisoners for transfer to a secure Alliance location. Guard them well and arrive safely. Good luck, and may the Force be with you." The holo-image fades.
3rd Rebel: Imperial prisoners! This is a bigger mission than I imagined.
5th Rebel: And a more dangerous one. One slip-up and we could be leading the Empire right to one of our safe-worlds.
4th Rebel: Back up a second. What's a safe-world?
1st Rebel: How long did you say you were with the Rebellion? A safe-world is a planet not under Imperial control where the Alliance maintains facilities for the families of the Rebel soldiers.
6th Rebel: On each safe-world, men, women and children not directly needed as combat personnel remain in hiding.
2nd Rebel: They stay safe and the front-line soldiers don't have to worry about their families while they're off fighting the Empire.
5th Rebel: Okay, let's get ready. We're about to come out of hyperspace.
1st Rebel: Realspace is so dull compared to the shifting colors along the hyperlanes.
2nd Rebel: Look out! We've emerged in the middle of an uncharted asteroid storm! And you said realspace was dull ...
GM: A round object smashes into your ship's rear section, then goes spinning away in flames. Warning lights flash, but the ship's systems remain on line.
4th Rebel: Those aren't asteroids. They're TIE fighters! And there are dozens of them!
3rd Rebel: A full squadron to be precise, and they're being supported by an Imperial Star Destroyer.
6th Rebel: I don't see any sign of Celestial, but those TIEs have noticed us. Prepare to take evasive action.
Appendix B: Red Mist Cards
When a player's character is overcome by the red mist, hand the player the next Red Mist Card. After the player describes the scene to the other players, return to episode three for more information.
Red Mist Card #1
Describe this scene to the other players through your character's eyes, then wait for instructions.
The mist ahead parts and you see the others from your group. They are laughing and joking, full of life and vitality. You hate them! Don't they realize the futility of it all? Only death awaits you within this desolate place. The image fills your mind, and you long for the peace and security of the Final Jump. Life has become too stressful, too random. It must be destroyed. You reach for your blaster, ready to extinguish the curse of life from the others.
Red Mist Card #2
Describe this scene to the other players through your character's eyes, then wait for instructions.
Through the swirling tendrils of mist you see a tall, black monolith. The smooth stone absorbs all light, all heat, all life into its shadowy depths. It calls to you, silently beckoning you to step forward. You refuse, holding your ground in this fog-filled terrain. Then the monolith begins to grow, its dark outline coming closer and closer. You turn to flee, but the spreading darkness engulfs you, wrapping around you like the cold of eternal night.
Red Mist Card #3
Describe this scene to the other players through your character's eyes, then wait for instructions.
You move forward, wading through the crimson mist to find an exit from this chamber. Each step becomes more difficult, however. The tendrils of fog cling to you, pulling at your limbs and hindering your movements. Like webbing, the mist wraps around you. It covers your weapons and equipment, binding them in place. Soon the red mist is so thick that you cannot move at all, cannot see, cannot breathe. Then something begins to drag you down.
Red Mist Card #4
Describe this scene to the other players through your character's eyes, then wait for instructions.
You wander within the deep red mist, feeling alone and separated. Strange sounds echo around you, bouncing through the crimson tendrils. You can see dark shapes begin to form in the fog. For a moment you think they are your fellow Rebels, but then the shapes become more pronounced, more definite. They are alien, insectlike shapes that seem to change in the swirling fog. Then, like flitting shadows, they begin to move, darting through the mist toward you.
Red Mist Card #5
Describe this scene to the other players through your character's eyes, then wait for instructions.
Ahead of you, through the billowing clouds of red, lies a pile of strange objects. Pushing past the clinging tendrils of fog, you see large pods scattered across the floor. You can see a shape within each pod, and your curiosity forces you closer. Suddenly you are surrounded by hundreds of pods. Those nearest you crack open, spilling bodies onto the floor. You try not to look, but you know who these bodies are — they are your friends.
Red Mist Card #6
Describe this scene to the other players through your character's eyes, then wait for instructions.
Shadows dart around you, obscured by the crimson mist. Dark shapes swirl in the thickening fog, silently stalking you. You continue through the chamber as sounds start to assault you. Something scrapes across the stonelike floor to your right, quickly joined by a symphony of scraping sounds. The scraping intensifies, getting louder and louder as the increasing number of shadows turns the crimson fog black. Then, all at once, the sounds stop.
Appendix C: Gamemaster Map Key — Desolate
Platform One
- The Connecting Ramp
- The Great Hall
- The Growing Chamber
- The Overlook
- Cargo Hold
- Mists of Death
Platform Two
- Vehicle Bay
- Hangar Decks
- Computer Room
- Chamber of Armor
- Chamber of Nutrients
- The Fuel Pods
- Ber'asco's Holopark
- The Living Hall
Platform Three
- Food Storage Pods
- The New Engine
- Hall of Contests
- Construct Chamber
- Chamber of Sleep
Platform Four
- The Ship's Brain
- The Altar of Death
- The Living Computer
- The Nest
- Crawltube Up
- Crawltube Down
- Power Core
Appendix D: Character Templates
Bane Nothos
Template Type: Imperial Commander. Ht: 1.85m. Sex: Male.
Physical Description: Nothos has a square face lined from exposure to stellar radiation. His dark eyes sharply contrast his white-blond hair. His motions are abrupt, his speech percussive and precise.
Background: Bane Nothos saw his career shattered by the Shantipole Project failure. Later, as commander of an Outer Rim Territories fleet, he improved his tactical ability. His capture by the Alliance was due to a flaw in his crew's execution of his orders, not his tactics.
Personality: Nothos is ambitious, headstrong, and enjoys taking risks when the reward looks promising. He has no patience for underlings who fail to grasp his concepts.
Quote: "History has proven precision and speed decisive."
DEXTERITY 2D+2
Blaster 3D+2, dodge 4D, heavy weapons 4D, melee 4D+2
KNOWLEDGE 2D+1
Bureaucracy 4D+1, cultures 3D, technology 5D+1
MECHANICAL 3D+1
Starship gunnery 5D, starship piloting 4D+1, starship tactics 5D+2
PERCEPTION 3D+1
Command 5D+2, hide/sneak 4D+1
STRENGTH 3D
Stamina 3D+2
TECHNICAL 3D+1
Computer programming/repair 6D, demolition 4D, medicine 4D, security 4D+2, starship repair 3D+2
Equipment: Blaster (damage 4D), laser ring (damage 4D+2, one charge)
Zardra
Template Type: Bounty Hunter. Ht: 1.7m. Sex: Female.
Physical Description: Zardra is a tall, dark-haired human. Her appearance is striking, sensual; she prides herself in projecting a hint of danger. A flowing cloak and a long force pike are her usual accessories.
Background: After a disastrous performance on Tatooine, Zardra found herself the target of bounty hunters even as she continued to accept missions. She was captured by the Alliance when one of her informants decided to play both sides of the airlock.
Personality: Zardra loves violence and personal combat, and has relished the chance to reverse roles with pursuing bounty hunters. She deeply resents her betrayal and capture; the informant had best crawl into a deep crater.
Quote: "Darling, soon I shall embark on my finest hunt."
Note: If in your campaign Zardra died in the adventure Tatooine Manhunt, substitute another bounty hunter.
DEXTERITY 4D
Blaster 5D+1, dodge 4D+1, force pike 6D
KNOWLEDGE 2D+2
Cultures 4D+2
MECHANICAL 2D+2
Starship piloting 3D+2
PERCEPTION 3D
Con 4D
STRENGTH 3D+2
Brawling 4D+2
TECHNICAL 2D
Computer programming/repair 3D
Equipment: Force pike (damage 5D+2), blaster pistol (damage 4D), thermal detonator, knife, stun cloak (wraps around victim, stun damage 5D)
Celis Mott
Template Type: Pirate. Ht: 1.65m. Sex: Male.
Physical Description: Celis Mott is used to eating well; it shows in his bearded face and around his gut. He trims and dyes his eyebrows in the Peluchian style.
Background: Mott's armada plies the Nanth'ri space route, or did until a Rebel fleet stopped him. Mott knows that without him, his pirate fleet will disintegrate in a series of internal squabbles; he cuts any possible deal to get himself back to Nanth'ri.
Personality: Celis Mott is dashing, only not as dashing as he believes himself to be. Mott is shrewd, a good negotiator, but not courageous.
Quote: "Please sit down ... have some Corellian whiskey ... I am afraid it is time to discuss the nasty business of having to push you out an airlock."
DEXTERITY 3D+2
Blaster 5D, dodge 4D+2, melee 5D+2, melee parry 5D+2
KNOWLEDGE 2D
Bureaucracy 4D
MECHANICAL 3D+2
Astrogation 5D, starship piloting 4D+2, starship shields 5D+2
PERCEPTION 3D
Bargain 5D+1, command 4D, con 4D+2, gambling 4D+1
STRENGTH 2D+2
Brawling 4D+2, stamina 3D+2
TECHNICAL 3D
Security 4D, starship repair 5D+1
Equipment: Blaze-cutlass (damage 4D+1), blaster pistol (damage 4D), 2 grenades, 6 medpacs
EL-434
Template Type: Assassin Droid. Ht: 1.5m. Sex: None.
Physical Description: EL-434 is made from a cerillium composite, giving him a dark sheen. His motoball forms a base for his crustacean-like upper body. All of EL-434's critical systems are well armored, and the Droid is in peak condition.
Background: Little is known about EL-434. The Droid has been efficient in eliminating all records and witnesses. Alliance intelligence guesses he was built in the Junquers system, and that EL-434 has been active for many years.
Personality: Cunning, ruthless and violent programming. No discernible personality.
Quote: (mechanical whisper) "Target acquired."
DEXTERITY 4D+1
Heavy weapons 7D+1, melee parry 5D+1
KNOWLEDGE 1D
Bureaucracy 6D, languages 5D, planetary systems 6D+1, technology 4D+2
MECHANICAL 1D
PERCEPTION 1D
Hide/sneak 6D, search 8D
STRENGTH 5D+2 (+1D armor)
Brawling 6D+2
TECHNICAL 1D
Equipment: Blaster cannon (damage 6D), concussion missile launcher (damage 7D), motoball, electro-photo receptor, infrared sensor, com-signal detector, motion sensor, chemical sensor, auditory membranes
Grand Moff Ravik
Template Type: Imperial Grand Moff. Ht: 1.9m. Sex: Male.
Physical Description: Tall, thin to the point of emaciation. Ravik looks 10 standard years older than he is. His movements are brittle and slight.
Background: Ravik rose quickly through the Imperial hierarchy, a man born with an instinct for the true nature of the New Order. His heartless rule of Tolonda sector is infamous. His sector has been given a brief reprieve with Ravik's capture, but the Grand Moff has plans enough to grind down the spirit of Tolonda when he returns.
Personality: Brutal and delighting in his brutality, Ravik shows no emotion other than anger or hatred, and shows those only rarely. Calculating and assured of his superiority, Ravik is slowly eroding the command of Bane Nothos in order to take charge.
Quote: "The tragedy of the weak is their lack of apprehension of their value as a resource for the strong."
DEXTERITY 3D
Dodge 4D
KNOWLEDGE 4D
Bureaucracy 6D, languages 5D, planetary systems 6D+1, technology 4D+2
MECHANICAL 2D
PERCEPTION 4D
Command 6D+2, con 5D, interrogation 5D+1, search 4D+2
STRENGTH 2D
TECHNICAL 2D
Computer programming/repair 4D, security 4D+1
Equipment: Comlink, pocket computer, blaster pistol
Charon Warriors
Template Type: Charon Warriors. Ht: 2.3m. Sex: Male (Immature).
Physical Description: Charon warriors are spiderlike beings with eight appendages that can be used as both arms and legs. Usually they stand upright, towering over all but the tallest opponents. Dark, shadowy masters of stealth, Charon are not often seen unless they want to be.
Background: Hailing from a planet which orbited a black hole, the Charon adopted a religion which worshipped the Void, and through the Void, death. Tens of thousands of Prophets have led them on a crusade destroying millions of worlds. Ber'asco is their Final Prophet.
Personality: They believe unfettered life is a blasphemy, and plan to send all life, including themselves, to the Void. They are hunters, and all living things are their prey.
Quote: (rasp of claws) "ss'hss'okss's" (descending bi-tone).
DEXTERITY 4D
Dodge 5D
KNOWLEDGE 2D
Survival 3D
MECHANICAL 2D
PERCEPTION 4D
Hide/sneak 6D, search 4D+2
STRENGTH 4D
Brawling 4D+1, climbing/jumping 5D
TECHNICAL 2D
Equipment: Web spinneret (traps victim, STR 3D+1), plasma blaster (damage 4D), clawed arms (brawling damage 5D)
Special Abilities:
Poison: Targets taking non-stun damage from a poisoned claw make a Moderate stamina roll. Failed roll means target takes an additional wound. Charon must spend one round secreting poison.
Charon Bioscientists
Template Type: Charon. Ht: 2.1m. Sex: Female (Immature).
Physical Description: Charon bioscientists are smaller than warriors. Their reactions are less quick, but their bodies are more agile. In contrast to the uniform, dull coloration of the warriors, most bioscientists have iridescent cilia on their forelegs.
Background: Bioscientists use their extensive knowledge to create motile, thinking biological constructs which lack the blasphemous free will and variability of life forms.
Personality: Bioscientists display a wider range of behavior than warriors. Bioscientists are fervent about their work, and are bred and taught to think in longer term goals than warriors.
Quote: (drone and rising tone) "ss'hss'ssp'spss'okss' (claw click) swi'spss' (cilia flutter) sssa'scs."
DEXTERITY 2D
Brawling parry 4D, dodge 5D, melee parry 5D
KNOWLEDGE 4D
Alien races 5D, languages 4D+2, planetary systems 5D+1, technology 6D+1
MECHANICAL 2D
PERCEPTION 4D
Hide/sneak 6D, search 5D+2
STRENGTH 2D
Brawling 3D+1, climbing/jumping 6D
TECHNICAL 4D
Computer programming/repair 5D, construct design 7D+1, medicine 6D
Equipment: Web spinneret (traps victim, STR 4D), clawed arms (brawling damage 4D), medprobe, diagnostic sensor, plasma scalpel, neuro-replacement chips
Ber'asco
Template Type: Charon Leader. Ht: 3.2m. Sex: Male (Mature).
Physical Description: A mature Charon male, his natural body armor has been augmented by his bioscientists into a formidable defense.
Background: Ber'asco led the campaign to extinguish the life on the last few living worlds in otherspace, claiming the title of Final Prophet. Now he must renew the crusade to destroy the galaxy of realspace.
Personality: Ber'asco believes that his every move is guided by the Void. He sees the discovery of life in another dimension as proof his job in otherspace is finished. He also believes hyperdrive technology to be another sign. For with it worlds shall fall to the Void far faster than before.
Quote: "The disease is strong; its strains resist fiercely. But the Void shall prevail."
DEXTERITY 4D (reduced to 3D)
Dodge 4D
KNOWLEDGE 4D
Alien races 5D, languages 5D, survival 4D+2
MECHANICAL 2D
PERCEPTION 4D
Bargain 4D+2, command 6D, search 4D+2
STRENGTH 4D (+2D armor)
Brawling 5D, climbing/jumping 4D+1, stamina 3D+1
TECHNICAL 2D
Computer programming/repair 5D
Equipment: None. All needs are taken care of by warriors, bioscientists, or by accessing the computer.