
Adventures
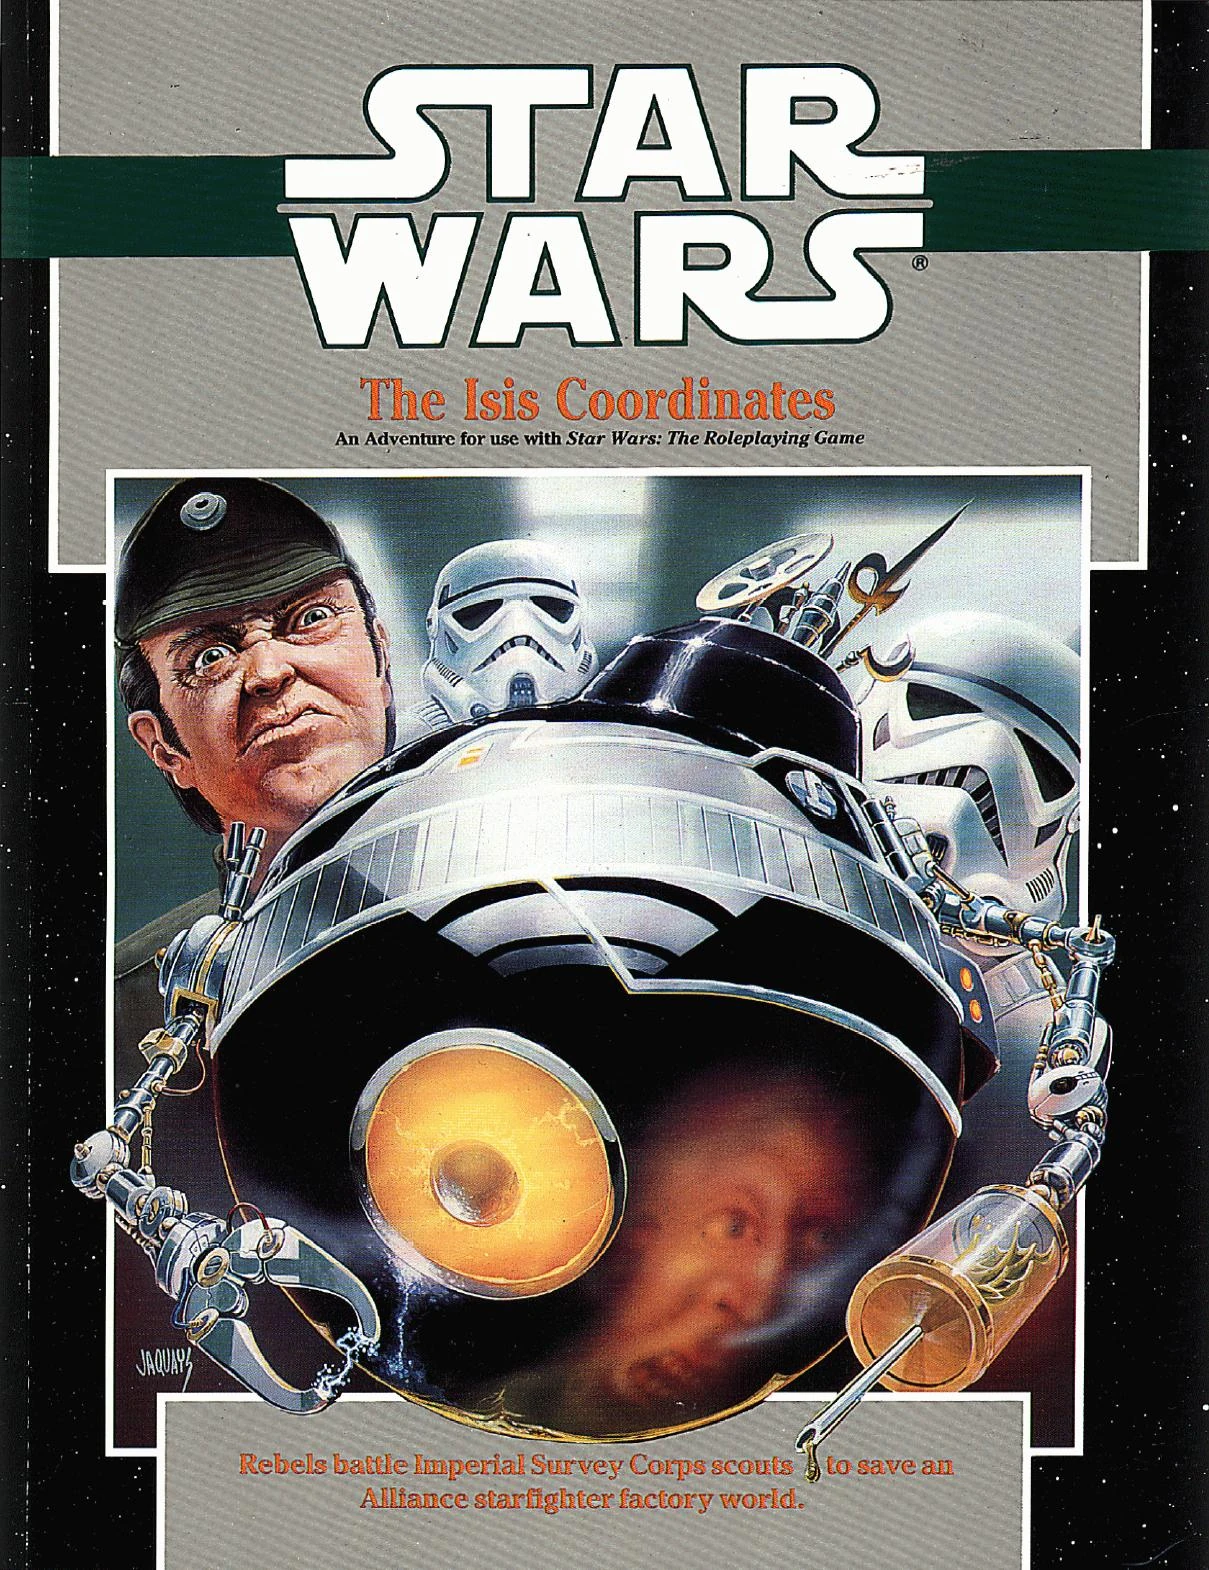
The Isis Coordinates
The Isis Coordinates
Star Wars
An Adventure for use with Star Wars: The Roleplaying Game
Rebels battle Imperial Survey Corps scouts to save an Alliance starfighter factory world.
by Christopher Kubasik
A long time ago, in a galaxy far, far away...
In its struggle against the EVIL GALACTIC EMPIRE, the Rebel Alliance has established many colonies on worlds far from the galactic core, worlds which remain hidden from the Emperor's ever-probing eyes. As long as their location is kept secret, these worlds serve as naval bases and dockyards for the Rebel fleet as well as safe homes for Rebel agents and their families.
There is a branch of the Imperial bureaucracy which directly threatens the existence of these hidden Rebel worlds. The Imperial Survey Corps (ISC) is charged with the task of traveling the galaxy and cataloging uncharted star systems. Usually these new star systems are devoid of life. Other times they contain civilizations ripe to be taxed and oppressed by the Evil Empire.
As yet, no Imperial scout team has stumbled across a system containing an Alliance colony. But since the ISC explores and catalogues a new world every 207 minutes, it is only a matter of time before a valuable Rebel colony is discovered by agents of the Empire...
Development: Michael Stern • Editing: Paul Murphy • Graphics: Jacqueline M. Evans, Stephen Crane • Cover Art: Paul Jaquays • Interior Art: Tom Baxa
Publisher: Daniel Scott Palter • Associate Publisher: Richard Hawran • Assistant Publisher: Denise D. Palter • Editorial Director: Bill Slavicsek • Associate Editors: Greg Gorden, Paul Murphy • Editor: Michael Stern • Assistant Editors: Greg Farshtey, Jennifer A. Williams • Art Director: Stephen Crane • Graphic Artists: Jacqueline M. Evans, Cathleen Hunter, Sharon Wyckoff • Production Manager: Steve Porpora • Sales Manager: Fitzroy Bonterre • Sales Assistants: Tony DeCosmo, Maria Kammeier • Special Projects Manager: Ron Selden • Treasurer: Janet Riccio
Published by WEST END GAMES RD3 Box 2345 Honesdale, PA 18431 40036
®, ™ & © 1990 Lucasfilm, Ltd. (LFL). All Rights Reserved. Trademarks of LFL used by West End Games under authorization.
Introduction
The galaxy is controlled by an Evil Empire which rules through tyranny and oppression. Innocent citizens are crushed under the Emperor's bureaucracy, while his corrupt minions are rewarded for their greed. Throughout the stars, the inhabitants of countless worlds are cowed by the destructive might of the Empire — paralyzed into inaction by despair and isolation.
But there is a force in the galaxy fighting for justice, a young but growing Rebel Alliance that is beginning to weaken the malevolent grip of the Empire. The Alliance has carefully and subtly made contact with interstellar governments and alien races throughout the known star systems. The oppressed and disheartened now know that they are no longer alone in their struggle.
Throughout the galaxy, world after world is beginning to strain at the shackles that bind them. Individually, the Rebels' efforts often seem small, but together they stretch the strength of the Empire beyond its limits.
This is the setting of Star Wars, a struggle between the forces of good and evil a long time ago in a galaxy far, far away. This adventure continues that saga, as the players take on the identities of Rebel agents working heroically against the overwhelming might of the Empire.
If you plan to play a character in this adventure, stop reading now. You'll spoil the adventure if you already know the story and the answers to its challenges when it comes time to play. If you plan to be the gamemaster for The Isis Coordinates, read on.
In This Adventure ...
... a group of Rebels chase after a team of Imperial Survey Corps scouts who have stumbled across a Rebel colony on the remote world of Isis. The scouts want to get back to an Imperial Naval base with the coordinates of the Rebel world so that a full strike can be launched against the planet.
The Rebels, of course, don't want this to happen, not only because a full evacuation of the world before Imperial ships could reach the planet is impossible, but also because the loss of Isis would delay the construction of starships desperately needed by the Rebellion. If the Rebel players are going to save Isis they will have to stop the scouts from reporting its coordinates to Imperial Intelligence.
The matter is further complicated when the Imperial scouts, after crash-landing on Isis, steal a freighter to get to an Imperial Naval base in the Bespin system. The freighter is the Handree, a Rebel gunship loaded with medical supplies bound for the world of Polmanar.
A massive guerrilla war is being fought against the Imperial forces on Polmanar. The Empire has recently blockaded the world, and if the medical supplies don't reach the struggling guerrillas within days, the war effort there may well collapse.
The Isis Coordinates leads the Rebels through the crystal valleys of Isis, into the glimmering city of Neskroff, across the chilling void of hyperspace, along the tunnels of the mining world of Miser, and finally into the corridors of an Imperial-class Star Destroyer, where the fate of two worlds is decided!
Preparing to Play
If this is your first Star Wars adventure, you'll need to spend a few minutes helping your players select and customize their character templates according to the rules of Star Wars: The Roleplaying Game.
If you plan to run this adventure as part of an existing campaign, be certain to review your players' character templates so that you can adjust the adventure to make use of their particular skills and experience.
Finally, you must read through the adventure thoroughly. The more familiar you are with the text, the smoother your gaming session will run.
Adventure Materials
This book contains the adventure The Isis Coordinates, various maps, diagrams and starship floorplans, the script that starts the adventure, eight non-player character templates, and two cut-apart puzzles. We suggest that you take time to photocopy the puzzles and any props, maps or floorplans that you might show to the players.
To play The Isis Coordinates, you will need the following items not included in this adventure: a copy of Star Wars: The Roleplaying Game, the Star Wars Rules Companion, pencils, paper, and enough six-sided dice to fill a Jawa Sandcrawler.
Some materials that are recommended but not necessary are the Star Wars Sourcebook, Galaxy Guide 2: Yavin and Bespin (part of the adventure takes place in the Bespin system), and Star Wars Miniatures Sets.
Difficulty Numbers and Game Balance
As gamemaster, you must modify this adventure to fit your particular group of players using the "Difficulty Numbers Scale" found below and in the Star Wars Rules Companion.
For example, if the text says a Rebel must make a Difficult streetwise roll to accomplish a given task, you would assign a number between 16 and 20, depending on the level of skill of the player's character.
Note that in all of West End's published adventures attributes are capitalized and italicized, skills are only italicized.
Also keep in mind that the number of Rebels and their particular types of templates affects the outcome of every encounter. This adventure is designed for four to six novice characters with a good mix of skills. Additional or more experienced characters may require you to beef up the encounters, while fewer or less experienced characters may require you to scale them down. The idea is to challenge the PCs, neither overwhelming them nor making things too easy.
| Task | Difficulty Range |
|---|---|
| Very Easy | 3-5 |
| Easy | 6-10 |
| Moderate | 11-15 |
| Difficult | 16-20 |
| Very Difficult | 21-30 |
If your characters are relatively new and untrained, assign numbers from the low end of the ranges; if the characters are rather more proficient, assign difficulty numbers from the higher end.
You will notice there are many partial repair rolls required in The Isis Coordinates. These rolls are based on the rules found on pages 43 and 44 of the Star Wars rules. However, the time required for the repairs has been altered slightly for each roll, so pay attention to the descriptions.
It is important that you use the partial repair rules because many of these tasks are of Moderate Difficulty or harder. It will be nearly impossible for the Rebels to complete the tasks without partial repair.
Adventure Background
The World of Isis
Isis is a system located beyond the fringe of the Empire. Its primary planet is a huge crystalline world covered with translucent mountains and giant spires which refract the sun's light into countless rainbows. The environment of Isis is hospitable to most sentient forms in the galaxy.
Isis has several native life forms, all of them based on organic minerals. Most prominent on the planet are the Gutretees, a nomadic crystal people that roam the plains of the world.
The system was first explored by an Alderaan scouting expedition at the time the Republic was crumbling. Rather than file the report through normal bureaucratic channels, First Chairman Bail Organa decided to keep the information about the new world within his own circle of political allies. The mineral-rich planet would make a perfect starship construction facility because materials could be mined and processed right on planet. Organa foresaw a day in the not-too-distant future when such places might be necessary to support a galactic uprising. Until then, the location of the world would remain his secret.
When Palpatine began his political purge of the Republic, Organa began secreting away the Emperor's opponents and their families on Isis, before they could be killed or imprisoned. When it became time to fight, hundreds and then hundreds of thousands of people moved to the crystal world to seek shelter. Most of these refugees were the families of those who opposed the Empire, hiding so that the Emperor could not strike against a known Rebel by attacking those he loved.
As the population of Isis grew, the Alliance began using the world as a starfighter construction facility. Engineers from all over the galaxy traveled to Isis to begin new, safe lives and support the efforts of the Alliance.
Over the years the Rebellion has made contact with the Gutretees, and the rock people are now sympathetic to their cause. Some of the Gutretees live in the Rebel cities, helping them mine and build ships. They have not been allowed to leave Isis; such a startling new race would surely draw the attention of the curious and might possibly lead to the discovery of the Gutretees' planet of origin — and the Rebels in hiding there.
Isis is vital to the Rebels' war effort. The system's distant location from the Galactic Core has thus far kept Isis from Imperial attention, and the crystal world's exact location is one of the Alliance's most closely-guarded secrets.
The Imperial Survey Corps
There is a division of the Imperial Navy, known as the Imperial Survey Corps (ISC), engaged in tracking down and cataloguing new worlds. The Corps is composed of scientists and scouts who explore the farthest reaches of the galaxy in small teams aboard long-range survey craft. The ISC records a new world for the Empire every 207 minutes.
In the days of the Old Republic, newly catalogued worlds would be studied with an eye toward possible colonization. This is no longer the case. The Empire does not want people moving to new worlds — that would stretch their control even thinner.
However, there are many worlds with native cultures in the galaxy that do not yet owe allegiance to the Emperor. These worlds are eagerly sought as new sources of tax revenues for the hungry coffers of the Empire. When discovered, these worlds are quickly absorbed into the ever-increasing sphere of Imperial influence; those which attempt resistance are quickly and efficiently subjugated.
Every once in a while, though, an ISC team stumbles across a world that is of far more value to the Emperor than mere tax revenues. Sometimes, the new world contains Rebels. Such a world is Isis, happened upon by the Imperial Survey Vessel Wanderer during routine exploration of the outer clusters...
Recent Events
Elsewhere in the galaxy, Rebels in the besieged Polmanar system are in desperate need of medical supplies to carry on their guerrilla war against the Imperial authorities there. The guerrillas have suffered terrible casualties and their supply lines have been choked off by an Imperial Naval blockade of the system. The resistance effort will collapse if medical supplies don't get to Polmanar soon.
If supplies arrive in time however, the battle could easily turn in favor of the Rebellion. With their forces stretched too thin as it is, the Imperial Navy can ill-afford to reinforce the blockade surrounding Polmanar. The guerrilla war has been costly to the Navy as well as to the guerrillas, and the Imperial Admiralty is calling for a temporary removal of the blockade fleet if the system cannot be subjugated within the next several standard weeks. (It is rumored that Lord Vader has requested these ships for service in his new fleet.)
If Polmanar wins its freedom, even for a short time, the victory will prove to other star systems in the sector that standing up to the Empire is possible. The Rebel guerrillas on Polmanar have only to stave off defeat for a few standard weeks, but they stand little chance of doing so if medical supplies don't get through — and soon.
Adventure Synopsis
When The Isis Coordinates opens, the Imperial Survey Vessel Wanderer is already in the Isis system. The Imperial scouts are trying to get life form readings and monitor communications broadcasts with their sensors, but the crystals of Isis are confusing their reception. The ship's captain, Pilia Tonth, decides that the Wanderer will have to get closer to the surface of the planet so that the ship's sensors can be used more effectively.
Just then, the Rebel heroes show up. They have traveled to Isis on a highly-critical mission. They are bringing a stolen transponder code that will allow the Handree, a Rebel gunboat filled with medical supplies, to pass through the Imperial blockade surrounding the besieged Polmanar system. The Rebels, once they install the transponder code into the Handree, are to escort the gunship to Polmanar and run interference for it.
The Rebels' mission is sidetracked, however. When they come out of hyperspace in the Isis system, they pick up the Imperial Survey vessel on their sensors and immediately recognize the danger.
The Wanderer spots the Rebel ship as well, but knows what price is to be paid for incomplete reports to the Empire. So, rather than immediately jumping to hyperspace, the Imperial Captain orders battle stations as she flies her ship down to the surface of Isis, hoping to hold off the Rebel ship long enough to gather the data and get back into hyperspace.
Combat ensues and the Imperial ship is damaged; it enters the planet's atmosphere to try to find a place to hide and make repairs. The Rebels pursue the Imperials through the crystal canyons of Isis, but before they can catch up to the scout ship, their ship in turn is seriously damaged and forced to make a crash landing.
When they recover from the crash, the Rebels discover that their ship is surrounded by a tribe of Gutretees. While the Imperial scout team heads for the nearby city of Neskroff, the Rebels must first gain the trust of the crystal aliens and then obtain help in getting to the city to cut off the Imperials.
The Rebels reach Neskroff right on the heels of the Imperial scout team. Inside the city, the Imperials manage to sneak into starport and board the nearest hyperspace-capable craft — which just happens to be the gunboat Handree. The Imperials hope to steal the ship and reach Imperial Intelligence to give them the exact location of the planet.
Because the medical supplies on board the Handree are so critical to the Polmanar resistance, the gunboat cannot be simply shot down. The Rebels have to rush on board the ship and attempt wrest control of it from the Imperials. Before they have time to accomplish this, the Imperial captain jumps the Handree into hyperspace and the Rebels are trapped aboard the gunboat for a twelve-hour trip. Their destination: a fully-armed Imperial base!
When the Handree comes out of hyperspace, the Rebels are quickly captured by the crew of the Imperial Star Destroyer Desolator. At that time they meet Admiral Grendreef, an overambitious officer who wants to keep the location of Isis a secret until he has had a chance to destroy the Rebel world personally — keeping the glory of the kill all to himself.
The player characters are shipped down to the Imperial Naval base on Miser, where they are to be thoroughly interrogated. One of them is singled out and subjected to the cruelties of an Imperial Interrogator Droid. Meanwhile, a Rebel secret agent working within the ranks of the Empire's Navy helps the rest of the group escape from their detention cell. The freed Rebels race against time to rescue their companion and prevent him from succumbing to the all-too-effective techniques of the torture Droid.
After freeing their companion, the Rebels discover that the Desolator is preparing for a jump to the Isis system — on a mission to devastate the planet! They must get off the Imperial base and wipe the Isis Coordinates from the Star Destroyer's nav computer before it is too late.
In the final episode, the Rebel characters sneak aboard the Desolator (no mean task) and break into the ship's nav computer. There they can do one of three things: remove the coordinates from the computer's memory, remove the coordinates and replace them with other coordinates that will bring the ship to a dead world, or they can set coordinates that will fly the Star Destroyer directly into a rogue planet — tearing the Desolator to shreds.
After mucking about with the computer system, the characters must rescue the Handree from the Star Destroyer to save the medical supplies for Polmanar. The Rebels must wait until the last moment before the Star Destroyer jumps into hyperspace before escaping, so the Imperials cannot send a wing of TIE fighters after them.
But there are complications — the Rebels are accidentally discovered and a desperate battle takes place in the last minute before the Desolator makes its jump. If all goes well, the Rebels fly the Handree off the Star Destroyer at just the right time, the Star Destroyer jumps to whatever coordinates they set for it, and the medical supplies are safely in the Rebels' hands.
The Main NPCs
The following are brief introductions to the major non-player characters, outlining their plans, motivations and involvement in the adventure. Additional information on most of them is available on their NPC templates at the end of this book.
The Imperial Survey Corps Agents: The team of scouts that stumbles across Isis is a tough group of men and women. Their many years in the Corps have trained them to be jacks-of-all trades, competent at everything from repairing a starship to shooting their blasters.
At the start of the adventure there are six scouts. Two of them die during the first episode before the Rebels even catch up with the Imperials, so they play no part in the adventure.
Captain Tonth: The Imperial scout leader is Captain Pilia Tonth. She is bucking for a promotion out of the Survey Corps and is willing to risk her ship and crew to get it. When her sensors can't pick up details about the world, she flies the Wanderer down to the planet's surface so she can gather more information. Once she learns that it is a Rebel planet — and a sure ticket for a promotion — she will do anything to get the planet's coordinates to the Imperial Navy.
Iponta: Iponta is the lead warrior of the Gutretees, the people of living crystal that are native to Isis. He challenges one of the Rebels to combat, not because he wants to hurt them, but because it is the custom of his people. Iponta has dealt with Rebels before and likes them, but knows he must follow the rules. After the formalities of battle are taken care of, he is good-natured and very helpful.
Ulthar Blaze: A Rebel secret agent who has infiltrated the Empire's Internal Securities Bureau. He was recently stationed at a temporary Naval base on the world of Miser in the Bespin system as an assistant to Admiral Grendreef of the Imperial Navy. When posing as a corporal in the ISB, Blaze is efficient and frightening. When he is with his fellow Rebels, he is high-spirited.
Admiral Grendreef: The commander of the Imperial Star Destroyer Desolator. Grendreef is someone who derives more personal pleasure out of his work than he does professional pride. He loves to see people in pain and loves to be the man causing it. His function in the adventure is to be despised.
Episode One: Discovery!
Summary
The adventure begins with the Rebels coming out of hyperspace in the Isis system. Their mission is to install a stolen transponder code in the Rebel gunboat Handree and then escort the ship to the blockaded world of Polmanar. As soon as the Rebels come out of hyperspace, however, their sensors pick up a ship that isn't broadcasting an Alliance transponder code. Since Isis is a secret Rebel colony, every ship encountered in the system should transmit a Rebel-confirmed transponder code.
After checking the ship out, the Rebels discover that it is an Imperial Survey Corps scout ship. They move in and chase the Imperials to the planet's surface, where they take part in a high-speed chase through the planet's crystalline ravines and canyons.
Start the Adventure
Locate the script and assign a part to each player. The parts are labelled "1st Rebel," "2nd Rebel," and so on. If you have fewer than six players, assign additional parts as necessary. Give each player copies of the script. If you don't have access to a photocopier, you can share the copy in the book. When everything is set, read the opening scroll to the players (found on page three), then start the script.
Running the Picket
The Imperial ship and the Rebel ship start at long range, with the Imperials rushing for the world of Isis in an effort to gather more information on it, and the Rebels chasing after them. The Imperial ship's configuration will only allow two of its cannons to fire on the Rebel ship as long as the Rebels stay on the Wanderer's tail.
The Imperial Captain, Tonth, will try to keep as much distance as possible between her ship and the Rebels' ship. Because the Wanderer is heading directly for a planetary body, however, it cannot get farther than long range from the Rebel ship.
Sidebar: Ships That Pass in the Night
The ISC agents are zipping through space in the Wanderer, a Loronar FarReach IV PQR scout ship. The IV PQR is a heavily armed version of Loronar's popular FarReach scout line. There are six Imperial agents on board. One is piloting, one is navigating, and the other four are working the laser cannons.
Far*Reach IV PQR
Hyperdrive Multiplier: x4
Sublight Speed: 3D
Maneuverability: 2D
Hull: 3D
Weapons: Four laser cannons (fire independently); fire control 2D; damage 4D
Shields: 1D
If the Rebels don't have their own ship, the Alliance has supplied them with the modified light freighter Out Runner for their trip to the Isis system.
Modified Light Freighter
Hyperdrive Multiplier: x2
Sublight Speed: 2D
Maneuverability: 0D
Hull: 4D
Weapons: Two laser cannons (fire independently); fire control 2D; damage 4D
Shields: 1D
Let the gunners on the two ships exchange shots for three rounds. At the end of the third round of starship combat, the Rebels catch sight of three X-wing fighters rushing up from the planet's surface. The X-wings have identified the Rebel ship's transponder code while the scout ship is still unidentified. Read the following to the players:
The Imperial scout ship is rushing toward the planet's atmosphere. Ahead, three X-wings are racing up from the planet's surface, on an interception course. Instead of changing its course, the scout ship is heading directly toward the fighters.
The player characters might want to contact the X-wing pilots on their sub-space com unit in order to warn them of the situation. If they don't, the X-wing leader will make contact with the Rebels. Either way, the conversation should go something like this:
"How do, Out Runner, this is Red Team leader. Got us a non-clear here and I was wonderin' if you could give us some info on it, copy?"
The X-wings have yet to identify the Imperial ship and are asking the Rebel players for some help. Once the fighter pilots are apprised of the situation, they break off into attack formation.
Let there be one more round of combat before the X-wings and the Wanderer get into firing range, giving the characters another chance to inflict some damage. At the end of that round, read:
Just ahead of you, the X-wings peel-off in attack formation and come screaming in toward the scout ship — one right toward the bow, one angling in from the starboard side and one from the port side. A cascade of blaster fire is unleashed from the onrushing ships.
One of the X-wing's shots slams into the scout's spine — blue bolts crackle over the surface of the ship! But before you have time to cheer, the scout's laser cannon spin around and fire into the X-wings with uncanny precision. Each shot is a direct hit, consigning the Rebel fighter pilots to fiery deaths.
The damage done by the X-wing fighter ruins the Wanderer's hyperspace navigation capabilities.
After the X-wing fighters are destroyed, the Wanderer continues at top speed toward the surface of Isis. It is a risk to do so with the Rebel player characters right behind her, but for Tonth the world of Isis has become a carefully wrapped package that might have something very valuable inside.
Isis Coordinates Adventure Script
Use the following script to start your adventure. The gamemaster will tell you which part (or parts) to read.
Gamemaster: The streaks of light out the viewport of your ship shorten themselves to pinpoints as you enter real space. Up and to the left of you hangs the crystalline world of Isis. Even from space, its rainbow refracting spires are a splendor to behold. Circling the world are several starship construction facilities. Shuttles buzz between the space docks and the Rebel cities below.
1st Rebel: Too bad we won't be able to spend some time relaxing on Isis.
2nd Rebel: Yeah, imagine it. A Rebel colony. A whole system where the Imperials have never been. No chance of getting boarded or shot at or...
3rd Rebel: Don't be so sure. With a colony this large, security must be a nightmare.
2nd Rebel: Well its gotta be safer than trying to run that Imperial blockade on Polmanar.
4th Rebel: Yeah, I wonder who they found to pull that one off?
GM: There's a long silence. The sixth Rebel coughs embarrassedly. Everybody turns to look at him.
4th Rebel: On second thought, I'm sorry I asked.
5th Rebel: Wait a minute. How are we supposed to get the supplies through the blockade?
6th Rebel: We've got a stolen Imperial transponder code that we're going to burn into a Corellian gunship called the Handree. It's waiting for us in the city of Neskroff on Isis.
1st Rebel: The gunship's been stocked up with practically all the medical supplies we've scarfed from Imperial convoys this month.
5th Rebel: Sounds a bit risky — putting all those valuables in one ship.
1st Rebel: We've got no choice. We're taking a big enough risk just trying to get two ships through the blockade.
2nd Rebel: Two ships?
6th Rebel: Right. After we install the code into the Handree's transponder, we're going to have to escort her to Polmanar. If those supplies don't make it, millions of lives will be lost.
4th Rebel: Uh-oh.
6th Rebel: I know it sounds pretty bad...
4th Rebel: No, I mean "Uh-oh" as in I think something bad is happening now.
3rd Rebel: What's that on your scanner?
4th Rebel: My uh-oh. It's a ship — but it's not giving off an Alliance-confirmed transponder code.
5th Rebel: It's not Imperial is it?
4th Rebel: Hang on a minute. Uh, yeah. Its Imperial.
Everyone: Uh-oh.
2nd Rebel: Can you pick up an ident beacon or code of some kind?
6th Rebel: Working on it, just a sec. It's a scout ship. Survey vessel from the Imperial Survey Corps.
3rd Rebel: Where's our patrol fleet?
5th Rebel: Other side of the system. The scout must have stumbled in blind; just a routine charting mission. Maybe they don't know...
1st Rebel: We gotta get it while we still have time, and maybe surprise.
2nd Rebel: If we don't stop them from reporting the location of this colony to the Empire, those people down there are in a lot of trouble.
4th Rebel: They're heading into low orbit. Probably want to make a more complete scan before they report back to the Empire.
6th Rebel: Better move fast, before she has a chance to jump to lightspeed.
1st Rebel: I'm bringing us around. Here we go!
Information
The galaxy is very, very big and it is impossible for anyone to know everything there is to know about it. Even Rebel heroes, who zip constantly from one star system to another, are hard-pressed to know every detail about a place they are visiting for the first time — or even about planets they were actually on for a day or two.
Because Isis is a Rebel colony, the Rebel heroes know some information about the world simply because they are members of the Alliance. Other tidbits are known only to Rebels who succeed at Knowledge skill rolls. These reflect data entries the Rebels might have come across in their youth, stories overheard in a cantina, and so on.
Here's what the Rebels know without having to make rolls:
- Isis is a Rebel colony established by Bail Organa when the Old Republic began to crumble.
- It is a crystal world, and the crystals disrupt transmissions and sensors. All communication on Isis is through fiber optics medium (like telephones).
If a Rebel makes a planetary systems roll, give out the following information according to the total of his roll:
- 10+: Neskroff, the city the Rebels are traveling to, is the only starport on Isis.
- 15+: There is a native sentient life form on Isis known as the Gutretees.
If at any time a Rebel makes an alien races roll to learn more about the Gutretees, read the following according to the total of his roll:
- 5+: The Gutretees are a life form based on crystal. (This will be obvious if the Rebels have seen the aliens.)
- 10+: The Gutretees live in primitive nomadic tribes. They gain nourishment from mineral deposits which grow on the surface of Isis; they also eat other crystalline animals.
- 15+: Some of the tribes are allied with the Rebellion and work with Rebel miners to get materials for starships. Other tribes hate the Rebellion and consider themselves at war with the off-worlders.
- 20+: The tribes are very aggressive in nature and most of their rituals and rites of passage involve fighting of one kind or another.
- 30+: Because of their crystalline structure, the Gutretees cannot be harmed by blasters — the beams bounce right off of them. The Gutretees are a single sex race.
The other important fact about the Gutretees is that the creatures store all of their memories in exact detail within their own bodies — their crystal bodies are, in essence, data files.
When two tribes meet, one member of the tribe must fight another member of the tribe. Whoever wins gets to make a copy of the memory of the loser and absorb this copy into his own body. In this way the strongest members of each tribe accumulate all the history of all the tribes of the world.
None of the Rebels will be aware of this last information, no matter what they roll.
Sidebar: Dramatic License
Roleplaying games are caught by the pull of two conflicting forces — that of trying to tell a story and that of being a game. In a story, the author gets to decide when the heroes are caught or escape, when the villain is safe and when he is vulnerable. In a game, the players' skill and random chance determine the outcome of the action.
Often, the two forces don't quite mesh. A random die roll can produce a result that runs counter to the direction that you (or the adventure's author) may want a story to take. For example, the primary action of The Isis Coordinates involves the Rebels chasing after the Imperial Survey Corps agents. If the Rebels capture or destroy the Wanderer with a lucky die roll, the adventure is over just as soon as it starts. You, as gamemaster, must make sure this doesn't happen.
This is just as if you were the writer/director of the movie, Star Wars. If the stormtroopers had captured Luke and Ben at the Mos Eisley starport, the story would have ended right there. It was important that the good guys get away so they could fly to Alderaan and find the Death Star, so the writer/director made sure that they did. In your roleplaying sessions, you might have to do the same thing.
Though for the most part, you should let the characters' luck and ability control the action, you may have to "fudge" the die rolls to keep the story going in the proper direction. This means that the players are rolling dice as normal, but you are altering or ignoring the results — without the players being aware of what you are doing.
Naturally, you don't want to do this for every single roll, rather only when the situation is particularly crucial to the story. Don't "cheat" to penalize the characters; cheat to keep the story alive. And do not do it at all if you can see a way to get the story back on track without messing with the dice.
Through the Crystal Canyons
By this time, the Wanderer has sustained enough damage from the Rebel characters and the hit from the X-wing that the Imperials have decided to bring the craft down for an emergency landing to make repairs. Even if the characters haven't gotten any hits against the Wanderer yet, the hits taken from the X-wings are enough to drive the Imperials to earth.
Continue the chase for two more rounds and then read:
As you approach the surface of the world, you see that Isis is made of giant, translucent crystals that reflect the sun's light into countless rainbows across the sky. Some of the crystals form giant spires that reach high into the air. Others are thick mesas filled with caverns and tunnels and separated by wide canyons.
Ahead of you, the Imperial ship is veering down into one of the canyons.
The Wanderer's pilot is now attempting to lose the Rebels by flying through the maze-like canyons of Isis. It is expected that the Rebels will follow the ship into the canyon for a high speed chase through its twists and turns.
The canyons are, on the average, 750 meters wide and their walls are 12,500 meters high.
If the Rebels want to follow the Wanderer from above the canyon walls, explain that they will probably lose the ship because it will eventually take a turn out of their line of sight beneath a canyon wall. Sensors are nearly useless this close to the surface of Isis. The only hope the Rebels have of keeping track of the Imperials is to follow them down into the canyons and stick right on their tails.
If the Rebels still don't go into the canyons, sure enough, they lose the Imperials in a matter of seconds when the enemy dives beneath an intricate network of natural bridges and tunnels. The Rebels have to circle back and go in after them. When they once again catch sight of the enemy, they are 13 speed actions behind — on the verge of losing them (see below).
Running the Chase
The chase through the canyons makes the following assumptions:
-
The Wanderer starts 2,500 meters ahead of the Rebel ship.
-
The distance moved per successful speed action is 250 meters. This is reduced from the starship's normal 10,000 meters per action because the ships are not flying in open space, but instead must carefully navigate the unpredictable canyons without the aid of sensors. Thus the Wanderer begins the chase 10 speed actions ahead of the Rebels. Add or subtract the number of speed actions each ship loses or gains from this starting total of ten as the chase continues.
-
If, at any point, the Wanderer is 3,750 meters ahead of the Rebels (15 speed actions), the Rebels have lost the Imperials. You should point this out to them when the Imperial are about 13 speed actions ahead of the Rebels. For example: "The Imperials are far enough ahead that you might miss them if they come up to a fork again."
-
The standard movement difficulty is Moderate. This difficulty is raised to Difficult when either pilot is attempting a maneuver (see below).
-
Flying through the canyons prevents the use of maneuver actions most of the time. However, a fork in the canyon, a winding stretch of canyon, or an especially narrow passage will give the Wanderer a chance to try a maneuver and leave the Rebels far behind and lost. To reflect this, the Imperial pilot will try a maneuver every third round. Every time the Imperials try a maneuver, the Rebels must make an opposed maneuver action or let the Imperials get more reserve speed actions.
The Rebels, because they are simply following the enemy ship's course, cannot actively attempt to outmaneuver the Imperials. Thus the Rebels are at a distinct disadvantage — which is exactly why the Wanderer's pilot is flying through the canyons in the first place.
For example, as the ships race between the crystal walls of the canyons, the Wanderer rushes toward a fork in the canyon. The pilot wants to fake out the Rebel pilot, so he attempts a maneuver, making it look like he's going to the left, but, at the last second, dodging right. Because the Rebels are trying to follow the Imperials, the Rebel pilot must attempt to beat the Imperial's maneuver.
If the Imperials win the maneuver contest, it means that the Rebels momentarily went off in the wrong direction and they get reserve speed actions which they can apply toward getting the 15 speed actions they need to lose their opponents. If the Rebels win, it means they saw through the trick and inched closer to the fleeing ship. The Rebels get the reserve speed actions, which they can use to cut down the distance between the ships.
- The ships may fire at each other normally, but assume they have a difficulty number of 20 to hit. This reflects the difficulty of firing from a ship racing down twisting canyons at another ship in similar circumstances.
The Added Danger
Leading the Rebels into the canyons gives the Imperials an advantage that they did not anticipate — the sound waves caused by their ship racing down the canyon is shattering the crystal walls of the canyon, effectively creating an avalanche in their wake. As the Rebels pursue the Wanderer, their ship is bombarded with giant crystal boulders.
When the Rebels race into the canyon, read the following aloud:
As your ship swoops down into the canyon and quickly levels out with a roll to the left, your ears are filled with a painful, high-pitched tone. You suddenly realize that the sound of the Imperial ship's flight is reverberating in the crystal canyon. Now there's a thump on your hull, and then another, as shards of the canyon's wall, some as big as boulders, loosened by the roar of the Imperial ship's engines, begin tumbling down into the canyon.
Maneuvering Around the Boulders
To determine the effects of the boulders on the Rebels, roll a die every round. If a 1, 2, 3, or 4 comes up it means that the ship is pelted with small chunks of crystal that have no ill effects on the Rebel's craft. However, if a 5 or a 6 is rolled, it means that several very large boulders are falling out into the path of the Rebels. Roll 1D+2 to determine the number of boulders.
If one or more of the boulders strikes the ship, it does not take damage but instead the ship is knocked about the canyon. This disrupts the ship's flight path and effectively gives the Wanderer two speed actions.
To avoid losing speed against the Wanderer, the Rebel pilot must make a maneuver action that round. The maneuver is an opposed roll made against the boulders, with the boulders getting 1D for every boulder falling upon the Rebel ship.
Note that if the Rebel pilot beats the boulders he does not receive any reserve actions. He outmaneuvered the boulders, not the Wanderer. Once again this puts the Rebels at a severe disadvantage in their attempt to catch up with the Imperials.
Shooting the Boulders
Clever Rebels might want to soften the odds of the maneuver by blasting some of the boulders to bits before they strike the ship. The Rebels fire at the same difficulty of 20 that applies to firing at the Wanderer.
Roll for the shots against the boulders before having the pilot make his maneuver roll.
Any hit from a blaster cannon shatters a boulder immediately — no roll for damage is required. For every boulder destroyed, remove one die from the total dice rolled against the Rebel pilot. It is possible, then, that gunners on board the Rebel ship will clear all the boulders falling that round, relieving the pilot of the need to make the maneuver roll.
Losing the Quarry
After chasing the Imperials for 10 rounds, read the following to the players:
The rear guns of the Imperial ship pivot to face the canyon wall. There is a brief flash of blaster fire and a shower of glittering crystal instantly fills your viewport. The clattering of tiny shards soon becomes a steady thumping as larger chunks of crystal pummel your ship's hull. The ion drive warning claxon springs to life and a shower of sparks erupts on the command console. You are thrown as the ship abruptly bottoms out, skipping along the floor of the canyon, finally stopping, buried beneath an avalanche of crystal.
The pilot of the Rebel ship must make a Moderate starship piloting roll to bring the ship to a safe landing. If the pilot makes the roll, the ship skims along the base of the canyon and comes to a safe stop as it is buried beneath the crystal avalanche. In this case none of the Rebels sustain damage, but the ship remains buried beneath a mound of crystal.
If the roll is failed, then the ship slams into the wall of a canyon and flips over. In this case the ship is still buried, but all of the Rebels now must make Strength rolls against 4D damage.
Describe how sparks are spraying out from some of the ship's control units periodically, and the interior lights go out all over the ship. Go on to Episode Two.
I Ain't Flying My Ship in There: Do You Know What These Things Cost?
If the Rebels never entered the canyon in the first place, you can improvise another accident which causes their ship to malfunction and crash, or you can let the Imperials escape. The Rebels have little choice but to go to Neskroff and warn the authorities.
Despite everybody's best efforts, the Imperials sneak into the city and steal the Handree. You can return to the story line in Episode Three, with minor adjustments.
Episode Two: The Crystal Warriors
Summary
In this episode, the Rebels must first dig themselves out from under the avalanche. Once they have done this, they meet a native tribe and engage in the ritual of battle which passes for "hello" on this planet.
Once greetings have been exchanged and the injured tended to, the natives may take the Rebels to the crashed Imperial ship. The Rebels explore the ship, gaining clues about the plans the scouts have made. Then the natives give the Rebels a lift to the city.
Buried Alive
Read:
With an abrupt jolt, the ship finally comes to a complete stop. In the darkness, you can hear the soft thumping of boulders tumbling down upon other boulders — the ship shudders with each one. The emergency lights suddenly snap to life, filling the cabin with a soft red glow.
In this eerie light, you can see that the viewport before you is completely filled with crystal shards. Although you don't know exactly how much of this rock you are buried beneath, you note that no light shines through the normally translucent crystal — and you can almost feel the great weight pressing down upon the hull of the ship, which creaks and pops alarmingly under the growing pressure.
The ship's life support systems are still functioning, so the Rebels are in no immediate danger of suffocation. They are, however, on a rather time-sensitive mission, and therefore will not wish to spend too long digging their way out from under the rubble.
Getting Out
The Rebels have a number of options open to them, and in a situation like this, are likely to improvise some sort of really outrageous solution to the problem. If they come up with something wild, you'll have to wing it, but here are a few of the things they might try:
Trying the Entrance Ramp or Emergency Hatch
This is completely futile. Both are jammed shut by tons of crystal rubble.
Using the Laser Cannons
If the Rebels try this, do not bother having them make rolls. They can successfully burn through the rubble directly in the laser's firing arc, essentially fusing a corridor to the surface, but they can't pivot the gun down at the angle necessary to blast away the pile blocking the entrance ramp or the emergency hatch.
Using Hand Weapons or Explosives
The most obvious way for the Rebels to get out is to blast through a viewport and then through the rubble itself. There are several viewports scattered throughout the ship, including the main cockpit port.
Using fusion cutters or a beam drill, the Rebels automatically cut a path through the rubble in about one hour. (There aren't any of these in the ship's stores, but it is conceivable that the Rebels have one in their personal equipment.)
Improvising with explosives or hand-held blasters, the Rebels must roll first against the viewport's Strength of 30, and then six times against the rubble's Strength of 25. Each of the latter rolls represents about 30 minutes of continuous blasting with lasers, three grenades timed to explode simultaneously, or one thermal detonator. Combined actions are allowable for the laser shots.
If a laser cannon has been fired previously and the Rebels cut through that port, only two rolls with hand weapons are required to clear a path through the remaining rubble to reach the surface.
Note that the fumes given off by vaporized crystal are noxious and toxic, and the Rebels must make opposed Strength rolls against the fumes' damage code of 3D+2 every fifteen minutes they are exposed to it. Environment or space suits protect against the fumes.
Note also that, if grenades or thermal detonators are used, it is a good idea to set them with time delays and beat it back into the ship before they detonate...
Firing the Engines
A creative solution, but not without its own problems. First, the engines are inoperable, and they require a Very Difficult starship repair roll to get them to fire for even a two-minute duration. Once again, combined repair rolls are okay.
The next problem is that the engines (in their weakened condition) are not strong enough to push the ship free of the rubble. They do melt the crystals astern, however. In this case, the Rebels may cut their way out through the jammed emergency hatch in the engine room (Strength 45) and then, after giving it an hour to cool below boiling, wade gingerly through the melted rock.
The Emergency Jettison Hatch
If the players specifically ask you about any special hatches, accessways, etc., that their ship might have, ask for starship repair rolls. An Easy success means that the Rebel remembers the emergency jettison hatch specially installed in this model starship. The hatch is in the rear quarter of the ship.
The controls which operate the hatch are inoperable, but a moderate starship repair roll will remedy that. Once unjammed, the controls operate a panel which leads to a small two-meter by two-meter airlock, on the other side of which is another panel which opens to the outside of the ship. Once outside, the Rebels can blow through the crystals as described above.
Blasting through the Ship's Hull
Not the wisest approach, but still feasible. Use the same rules as for blasting through a viewport, only the hull has a Strength of 45. Once outside, the Rebels can burn through the crystals as described above.
Meeting the Natives
When the Rebels have emerged from the rubble and dusted themselves off, read the following:
On the cliffs above, you see 20 to 30 humanoid-looking creatures that appear to be made of crystal — their "skin" reflects green, red, and blue light from the setting Isis sun. Each is holding a tall, thin crystal spear.
If the Rebels didn't make an alien races roll before, they might want to now. The information they could know on the Gutretees is listed in Episode One.
Twenty-five Gutretees stand on the cliffs above the Rebel ship, completely still and silent. Before the Rebels have a chance to do anything, the alien leader, Iponta, pounds his hand on his chest and waves his spear. He speaks in the Rebels' language, although thickly accented:
"New-com-ers. You have the ho-nor to prove your-selves. If you are strong-er than me, you are wor-thy of life!"
Here's what's going on: The Gutretees have a custom that has been with them for countless generations. When a tribe meets another tribe (and the Rebels count as a small tribe in the eyes of the aliens) there must be a contest of strength. The key phrase to signal the contest is "If you are stronger than me, you are worthy of life!"
However, when a Gutretees says, "worthy of life," he is not referring to whether or not the other person should continue breathing. He is referring to the Gutretees' tradition of passing on tribal history through their crystal bodies. In effect, the warrior is saying to the Rebels, "If you beat me you are worthy of my tribe's life (history)." In this contest, the winner gets to share the memories of the loser.
The Rebels may believe that the Gutretee is challenging them to a fight for their lives, and you should do nothing to dissuade them from this. The phrasing that Iponta used is how they really see it (tribal history is their life) so they won't be able to explain it any more clearly to the Rebels. The Rebels will just have to fight and find out.
Gutretees
DEXTERITY 2D
Crystal spear 3D
KNOWLEDGE 2D
MECHANICAL 1D
PERCEPTION 3D
STRENGTH 3D (4D for purposes of determining damage)
TECHNICAL 1D
Crystal spear: damage code STR+1D+1. The spears can be thrown, damage same as above. Use the crossbow ranges from the Weapon Chart for the spears' range.
Note that Gutretees are immune to blaster fire.
What the Rebels Do
This scene can go several ways. Below are some of the options the Rebels might choose and how the Gutretees will react. Keep in mind that the Rebels might try one strategy and then another, eventually exhausting all of the options below before the fight actually begins.
The Rebels Hole Up Inside their Ship
If they do this the Gutretees tribe simply assumes that the Rebels are choosing their strongest tribe member to send out for the fight. The Gutretees are very patient and will wait like stone statues for hours. But, when night falls, 12 hours later, the Gutretees get bored and go away.
The Rebels have to make their own slow way to the Imperials' ship or directly to the city, giving the enemy an almost insurmountable lead. You must decide whether the Imperials got to the city and stole the Handree, ending the adventure immediately (not fun, and it means that you've kind of wasted your money on this module!), or you must assume that the Imperials too were delayed in their journey to the city.
The Rebels Shoot the Aliens with their Blasters
If this happens, read:
The blaster bolt enters the skin of the alien and refracts outwards in a spray of light, leaving the creature unharmed. All the aliens begin laughing, heaving their bodies almost uncontrollably.
Unable to catch his breath, the alien repeats his request through his laughter. "Please newcomer ... Let us fight ... Ha, ha, ha, ha."
The story of how surprised the first offworlders were when their blasters did not work on the Gutretees has passed from tribe to tribe around the world of Isis, always to the extreme merriment of the listeners. Now, when anyone uses a blaster on the aliens, it's always good for a laugh. In fact, the natives often borrow the weapons of their Rebel friends to shoot at each other just for kicks.
If the Rebels continue to fire their blasters, the laughter builds and builds until Yustavan speaks. In this case, Yustavan does exactly what he does if the Rebels try to talk to the Gutretees, which follows below.
The Rebels Attack the Gutretees with Non-Energy Weapons (like Grenades)
This type of weapon will have the standard damage effect.
The Gutretees take shelter within the very crystal cliffs themselves, somehow merging with the surface of the planet and becoming virtually invulnerable to physical attacks. From inside the ground, they throw their bastaskas (spears) at the Rebels. If a spear misses its target, it slides into the planet's surface, writhing like a snake, and "swims" back to the Gutretees who threw it.
The tribesmen do not give up the fight, keeping the Rebels pinned down while Iponta emerges from time to time to renew the challenge. As the Imperials are still on the loose and increasing their lead, eventually, the Rebels should agree to fight just to get on with the chase.
The Rebels Try to Talk
If they attempt a parley, the tribe's shaman, Yustavan, steps forward. Read:
A stillness falls over the tribe as one of the aliens steps forward. His crystal flesh is dulled and cracked. All the creatures bow their head slightly as he speaks. "If you are strong-er than him," he says, pointing to the first alien that challenged you, "you are wor-thy of life. If you do not prove this, you are not wor-thy!"
The Rebels Ask Questions about the Fight
Yustavan will answer questions in his deep and sonorous voice. Here is the information the shaman can offer about the conditions of the fight:
The fight is between two warriors. They hold between them a bastaska (see below). The two warriors fight until one of the warriors releases the bastaska. At that point, the fight is over. The loser then gives up his "life." (Remember that the Gutretees translate "life" as "history.") The tribes are then free to conduct business or ignore each other until they meet again.
The Fight For Life
When one of the Rebels finally steps forward to fight, read:
The warrior who first spoke to you begins to meld with the very ground beneath him. His body disappears into the crystalline cliff face and you can see a shadow moving through the wall down to its base. There the warrior re-emerges from the crystal canyon wall and walks toward you.
He extends his arm and touches the base of his spear against the ground. The spear slowly melts into the ground. The tribesman then pounds on his chest, and declares, "For the great-er life of the tribe!" He reaches his hand into the ground, grabs the end of the spear and drags it up. It is now no longer a spear, but a kind of crystal rope about three meters in length.
Iponta offers one end of the rope to the Rebel chosen to fight him and says:
"The first to let go of bas-tas-ka, gives up life!"
The fight is conducted as per the hand-to-hand combat rules on page 49 of the Star Wars rules book with one change. Any time either of the combatants is stunned or wounded, he must make Easy stamina rolls to retain his grip on the bastaska. If he lets go, the fight is over.
The fight can end one of two ways. One of the fighters can let go of the bastaska, or one of them can be knocked out, which means, of course, he lets go of the bastaska.
After The Fight
After the fight, it is time to exchange histories. All of the Gutretees come down from the cliffs to surround the Rebels. The following descriptions can be read even if one of the fighters has been knocked out, for the visions will work through the unconscious as well as the conscious.
If the Rebel won the fight with Iponta, read the following:
The warrior kneels down before you. The old Gutretees steps forward and says, "Now, new-com-er. Put your hand on de-feat-ed one and take life."
If the Rebel refuses to do this, all the warriors raise their spears. If he still refuses, the spears will be thrown and another big fight starts up. (It is a grave insult to not want to take a tribe's life; you are saying that their history is not important enough to record.)
The Rebels again have no real choice except to go along with the aliens. Remind the players of their characters' mission, and the valuable time they are losing by all of this.
Once the Rebel touches the kneeling Gutretees, read:
A tingling sensation rushes through your body, and your mind is suddenly filled with a flood of images. You realize you are seeing the alien warrior's life, through his own eyes: finding mineral deposits in the ground for food, hunting frightening beasts also made of crystal, riding crystal waves across the surface of Isis at fast speeds.
You also see the kind of duel you just engaged in. The alien apparently engaged in several of these, and in each of the fights that the warrior won, many more images were added to the warrior's memories — images of the defeated warriors' lives. Suddenly, you realize that none of these fights ended in death — the loser gave up copies of his memories, not his life.
Near the end of this incredible sequence of images, you see the Imperial scout ship racing down the canyon trailing smoke, then crash-landing at the bottom of the canyon. Apparently, the warrior was watching from the top of the cliff. You see the Imperial survey team leaving their ship and heading away down the canyon aboard a skiff of some kind, moving too quickly for the tribe to intercept and challenge. Then you see your own ship make a crash-landing at the base of the canyon as it is buried beneath the crystal avalanche.
The detail about riding waves on the surface of the world is a clue that the aliens can help the characters reach the city of Neskroff quickly. If the players don't pick up on this information right away, don't worry, it will become clear very soon.
If the Rebel lost the fight, the warrior steps up to him and places his hand on the Rebel's shoulder. Read:
A tingling sensation rushes from the warrior's hand and through your body. Suddenly all the images you have ever seen in your life, even those you have forgotten, rush before your eyes at an incredible rate. You sense that the alien is somehow making a copy of everything you have ever seen and taking that copy into himself.
When the exchange of memories is completed, no matter who won, a great cheer goes up from the Gutretees. Now the business of making friends can proceed.
New Friends
After exchanging memories, Yustavan walks over to the fighters and uses his Force powers to perform accelerate another's healing on either fighter if they were hurt. Once both fighters are healed, Iponta embraces the Rebel he just fought and says, "It is good to share lives, eh?" The warriors come over to the other Rebels and slap them on the back and so forth — general greetings all around.
If the Rebel won the fight with Iponta and viewed Iponta's memories, he will most likely ask about the Imperials. The warrior's response:
"The wave of the oth-ers who fell from sky is near-by. Shall we go there?"
Since the Rebel who viewed Iponta's memory saw the Imperials leave their ship, there is no reason to go there. If the Rebels decide to head directly toward Neskroff, go to "The Crystal Miracle," below, then skip the rest of this episode and go to Episode Three.
If the Rebel lost the fight with Iponta and did not see Iponta's memory of the Imperials, they will probably ask about their enemies anyway. Iponta will tell them that their enemies' "wave" is nearby and offer to take them there. If questioned properly, Iponta will also tell them that the Imperials have left the ship already, apparently heading toward Neskroff.
In any case, Iponta will cheerfully use the crystal miracle to take the Rebels anywhere they want to go — to the Imperials' ship, or to Neskroff.
The Crystal Miracle
Once the Rebels are ready to go, the Gutretees line up in five rows and face down the canyon. The shaman gestures for the Rebels to line up behind them, then steps to the back of the entire group. Read:
The crystals beneath you start trembling, then rise up quickly, lifting you high into the air. You see that the ground has turned into a series of sparkling crystal waves, rolling down the length of the canyon. You and the Gutretees are riding these waves as the shaman chants behind you.
The shaman is drawing on his ability to commune with the crystals of Isis. THIS IS NOT A FORCE SKILL, but an ability native to the world and its shaman.
The movement is like surfing, except there's no surfboard. The aliens are used to traveling about like this and have sure footing as the crystal waves rolls beneath them. The Rebels, however, are new to the process and might have some trouble.
Have the Rebels make Easy Dexterity rolls. Anyone who fails the roll loses his balance and falls. He doesn't fall off the crystal wave, he simply lands on his bottom and finishes the ride sitting down. A few of the Gutretees turn around, see what happened, and laugh good-naturedly.
The Wanderer
Even if they know that the Imperials are gone, the Rebels may want to search the ship for clues anyway. The Gutretees will gladly perform the crystal miracle to take them to the ship.
If the party is heading for the downed Imperial ship, they see the Wanderer after only a few minutes of traveling. It is lying on the floor of the canyon. Read:
Smoke still rises from the ship. It is resting at an angle on some boulders, as if it had a rough landing. You see no signs of life.
Because the alien tribe is now friendly to the characters, they will do as the Rebels ask, within reason — act as guards, enter the ship, whatever. Remember that they know most off-worlders use energy weapons and therefore the Gutretees are not afraid of being harmed. However, they will not understand the technology within the ship. All they can do is wander around and look for obvious signs of danger.
There's a map of the Wanderer on the following page. If the players tell you that their characters are entering the ship, describe to them what they see according to the following map key:
- Bridge: When the Rebels enter the bridge, read:
Many of the instruments on the bridge are shattered, and most of the metal has been scorched from internal systems short circuits. You see a figure seated at the control panel, his back to you ...
The man is dead. His name-tag reads Brektate. His pockets have been emptied.
The Rebels may examine the ship's control systems. If they do, one Rebel immediately notices that the ship's black box is missing. Judging from the space left where the box used to be, Wanderer's black box is a cube about a third of a meter on each side.
Explain to the players that the black box is a navigation aid common in exploratory ships. These ships often make "blind" jumps — that is, without knowing exactly where they will end up, and getting lost is a common experience. The ship's black box logs each jump. This way, if the ship does get lost, the data from the box can be re-inputted into the nav computer and the ship's path retraced.
This is a catastrophe. Though it is unlikely that any of the Imperial personnel will remember Isis' exact coordinates — they make dozens of jumps during a voyage — the ship's black box will have it recorded precisely.
If the Rebels try to access the ship's log, they discover that it was scrambled before the crew left the ship. A computer repair roll is required to retrieve the fragments of information left in the system.
An Easy roll gets the following:
... city nearby ... are dead ... abandoning ship ... X-wings ... perhaps one of the Rebel colonies we've heard ... steal a ship ...
A Moderate or better roll gets the text above and the following:
Lerenga picked up a spike of life through the crystal's static. Thinks it might be a city of some kind. If that's true then this is perhaps one of the Rebel colonies we've heard rumor of. We're abandoning the Wanderer and will attempt to get to the city and steal a ship.
No more information can be retrieved from the log.
- Captain's Quarters: Tonth's room is sparse, as would be expected on a long-range exploration vessel like the Wanderer. She has a bed, a table which she also uses as a desk, a bureau, and a private bathroom. On the table is a data pad. The name Captain Tonth is printed on the right side. If any of the Rebels turn it on and access a file, they read:
... too blasted slow. Must find something to facilitate promotion so I can get out of ISC. There are rumors of a Rebel colony in this sector. If only I could find it...
The next entry they find is:
Have spent an extra week in this sector against orders. Where are the Rebels?
And last:
The one thing I can be thankful for on this assignment is a loyal crew. They'd probably follow me into the heart of the Rebel fleet.
Other entries can be accessed, but all of them simply contain more bile spilled about either the Rebellion or Tonth's desperation to get promoted out of the ISC.
- Pilot's Quarters: This room is similar to the captain's quarters, but the name tag found on the footlocker is "Bektate, pilot."
Nothing of use here.
-
Entrance Bay: This area is empty and unremarkable, save for an open cabinet on the far wall. The cabinet is a rack of some kind, but its contents are missing. A Moderate Perception roll suggests that this was the ship's armory. All of the weapons are now missing.
-
Cargo Hold: The hold is stacked with small plastiflex crates containing various soil, flora and fauna samples gathered from newly-charted worlds.
-
Lounge/Galley: This area is in a shambles. Food containers are sprawled everywhere, their contents spilled across the floor.
-
Skiff Hangar: By investigating the starboard side of the ship, or finding the door to the hangar on the inside, the Rebels find that the door to the ship's repulsorlift skiff hangar is open and the skiff is gone.
-
Repair Bay: This area is used for maintenance of the ship and the repulsorlift skiff. Some of the tools are missing from their obvious resting places.
-
Gun Well: This cylindrical passageway joins the top and belly turbolaser batteries for easy access. There is nothing unusual here.
10, 11, 12, 14. Crew and Engineer's Quarters: Each of these cabins was the living quarters of a single crewman. Each room contains a bed and footlocker. On each of the lockers there is a name. The names are Meahonon, Talke and Lerenga. The name on the engineer's locker is Higgs. The foot lockers contain boots and spare uniforms for ISC scouts and a few miscellaneous personal effects.
- Engine Room: The engine room took a critical hit at some point in the battle. The entire chamber is scorched and part of the hyperdrive engine is a mass of metal fused together. The body of the ship's engineer is lying on the deck. The corpse is badly burned. The engineer's ID card has been partially melted, but the name printed on it can be deciphered as Esteren Higgs.
Gamemaster Diagram: ISV Wanderer
Map Key
- Bridge
- Captain's Quarters
- Pilot's Quarters
- Entrance Bay
- Cargo Hold
- Lounge/Galley
- Skiff Hangar
- Repair Bay
- Gun Well
- Crewman's Quarters
- Crewman's Quarters
- Crewman's Quarters
- Engine Room
- Engineer's Quarters
Imperial Survey Vessel Wanderer
Craft: Loronar Far*Reach IV PQR
Type: Imperial Survey Vessel
Length: 80 meters
Scale: Starfighter
Crew: Six
Cargo Capacity: 150 metric tons
Consumables: 6 months
Hyperdrive Multiplier: x4
Nav Computer: Yes
Hyperdrive Backup: No
Sublight Speed: 3D
Maneuverability: 2D
Hull: 3D
Weapons: Four laser cannons (fire separately); fire control 2D; damage 4D
Shields: 1D
New Directions
Night is falling as the Rebels finish exploring the Wanderer. Now they've got to figure out what to do next. After checking out the ship, they know some or all of the following: the Imperials are traveling on their ship's repulsorlift skiff, and they have the ship's black box, containing the hyperspace coordinates for Isis, with them. If they read the ship's log, the Rebels may also know that the Imperials are heading toward a nearby city.
If the Rebels didn't get the information from the log, then they might ask Iponta where the Imperials have gone. He will tell them there is a Rebel city nearby, called Neskroff, that "has a place where the Reb-els ride to the sky." When he last saw the Imperials, they were heading in that direction.
Once he finds out that they wish to get to Neskroff, the shaman will use the crystal miracle to carry them there. As for the tribe, they must be on their way. They slap everybody on the back and then step aside as the shaman commands the Rebels to stand in a row. He then starts chanting, the ground swells up beneath them, and the Rebels are on their way.
As the Rebels are riding along the crystal waves, read the following Cut-Away. Then it is time for the next episode.
Sidebar: Cut-Away to an Entrance of Neskroff
EXTERIOR: BASE OF THE CRYSTAL MESA — NIGHT.
A Rebel guard makes his rounds around the base of a glowing mesa. A large shadow moves toward the guard and in an instant the guard is gasping for air as a muscular arm chokes the life from him.
Three more humans in Imperial uniforms join the large man, and all of them walk up to a metal grating built into a crystal wall.
The Imperials pull out tools and begin taking the grating off.
Dissolve to ...
EXTERIOR: OUTSIDE THE MAIN GATE.
A crystal wave gradually sinks back into the ground as the Rebels come to rest before the crystal mesa of Neskroff.
Episode Three: The Chase
Summary
The Rebels arrive at Neskroff and explain the situation to the city officials. The Rebels then join in the search for the Imperials, which leads them to the city's starport. Once there, the Rebels see the Imperials boarding the Handree, the Corellian gunship carrying the medical supplies that Polmanar so desperately needs in its war against the Empire. Since the ship can't be shot down without destroying the supplies, the Rebels board the ship to stop the Imperials.
Unfortunately, they don't make it in time. The Rebels find themselves trapped on board the gunship as it zips through hyperspace, bound for an Imperial naval base!
City on Alert
As the Rebels approach the city of Neskroff, they see that it is built into a huge crystal mesa. Corridors and rooms have been dug out of the semi-clear stone; artificial light from the city makes the plateau glow from within. Nearing the main gate, they see a Corellian gunship approach the top of the mesa and disappear from sight, entering the starport at the top of the city.
When the Rebels arrive at the city, read:
Before you is a large gateway built into the base of the crystal mesa. It serves as a skiff port and as the main entrance into the city of Neskroff. There are a half-dozen Rebel guards standing by the gateway; they level their blaster rifles at you as you approach. Two dozen civilians are also by the gate. They stop talking and stare at all the excitement.
Rebel Guards
DEXTERITY 2D
KNOWLEDGE 2D
MECHANICAL 2D
PERCEPTION 2D
STRENGTH 2D
TECHNICAL 2D
Equipment: Blaster rifles (damage code 5D)
Getting in to the city is simple: the Rebels are expected, and they have the proper ID to show to the guards. All they have to do is tell the guards about the Imperials and the city will be quickly put on alert.
When told of the Imperials, the lead guard at the post, Corporal Tessus, uses a com-box by the gate to alert the authorities. Because the crystal structure of the mesa interferes with comlink transmissions, the city uses com-boxes for internal communication. Com-boxes have fiber-optic cables connecting the units through a computerized switching system — like a telephone. The Rebels' com-units too are ineffective in the city.
Corporal Tessus hangs up the receiver and turns to you. "The city is now on alert. We've ordered a curfew and we'll have all our officers start checking IDs. There are a lot of people here, though: could take a while.
"In the meantime, we've shut down the starport — no more ships are going to be leaving until the Imps are caught. Since you're the only folks who know what the Imperials look like, we'd like you to go up there and keep an eye out in person, if you have no objections."
To the Starport
The Neskroff authorities have shut down all turbolifts at the level immediately below the starport. Only one turbolift bank is still in operation. Corporal Tessus leads the Rebels to the working lift bank. Read:
You are now walking down the crystal boulevard of Ralmathen Corridor on your way to the city's starport. The level is almost completely deserted, due, no doubt, to the curfew. There are a few guards in evidence, and some civilians being escorted to turbolifts. Suddenly, you hear blaster fire coming from down another corridor.
The Imperials have just killed two guards in front of a cargo turbolift. Lerenga is currently working the controls to get past the security lock.
If the characters rush for the sound of the blasters (and why wouldn't they?), show them the map of the corridor and continue reading:
You see two guards on the floor, dead or unconscious. Beyond the bodies, the door to a cargo lift elevator is opening; stepping into the lift is a large, brawny man, a small woman with short black hair, and a tall woman with red hair tied in a braid.
They whirl around and raise their blasters toward you, covering a handsome young man who is hastily manipulating the turbolift's controls. All four wear civilian clothes. The small woman's eyes meets yours and she smiles.
Gamemaster Map: Turbo Lift
- Rebels are here when they hear blaster fire.
- Com-box
- Detail of Turbo Lift B
- Imperials
- Dead Rebel Guards
The Imperials gain medium cover (+2 to the Rebels' difficulty to hit) from the walls of the turbolift; the Rebels are 50 meters away. There will be only one round of combat. After that, Lerenga leaps into the lift and the doors close.
Two Options
The Rebels have two options. They can call on Base Security to capture the Imperials, or they can go after their enemies themselves. Their choice here will dramatically effect the ease or difficulty of later parts of this episode, as described below.
Call For Help
The Rebels can grab one of the com-boxes lining the hall and call Central Security. Upon being appraised of the situation, CS sends guards to the turbolift exits on this and the starport level and orders the lift's controls overridden and the lift returned to the Rebels' level. If the order had been carried out in time, the enemy would have been captured by overwhelming numbers.
Unfortunately, the ploy fails. The turbolift comes back empty — almost (see below). The Imperials have gained a few precious steps on the Rebels, forcing the Rebels to take desperate chances to catch up with them later.
Go to "What the Imperials Do," below, and continue running from there.
Go After the Imperials Immediately
If the Rebels immediately pursue the Imperials in person, grabbing another lift down a parallel hall and heading up to the starport, leaving the guards to call in a report, upon reaching the top, they find out that the lift was empty when the guards reached it. Though they have lost sight of their opponents temporarily, they are still hot on their trail.
Skip the next sections and go directly to "Timely Arrival."
What the Imperials Do
Correctly expecting that there will be security guards waiting for them at the top of the lift, the Imperials leave the turbolift before it reaches the starport level. About half-way through the ride, they pull the emergency stop button and slip out of the lift through a hatch in its ceiling. Climbing the access ladder built into the walls of the turbolift shaft, they slip into one of the utility tubes that wind their way through the city. Using the complicated underground tunnel network, they eventually make their way to the starport unseen.
They also leave a little surprise for the Rebels in the turbolift — a detonite surprise.
The detonite is timed to explode two minutes after the Imperials' departure. The bomb is the size of a grenade and set against the base of the car. Anyone looking inside the car gets an Easy Perception roll to notice the explosive.
Deactivating the bomb requires a Moderate demolitions roll. If the character fails the roll or two minutes pass, the detonite explodes, doing 7D damage to anyone within five meters of the lift.
Into the Tunnels
If the Rebels figure out what has happened and investigate the turbolift shaft, they will find the grate pried off of a power cable tube on the shaft's wall. The tube is more than wide enough for someone to crawl through. Once inside, they can easily follow a trail of dust through a myriad of tubes and up and down ladders, eventually leading to an open ventilation grate in a storage area on the starport level.
The Starport
By this time, the starport is completely sealed and cleared of normal traffic. When the Rebels have a chance to look around, read:
The starport is a huge bowl-shaped opening dug out of the Neskroff mesa. The walls and the floor of the starport are made of the same crystal as the rest of the city. Numerous armed guards patrol the starport, watching carefully for the Imperials. However, there are even more places to hide than there are guards: huge pieces of machinery, docked starships, storage areas, and lots of piles of crates.
Above you looms the huge shadow of the Corellian gunship Handree, the original object of your mission which has since gone astray. It hovers above the starport, attached to the planet's surface only by the glowing beams of several repulsorlifts. A maintenance crew has just finished loading cargo into the ship's forward hold, and they are descending via repulsorlift beam.
The docking area is very, very, large. There are 30 landing areas for large ships, plus a landing field for X-wings and Y-wings. Although most of the fighters are currently circling the planet looking for other Imperial ships, almost every large bay is occupied. There are also hundreds of crates and other cargo spread out seemingly at random. The best the Rebels can do is wander around and look for anything suspicious.
Unfortunately, the Imperial scouts have already made their way through the tunnels, knocked out the guards, and stepped into the repulsor beam which carries them up and aboard the Handree. No matter how hard the Rebels look, they won't find them in the spaceport — unless they specifically look in the Handree, hovering above.
Because the Rebels know that the Handree is an important ship, they very well might want to go to it immediately. If this is the case, the repulsor beams begin retracting as they approach. Skip down to the next read-aloud.
The Handree's Departure
As the characters wander around the starport, have them make periodic Difficult search or Perception rolls while they look for the enemy. Now, it doesn't matter how long it takes someone to get the roll, but the players don't know that. As long as they are rolling and failing, it will make them think they are missing something crucial. All you're doing here is raising the tension and making the players paranoid.
When someone finally succeeds at the roll, read:
You notice that the repulsorlift beams connecting to the massive Corellian gunship are retracting, and its engines are firing up. An alert team of soldiers trains their tri-mounted blaster cannon on the ship, but before they fire, a technician pushes the cannon's barrel aside, yelling, "No! The medical supplies for Polmanar are already aboard!"
With the Handree's repulsorlifts retracted, there is no practical way of stopping the Imperials. Blasting the ship will do no good, nor will ordering a flight of X-wings to shoot it down — it can't be destroyed without destroying the cargo needed on Polmanar. The spaceport controller informs the Rebels that only a skeleton crew is aboard Handree, perhaps three crewmen; the rest are on leave in the city.
The players are likely to get creative here, but time is short, and unless they can come up with something real quick, the spaceport controller suggests that they take repulsorlift vehicles and fly up to the ship and gain control of it before it leaves the atmosphere.
Have the players make starship repair rolls. A Moderate success tells a character that it will be extremely difficult to dock with the gunship without the Handree's cooperation. Most exterior accesses can be magnetically and mechanically sealed from inside, and the Handree's hull cannot be breached with puny hand weapons.
However, if the PCs have the nerve, an entry can be made through the Handree's engine assembly, where a deep access crawlway leads to deck three of the Handree. This entails flying the repulsorcraft directly into the Handree's engines, not something to be undertaken lightly. But this is the only entryway on the ship which is designed to be accessible during flight — though it is usually employed only in emergencies, when an engineer must go outship to make crucial repairs.
Although dangerous, there are no other ways onto the ship without an assault shuttle. And the attempt must be made immediately, before the ship leaves the planet's atmosphere, or the repulsorcraft won't be able to reach their target.
Too Hot to Handle
Quickly scanning the starport, the Rebels find that the only repulsorcraft available with flight ceilings capable of reaching the Handree are three speeder bikes. Some of the characters may have to pair up on the bikes.
The Handree makes a very slow ascent from the surface of the planet. The characters have eight rounds before the gunship begins to leave the atmosphere. It takes one round to fly up to the ship, two rounds to navigate through the engine assembly and find the access crawlway, and another round to enter the ship itself. That gives the Rebels four rounds of leeway.
Flying up to the Handree requires an Easy repulsorlift operation roll. Once they reach the engine assembly, read the following aloud:
Your speeder bike whines as you nose it up toward the gunship's engine assembly. Before you are three massive cylindrical exhaust nacelles. A reddish glow emanates from deep within them; you feel their heat as the ship begins to power up. Between the giant nacelles and the outer engine casing are four small gaps leading to the engine's interior. They look large enough to accept one speeder bike at a time.
The Rebels don't want to fly directly into the exhaust nacelles, but rather into one of the four gaps. If someone insists upon flying into a nacelle, describe how the tremendous heat melts the nose of his speeder bike and blisters his hands and face. If he continues, well, nice knowing him.
When the Rebels enter the gaps leading to the engine assembly (and they might not all choose to enter the same one), they must make two repulsorlift operation rolls as they wind their way through the engine's narrow and cluttered innards. The first roll is Moderate difficulty, the next is Difficult. If a Rebel fails either roll, he becomes jammed in a very tight spot somewhere and must carefully extricate himself. He and everyone behind him in the same gap loses a round.
After two rounds, the Rebels reach the entrance to the deep engine access crawlway. Up till now, they haven't suffered any ill effects from the heat and static electricity generated by the revving engines. However, when they get off the bikes to open the accessway hatch, read the following:
As you dismount from your speeders, you feel an intense wave of heat as the engines crank up to a higher level of power — the ship must be just about to leave the atmosphere.
At the same time, a blue nimbus of static electricity plays around your body as you move. The electricity snaps at you with stinging pops and cracks, each slightly more painful than the last. If you don't get out of here soon, it will be interesting to see whether you die of oxygen deprivation, the heat, or electrocution first.
Down the hall, through the rippling waves of heat, you see a hatch marked "Access Crawlway D."
The heat has a damage code of 2D on the first round, and 3D on each successive round.
The static electricity lashes out at any exposed metallic objects carried by the Rebels. For each object of blaster-size or larger carried, roll 1D of damage. If a character is a Droid or wears a full suit of metal armor, roll 4D damage per round.
To open the hatch, a character must turn a series of dial-like latches. Doing so requires a Moderate Dexterity roll. Anyone wearing thick gloves or gauntlets must subtract 2D from their Dex when making the roll. However, anyone not wearing thick gloves takes 2D of damage from the heat of the metallic latches.
Go to "Into the Ship," next page.
Timely Arrival
This scene occurs only if the characters went directly up the parallel lift after the Imperials. If so, they were able to keep up with the Imperials and they arrive at the starport just behind their foes. When they reach a corridor leading to the other lift, they find a number of guards keeping a good distance away from it. A guard explains that it arrived empty and someone spotted a detonite bomb on the floor.
As if to punctuate the guard's comments, the detonite explodes, shaking the entire floor.
When the dust has settled and they have a chance to look around the starport, read:
The Neskroff starport is a huge bowl-shaped opening dug out of the Neskroff Mesa. The walls and the floor of the starport are made of the same crystal as the rest of the city. Above you looms the huge shadow of the Corellian gunship Handree, the original object of your mission which has since gone astray. It hovers noiselessly above the starport, attached to the planet's surface only by the glowing beams of several repulsorlifts. A maintenance crew has just finished loading cargo into the ship's forward hold, and they are descending via repulsor beam. Another team of four is heading up to the ship on a different beam.
The "other team" heading up to the Handree are the Imperial scouts. A Difficult Perception roll makes the Rebels aware of this. As they watch, the Imperials enter the ship. If they hurry, the Rebels have time to hop onto one of the repulsor beams before the Imperials can shut them down.
If the Rebel PCs fail to recognize the Imperials or they dither before jumping into a beam, the Imperials shut them down and they are too late. Go to "The Handree's Departure," above. Otherwise, read the following:
The beam creates a solid "floor" of energy beneath you and you are carried aloft toward the underside of the Handree. The Imperials have already entered the ship, but you won't be far behind them. Below you, Rebel technicians and soldiers scramble every which way, pointing up toward you and gesturing wildly.
The reason for all the excitement is that the Imperials have reached the controls and begun to retract the repulsorlift beams. The Rebel PCs can't tell that this is the case without making Moderate Perception rolls to figure out what the techs are shouting about.
If they do, they can try to "swim" up the repulsor beam to reach the Handree before the beam is fully retracted. A Moderate Dexterity roll is required to reach the Handree's entry hatch safely. If the Rebels do not catch on to what the ground crews are trying to tell them, or they fail to "swim" up the repulsor beam, the beam will completely dissolve while they are still two meters from safety; they must make Difficult Dexterity rolls to lurch up and grab hold of the Handree's entry hatch.
Those failing the roll still have one chance: they can grab hold of the legs of someone who successfully reached the hatch. This requires a Moderate Dexterity roll by the grabber, and then a Moderate Strength roll from the character whose legs he grabs. If some or all characters fail completely, they plummet to their deaths.
Frantic expenditures of Force points are advised at this point.
Into the Ship
If the Rebels entered the ship via the repulsor beams, read the following aloud:
The ship lurches as the maneuvering thrusters kick in. The entrance hatch automatically shuts as a warning claxon sounds. You're in a four-by-five-meter entrance bay. Two guards lie dead on the floor, their necks broken.
If the Rebels entered the ship via the engine crawlway, read this:
The rumble of the engines rises to a deafening crescendo and the ship lurches as the maneuvering thrusters kick in. You are in a cramped service crawlway lined with heat-resistant plating which must even now be protecting you from the tremendous blast of the engines.
In either case, the Rebels are trapped on board the Handree with the Imperials at the helm. They have no idea where they are going — only that the Imperial have the coordinates of Isis and have stolen a ship containing cargo that Polmanar desperately needs.
Go to Episode Four.
Episode Four: Desperate Delays
Summary
In this episode, the Imperials set the Handree on a course through hyperspace to the Bespin system. The Imperial Navy has recently set up a base on Miser, the Bespin system's first planet from the sun. The Imperial scouts know that all they have to do is survive the hyperspace journey and they will be rescued by the Imperial Navy on the other end.
With this in mind, they set up a series of traps and ambushes to delay the Rebels. Some employ complicated locks on doors, others are more deadly. The most potent, though, is a threat against the medical supplies in the Handree's cargo bay. The Imperials secure a safe hiding place for the hyperspace journey while the Rebels fight to save the precious supplies.
Warm Reception
If the Rebels entered the Handree via the engine assembly, they'll have to make their way through the access crawlway to deck three. This takes approximately ten minutes. Once they do this, go directly to "The Jump into Hyperspace," below.
Locked In
If the Rebels entered via the repulsorlift, they now find themselves in a small entrance bay. There is one blast door leading from the bay. When the Rebels attempt to open the door, tell the players that it is locked, and that this type of lock requires an Easy security roll to bypass. The attempt takes one minute — if it is failed it can be tried again and again, with each attempt taking up an additional minute of game time.
When someone makes the roll, look up with surprise, and say, "Someone must have tampered with the lock. The door isn't opening."
The lock has been tampered with to keep the Rebels busy while the Imperials set up shop in the ship. They know the Rebels will get through, but they're hoping it will take them a while to do it.
Sidebar: A Note on Timekeeping
This episode relies heavily on keeping track of the passage of time. The Imperials are seeking to delay the Rebels until the ship reaches its destination; the time the Rebels take to deal with the various tricks and traps set up by their foes is of critical importance.
Remember to carefully record the time each encounter or major action takes. The trip through hyperspace takes exactly twelve hours.
The Imperial Lock
Each of the rolls below take three minutes of game time. Up to three Rebels can combine actions for any single roll.
If Lerenga died or was captured in the corridor fight by the turbolift, someone less skilled set up the lock and the difficulty number for all the rolls below are Easy. If Lerenga survived, all the difficulty numbers are Moderate.
Getting Information About the Lock
The first roll the Rebels will have to make is a Technical roll to determine what the Imperials did to the lock. When the Rebels succeed, read:
It seems they've wired in a new tumbler sequence. You know that the Imperials have been experimenting with a type of computerized locking system that can be manually affixed onto an existing lock. From what you remember from security briefings, it used something like a five-digit code combination using the digits 1 through 5, with each digit used only once.
Getting Correct Information About the Lock
The prototype the Rebels read about is not the most up-to-date version. The model that the scouts are using (which they salvaged from their ship) has six slots for the combination, with the digits 1 through 6 each used once. The Rebels can start taking guesses with the five-slot combination (as described below), or they can try to get more information about the locking device. The latter requires a computer programming roll. If they make this roll, read:
Well, looks like the briefing files were a little out of date. This piece of work uses six slots, with the digits 1 through 6 each used once.
Opening the Lock
The correct combination for the lock is: 2 5 6 1 4 3
The Rebels can start taking shots at the combination. Have the players write down the sequence of numbers and read them out to you. If they are trying a five-slot combination, it might look like this:
Example #1: 3 5 1 2 4
If they are trying a six-slot combination, it might look like this:
Example #2: 2 5 3 6 1 4
Each guess at the combination is free — no roll is required (though it still takes three minutes of game time to program in the guess). After you have their guess, you tell the players how many of the numbers in their sequence were in the right slot. If, for example, the players had tried the combination given in Example #2, above, you would tell them two of the numbers were in the correct slots (the first two: 2 and 5).
After each guess, the Rebels can also make security rolls (Moderate if Lerenga worked the lock, Easy if he didn't). If they succeed, you tell them which numbers were in the right slots. For example, if they had given you the combination from Example #2 and made their security roll, you would tell them that the two numbers in the right slot were the first two: 2 and 5.
If your players don't think of it themselves, suggest that they write down the information you give them. This will greatly help them figure out the puzzle as they go on.
The Rebels might be trying fewer or more than six-digit combinations (they may not have made the computer programming roll mentioned above and are guessing at how many slots are in the combination). In this case, read the slots from left to right and give the information accordingly. For example, if the Rebels gave you the combination from Example #1, you would tell them that two of the numbers are in the right slot. If they made their security roll, you would tell them that numbers 5 and 4 are in the correct slots.
Of course, as long as they are trying a five-digit combination, they will fail, no matter how many different combinations they attempt. Eventually they will realize their mistake and try the computer programming roll. If they don't remember about this roll, remind them once they begin to get frustrated.
Remember to keep track of how much time the Rebels use to get out of the chamber, because it will affect what they find when they get to the Handree's bridge.
Gamemaster Diagram: The Gunship Handree
Dorsal Gunnery Decks
Deck 1
Deck 2
Deck 3: Turbolaser Turret 10, Power Core, Turbolaser Turret 5, Sublight Systems Control, Turbolaser Power Generator, Weapon Systems Control, Hyperdrive Systems Control, Accessways to Bridge, Sickbay, Science & Medical Labs, Sensor & Communications Control, Emergency Repair Facility, Shields & Screen Systems Control, Environmental Control, Power Distribution Control
Deck 4: Speeder/Skiff Hangar & Repair Shops, Droid Storage & Maintenance, Main Escape Pods, Cargo Airlock, Forward Hold, Security Hold/Brig, Equipment Storage, General Maintenance, Auxiliary Systems, Engineering Maintenance, Power Core
Deck 5: Ventral Deep Engine Access Crawlways, Storage, Belly Hold, Speeder/Skiff Launch Bay, Cargo Airlocks, Power Core
Ventral Gunnery Decks
Side View
Corellian Gunship Exterior Views
The Jump Into Hyperspace
Ten minutes after the Handree lifts off from Neskroff, it jumps into hyperspace. There is no chance that the Rebels will be out of the entrance bay or the access crawlway by then. Read:
You're all thrown suddenly to the floor and against the rear wall as the ship lurches forward.
Because the Rebels can't see outside the ship (there are no viewpoints in the entrance bay or the crawlway), they don't see the light of the stars streaming by as the ship enters hyperspace. Although some of them will undoubtedly guess that they just went into hyperspace, they won't know for sure until later. If the Rebels are in the crawlway, they hear a distinct change in the engines' hum. A Moderate starship repair roll clues them in to what's going on.
When the Rebels get to one of the gunship's main decks, start describing the ship to them from the floorplans provided below.
Once free of the entrance bay or the crawlway, the Rebels will probably head for the bridge to try to gain control over the ship. Continue with the section below. If they have some other ideas, use the floorplans and the section titled "What the Imperials are Doing" to determine the results.
Breaking Through to the Bridge
When the Rebels get to the bridge, the door is locked. They must make an Easy security roll to open it.
It takes about three minutes to get from the entrance bay or the access crawlway to the bridge. If the Rebels took less than 18 minutes to reach the bridge (including all the time to get through the two locked doors or the access crawlway), go to "Meahonon's Last Stand." If they took longer, go to "Too Late."
Meahonon's Last Stand
Read the following aloud:
Before you is the bridge of the Handree. The stars out the viewport are solid streaks of light — you are racing through hyperspace. You see the red-haired Imperial scout crouched by the nav computer, a clump of wires in her hands. She has seen you, but is ignoring you, continuing her work.
Meahonon is putting the last touches on the destruction of the Handree's nav computer. The ship is now set on a 12-hour journey to the Bespin system — and the Imperial Navy's temporary base on Miser, the system's innermost planet.
The Rebels can try to stop her, but even if they gun her down in the first round, she rips the wires out of the computer with her last breath. If they miss her in the first round or don't kill her outright, she rips the wires out, grabs her blaster and engages to take as many of the Rebels with her as possible. She fights to the death, buying more time for her fellow scouts.
Continue with "The Nav Computer and the Command Console," below.
Too Late
If the Rebels arrive at the bridge more than eighteen minutes from liftoff, Meahonon has had time to finish her work and rejoin Tonth and the other scouts. Read:
The door to the bridge slides open and you see streaks of light rushing past the viewport — you are in hyperspace now. The bridge is a shambles. The nav computer has wires ripped out of it and the command console is battered well beyond repair. As far as you can tell, the ship is locked on course through hyperspace and there's little to be done about it.
The Nav Computer and the Command Console
After dealing with (or missing) Meahonon, the Rebels might want to check the nav computer and the command console to see what was done to them and if they can be repaired.
The Nav Computer
At first sight, it is obvious that the nav computer has been trashed. It is irreparable without access to parts available only at Imperial-grade repair facilities. The parts could be manufactured in the Handree's machine shop, but it would take a team of skilled craftsmen probably well over a week to do so. There simply isn't time.
Further study of the ruins tells the Rebels that some hard thought was put into what was destroyed and what was left intact. The navigation system can no longer affect the hyperdrives — the only way of stopping the ship is to switch off the engine.
In space biz, this is known as a "Stop Dead," and all the Rebels should know that the Stop Dead maneuver takes its name from the fact that when it's tried, the ship and all passengers have a very high chance of becoming a cloud of fine powder floating through space.
The chance of destruction is, in fact, about 83 percent — which any character knows with an Easy starship piloting roll. If the Rebels try this anyway, have the character who pulls the plug roll one die. If he rolls 1-5, he, his companions, the Handree and all the medical supplies it carries are destroyed. Game over. If he rolls a 6, the Handree's engines blow but the ship safely returns to realspace, a powerless cripple awaiting rescue by whoever finds it first.
For obvious reasons, you should make a real effort to discourage your players from this option.
Although access to the nav computer has been rendered nearly impossible, the Rebels can, with much less effort, retrieve information about the ship's current hyperjump coordinates. (In other words, they can read the nav computer but they can't write to it.)
To access the hypercoordinates requires a Very Difficult computer repair roll. Use the rules for partial repair and time taken from the rules on pages 43 and 44 of the Star Wars rulebook, except that every attempt takes half an hour.
If the Rebels repair the computer so that it may be read, they find that the Handree's destination is the Bespin system and that the journey will take a total of twelve hours, less the time since the jump.
The Command Console
The command console has also been thoroughly destroyed. Only a single red light flashes on the entire panel. The light indicates that the cargo doors of the forward hold are open (see "The Forward Hold" for details). The Rebels should become more than curious about this, since they saw the Polmanar medical supplies loaded into the forward hold earlier. If the supplies are in jeopardy, they'd better check it out — and fast. The doors cannot be shut from the bridge.
The Rebels can attempt to repair the console with a Difficult starship repair roll. Again, use the partial repair rules listed in the Star Wars rules on pages 43 and 44; each attempt takes one hour. There is no limit to the number of repair attempts the characters can make (except, of course, the limit imposed by the time deadline). Until the console is repaired, the characters cannot access the ship's sub-light engines.
If anyone thinks of it, it is possible to reroute control of the engines, jury-rigging control through the Engineering section of the ship. This starship repair roll too is Difficult, but each attempt takes only 45 minutes instead of an hour. Do not tell the players about this possibility unless they come up with that or a similar idea on their own.
Once the console is repaired or control is rerouted through Engineering, the ship will be able to use its sub-light drives. The Handree will still not be able to make hyperspace jumps until the nav computer is repaired.
What the Imperials are Doing
At this point, in all likelihood, only Tonth and Talke are alive. If any other Imperials are still around, assume that they are traveling with Captain Tonth. Use them as cannon fodder to keep her alive until the end of the adventure.
After wrecking the bridge, the Imperials run off to the forward hold to plan their defensive strategy for the trip through hyperspace. Tonth is aware that there are Rebels on the ship, probably heavily-armed and outnumbering her forces substantially. However, time is on her side. She knows that all she has to do is survive until the ship reaches the Bespin system, where it will be quickly picked up by the Imperial Navy. She doesn't have to kill the Rebels — she just has to live through the next eleven and a half hours.
If the Rebels were dead, however, that would be a lot easier ...
Traps
As soon as the scouts get to the forward hold, Tonth orders Talke to plant several of his bombs on Deck Two of the ship. The massive Imperial begins working during the time he thinks the Rebels are still on the bridge. Those doors that have been trapped are marked on the floorplans.
The trap goes off if the door is opened. A Moderate Perception roll is required to spot the trap if the Rebels aren't searching for one (if this is the case you should make the roll in secret).
The roll is Easy if the Rebels are actively checking the door for traps.
Once spotted, an Easy demolitions roll is required to disarm the bombs. The bombs do damage as 4D grenades.
Talke will be done planting the bombs on Deck Two twenty minutes after the ship goes into hyperspace. If the Rebels are still on their way to or still on the bridge, Talke has finished setting the three traps and is on his way back to Deck Four to find his captain.
If the Rebels start exploring Deck Two before twenty minutes have elapsed, there is a chance they will run into Talke. Have each Rebel make a Moderate Perception roll every five minutes of game time until the twenty minutes are up. Don't tell the players what they are rolling for — keep them wondering what it is they are missing.
If someone makes the roll, check the map of the Handree and pick a spot within 20 meters of the Rebels for Talke to be. Read:
You hear soft footsteps coming from about twenty meters away. As you pause to listen, the footsteps stop.
Tell the players what direction the sound came from and let them decide what to do about it.
Talke wants to stay out of combat, if possible. If discovered, he will rush for cover and attempt to escape. Use the movement rules from Chapter Two of the Star Wars Rules Companion to determine if Talke reaches shelter before the Rebels spot him. If shot at, Talke pulls out his blaster and returns fire. He will fire off a bunch of shots to keep the Rebels' heads down and then try to retreat before they can corner him.
If captured, Talke gives no information other than that he is an Imperial scout and that he will kill them all as soon as he gets a chance.
If he gets away, Talke will try to circle around the Rebels on another deck and then return to Deck Two to finish planting his three bombs. Once he has done so; he will rejoin Captain Tonth in the forward hold.
Tonth's Distraction
While the Rebels are busy on Deck Two, Captain Tonth (and any other scouts that are still alive) are well away from the bridge, hiding out in the forward hold.
Initially picking the hold merely as an ideal spot to lay low for awhile, Tonth was quite pleased with the added bonus she found there: the medical supplies for Polmanar! Recognizing their value to the Rebellion, she quickly came up with a scheme to use the supplies to keep the player characters occupied for the entire length of the trip.
Last Doors and Locks
Tonth (or any other retreating character) can try Luke's trick from Star Wars: A New Hope — getting through a doorway, closing it, and then shooting its control panel to jam it shut. If a normal door is damaged in this manner, a Moderate Technical roll is required to fix the door. If a heavy blast door (as indicated on the floorplans) is so damaged, a Very Difficult Tech roll is required.
Use the partial repair rules in the Star Wars basic rules, except that the first three attempts take fifteen minutes of game time. The fourth repair attempt takes one day. This means that some doors may be ruined for the duration of the trip.
Blowing Doors Open
To blow a door open with explosives, a character must do 15 points of damage to it if it is a normal door, 20 if it is a blast door (see page 44 of the rules book).
A character can attempt to shoot a door open with a blaster or other hand weapon, but these weapons have die caps of three when used against doors in this manner. Since the damage is cumulative, the firer will get through the door eventually — unless his ammo runs out first.
The Forward Hold
The forward hold has three doors. One is a small interior door used to gain access to the cargo during flight. This door is found on Deck Three. The other two doors are exterior cargo doors set in the ship's hull. When in a planetary atmosphere, repulsorlift skiffs fly in and out of these doors to load and unload cargo. They normally cannot be opened in space.
To buy some more time to complete her trap, Tonth disconnects the controls to the interior door leading to Deck Three. When the Rebels try the door, it will not open. If they examine it, they find that its circuitry has been tampered with from the other side, jamming it shut. Since there is only one way in or out of the hold (as far as the Rebels know), whatever tampered with the door must still be inside. This should make them very cautious.
The Rebels can attempt Difficult Technical rolls to override the door's interior controls. Once again, use the partial repair rules; every override attempt takes 15 minutes.
By the time the Rebels open the door and get inside, the Imperials have finished setting their trap and have fled. Read:
The door opens. Before you is a ladder leading down to a large cargo bay. The hold is filled to the ceiling with crate after crate labelled "Medical Supplies." These are the supplies that Polmanar so desperately needs to keep fighting. You look the boxes over, making sure the scouts didn't harm them — when you realize they did something far worse.
The loading doors built into the external hull of the hold are wide open. A red light flashes, indicating a malfunction. The only thing keeping the crates (and you) from being sucked out of the cargo bay and into hyperspace are the emergency hyperspace seals. The white streaking stars of hyperspace are clearly visible through the plastisteel seals.
It is standard procedure for such seals to spring up automatically over large hatches in a vessel when the ship enters hyperspace. But once the ship comes out of hyperspace, the seals will automatically retract, exposing the hold to vacuum.
Even if they don't, the seals are not load-bearing: they merely provide a better carrier surface for the hyperfield. When exposed to the pressure differential of realspace vacuum, the seals will shatter like eggshells and anything in the hold will be sucked out and lost forever. If the Imperials have jammed the doors open ...
While the Rebels Wander Around
For about an hour after the jump into hyperspace, the Imperials are setting up a surprise for the Rebels in the forward hold. During that time, the Rebels are probably attempting to get some control over the bridge and perhaps skirmishing with Talke on the second level. Eventually, the Rebels will either begin searching the ship, or will head toward the forward hold to check out the light from the control panel. When they reach the forward hold they will have to deal with the problem that Tonth has set up (see "The Forward Hold," below).
If they wander around elsewhere in the ship, they won't come across much of any interest. Describe the vessel from the information on the map, adding color and details as necessary.
If they do nothing, the ship comes out of hyperspace in the Bespin system in 12 hours. The medical supplies in the forward hold are lost, and the ship is captured. Go to Episode Four.
Meanwhile, a quick examination of the hold discovers no Imperials, just a hole cut in a bulkhead leading to dead space within the ship's superstructure.
The wily Imperials have once again eluded the Rebels. Once she was finished tampering with the doors, Tonth used a beam cutter to breach the hold's wall, giving her access to the ship's superstructure. She (and any surviving comrades) made her way through coolant tubing, ventilation shafts and wiring of every conceivable kind, heading upward toward Computer Control on Deck One.
Though Tonth hasn't much of a lead on them, the Rebels may not be able to give immediate chase: they've got other problems to worry about at the moment. If they do give chase, go to "Superstructure." Otherwise, continue below.
The Cargo Door Controls
If the Rebels check the control panel of the cargo doors, they indeed discover that the Imperials have rendered them inoperable. Some serious repairs will have to be made to get the doors back in working order.
The Cargo
A spot-check of the cargo reveals there are about 300 crates. Each crate is on the average one by one by one meters and weighs about 400 kilograms. The crates contain pharmaceuticals, medpacs, operating room equipment, diagnostic equipment, bacta tanks, several disassembled medical Droids and lots and lots of bacta fluid.
The crates can be saved in one of two ways: removing them from the hold or fixing the door units.
Moving the Crates
The Rebels can move the crates out of the cargo bay and onto Deck Three and throughout the ship. The door to the hold which leads from Deck Three would then have to be sealed, protecting the rest of the ship from explosive decompression when it re-enters realspace. This is a time-consuming process, but it guarantees that the bulk of the crates will be saved. It also severely hampers the Rebels' efforts to hunt down the Imperials — just as Tonth planned.
Removing the crates is represented by a single combined lifting roll made by all Rebels participating. The roll is made once an hour of game time. The total equals the number of crates that are moved out of the bay in that hour.
Even with the assistance of Droids and repulsorsleds, the work is exhausting. After a character has worked six hours, he must pass a Very Easy stamina roll to continue working.
If the Rebel passes the roll, he may work for another hour, when he must make another stamina roll, this one Easy. The rolls get more difficult with each subsequent hour the character works, until he fails a roll or he rests. For each hour of full rest the character gets, reduce the difficulty of subsequent stamina rolls by one (to a minimum of Very Easy). If the character rests four hours in a row, he may work six more hours before he must make another stamina roll.
If the Rebel fails a roll, he must rest an hour. At the end of that time, he can attempt the lower stamina roll. Until he passes a roll or until four full hours of time go by, the character cannot move crates or do anything else strenuous — he's just too tired.
Fixing the Controls
If you examine the EAU Chip Diagram, you will see nine EAU chips (the large squares). The EAUs are the small black rectangles on the squares. The number of EAUs on the chips range from three to eleven.
Cut out the chips and set them aside.
Tonth has rendered the cargo bay doors inoperable by removing the EAU chips from the circuitry of the controls. She could have destroyed the controls outright, but she wanted to leave the Rebels enough of a chance to repair the doors that they would spend their time trying to save the medical supplies rather than chasing after her and her companions. It's a trick to buy time.
EAU Chips
Give any Rebel with a starship repair skill of 3D or higher who studies the doors' control panels the following information:
As any competent starship mechanic knows, an EAU chip is a large plastic square with several EAUs (Equalizing Amplitude Units) burned into it.
(Hold up one of the cut-out chips as an example.)
EAU chips are used to carry electromagnetic impulses from control panels to certain equipment. Different control panels use chips of different sizes and configurations. A control panel must be supplied with the correct chips, configured in the proper sequence, to operate at all. If not, the panel will short out violently, possibly doing serious damage to the equipment it controls.
The Imperials have removed the EAU chips from the door control panels. You must find replacement chips and put them in the proper sequence before the doors can be shut.
It looks to you as if the door's control panels require nine chips, set up in a three-by-three grid, with unique chip stress and six-path redundancy. Now, if you can only figure out the run of the sequence and the pathload, you can determine what chips you need.
What the scientific gobbledigook means is that the Rebels need to find the nine correct replacement chips. Each chip must have a different number of EAUs on it. The chips must be set up in a three-by-three grid, in the proper configuration.
However, any nine chips won't do. "Unique chip stress" means that each chip must have a different number of EAUs (the black rectangles on the chip) on it. "Run of the sequence" refers to the minimum and maximum numbers of EAUs on an individual chip. "Six-path redundancy" means that the total number of EAUs in each row and column of the square must be equal. "The pathload" is the number of EAUs in each row and column.
In short, to successfully repair the control panel, the Rebels must find nine replacement EAU chips, each with a different number of EAUs on it. When put into a three-by-three grid, each horizontal and vertical series must have the same EAU value (must have the same number of EAUs in it). This value must fit the value required for the cargo bay's door control panel.
See the sidebar for the solution.
Once they have digested this, the Rebels' first thought might be to go to the maintenance section of the ship and look for replacement EAU chips. No such luck. Tonth thought of it first, and while they were busy, she went down and melted all of the ship's limited supply of replacements. The Rebels are going to have to ransack the ship for chips that they can steal from other control panels.
Sidebar: The Solution
The EAU pathload for the control panel is 21, and the EAU chips must run in sequence from 3 to 11. Here is a correct configuration:
| 3 | 11 | 7 |
|---|---|---|
| 8 | 4 | 9 |
| 10 | 6 | 5 |
The numbers represent the number of EAUs on each chip. Notice that chips containing from three to 11 EAUs are used, and each row and column of chips has 21 EAUs in total. As 21 is the control panel's EAU value, the sequence is correct. There are any number of other correct solutions as well — any configuration in which all of the rows and columns have 21 EAUs in them is correct.
Making matters worse, Tonth has wiped the EAU maintenance and specification file from the memory of the ship's computer. The Rebels cannot look up the doors control panel's repair specifications in the computer; they will have to determine the panel's EAU value on their own. In addition, because of Tonth's tampering with the computer, there's no way to know which control panels aboard the ship contain the correct EAUs. The Rebels will have to manually disassemble control panels to find if they contain the proper replacements.
To Work
The job of repairing the panel has three parts.
Determine the EAU Pathload Value and the Sequence of Chips
The Rebels know that the total EAUs in each row and column must be equal, but they don't know what that total should be. In addition, they also need to find out the sequence of chips they must use in the grid.
To find this information, one Rebel needs to study the control panel and pass a Difficult Technical roll. Each try takes one half hour. The Tech roll can be made as a combined action and attempted over and over again.
When a Rebel eventually succeeds at the roll, tell him that the series value is 21 — that is, there must be 21 EAUs in each row and column in the square. With that same roll, the Rebel also learns that the individual chips in the control panel's board must run in sequence from 3 to 11 — that is, one of the chips must have three EAUs on it, one four EAUs, one five, and so on, with the ninth and final chip having 11 EAUs.
Collecting the Chips
Once they know the chips they need, the Rebels can begin collecting them. To do so, they must roam about the ship, open various non-essential control panels, and see whether they contain the necessary chips.
This process occurs in two steps:
Step One: Finding Control Panels Containing the Correct-Sized Chips
After an hour of game-time spent searching, the Rebels must make Technical rolls. The rolls can be made as combined rolls or individually. If the result is:
- Easy: The Rebel rolls three dice in Step Two.
- Moderate: The Rebel rolls his choice of one, two, or three dice in Step Two.
- Difficult: The Rebel does not roll at all in Step Two: he can pick the value he wants.
- Very Difficult: The Rebel does not roll at all. He can pick two values he wants.
Step Two: Determining the Value of the Control Panel's Chips
(Remember that the doors' control panel requires nine chips ranging in value from 3 to 11.)
In this step, the Rebels determine what chips the control panel they are checking contain. It might contain one or more needed chips, it might contain chips with higher or lower values than they can use, or it might contain chips they have already gotten and no longer need. To determine what chips they find in the control panel, the players roll a variable amount of dice (determined in Step One). The result is the EAU value of the chip they find.
If a player achieved just an Easy level of success in the Technical roll from Step One, he rolls three dice in this step.
For example, if he rolled a 5, 2, and 1, he would have found a chip with an EAU value of 8. Unless a Rebel had already found that chip, you would give the player the EAU chip prop with eight EAUs on it. If someone already had found that chip, the Rebel would get nothing. If the player had rolled a total of 14 instead of 8, the EAU value would be too high for the control panel; the chip would not be useful.
If the Rebel had rolled a Moderate success in his Technical roll in Step One, he can choose how many dice to roll in this step. Two dice would give him possible values of from 2 to 12. Anything but a 2 or a 12 would gain the Rebel a useful chip — unless, of course, the Rebels already had the chip.
If the Rebel chooses to roll one die, he has a better chance of getting the lower-valued chips, but gets nothing useful on a roll of 1 or 2.
If the Rebel had made a Difficult or Very Difficult Technical roll in Step 1, he picks the value of the chip he finds.
Arranging the Chips
Once all nine chips have been collected, they must be arranged so that every vertical and horizontal row has 21 EAUs in it.
This is a real-time task performed by the players. Time the players while they do it, and subtract this time from the 12 hours they spend in hyperspace.
Once the chips have been arranged properly, the Rebels can seal the door to cargo bay.
Gamemaster Prop: Computer Programming Puzzle
This section contains a visual puzzle designed for gamemasters to use as a computer programming challenge within their Star Wars campaigns. The puzzle consists of nine circuit board diagrams, each with various paths and obstacles that must be navigated.
Gamemaster Prop: Computer Programming Puzzle (Back)
This image contains a visual puzzle and cannot be transcribed into text as it consists of circuit board diagrams arranged in a grid pattern for use as a gamemaster prop.
Superstructure
One or more of the Rebels might wish to pursue the Imperials into the superstructure of the ship. The superstructure is a tangle of pipes, wires, ducts and vents. It is very noisy and foul-smelling. In addition, the superstructure area is not under the influence of the ship's artificial gravity. If the Rebels go up into the hull, use the side-view floorplan to keep track of their movement.
Unless the Rebels found the Imperials' escape hole and pursue right away, the scouts have climbed far out of sight and the Rebels must track them down. If the Rebels did pursue immediately, they quickly catch sight of their opponents working their way up to the top of the ship. Go to "Zero-G Fight."
If the Rebels did not catch sight of the Imperials, they can attempt to track them. A Difficult search roll allows a character to notice dusty marks on nearby pipes and wires, leading generally upward toward the top of the ship.
There are two forms of movement within the zero-G, cluttered environment of the superstructure: "crawling" and "jumping." A character can crawl at a rate of two meters per round, threading his way through narrow passages, around pipes, and so forth, making sure to maintain a grip on something at all times. This is slow, but sure.
A character could also choose to jump, launching himself in the direction he wishes to travel, dodging the many obstacles in his path. This is much quicker than crawling, but also much more dangerous. A character who succeeds at a Moderate jumping roll launches himself in the proper direction, travelling at five meters per round. If he fails the roll, he heads off in another direction altogether. He must stop himself and start again.
Once a character jumps, his speed remains constant without the need for further push-offs. However, each round, the character must fend off the many obstacles in his path. This requires a Moderate Dexterity roll. If successful, the character continues; if he fails the Dex roll, the character caroms off of the obstacle and heads off in a random direction and taking 2D damage from the collision to boot.
The Imperials remain in hiding within the ship's superstructure for about an hour. If the Rebels get to the top of the ship by then, go to "Zero-G Combat," below. Otherwise, the Rebels track them to a large ventilation duct system leading to every level of the ship, where the trail is lost.
Zero-G Fight
If the characters manage to catch up with their opponents in the superstructure, read:
You hear clamoring noises above you, and as you float upward you see several Imperials making their way further up toward the top deck of the ship. They have not spotted you.
The Rebels have the advantage here — they automatically gain surprise on their opponents. But a shootout in the superstructure of a starship is an extremely dangerous thing. If the Rebels open fire, they run the risk of blowing a hole in the wrong side of the hull and exposing themselves to the hard vacuum of space.
MAKE THIS CLEAR TO THEM.
If they still insist on using blasters, describe a ricocheting blaster bolt opening a minute gash in the outer hull, the temperature dropping rapidly, unbelievable winds suddenly whipping up and pulling them toward the newly-opened gash.
Several seconds later, after the players have had time to get real nervous, the ship's automatic environmental systems release leak-seeker balloons in the area of the leak. These float rapidly toward the gash, carried by the escaping winds.
When they hit the hole, they burst, plugging it with quick-drying sealant.
Remind the Rebels that leak-seekers are not effective against larger holes. As nobody in either party is wearing a space suit, another shot could be fatal to everybody.
The way to go here is hand-to-hand combat. In zero gravity, however, it's not quite that simple. For starters, all difficulty numbers are increased by two. In addition, no combined actions are possible, and all damage from melee or hand-to-hand blows is reduced by 1D.
Regardless of the outcome of the fight, Captain Tonth is nowhere to be found. Leaving her cohorts to delay the Rebels, she escapes through a nearby duct.
The Imperials and the Black Box
If the Imperial scouts are still alive at the end of the Handree's journey, they slip back into the ship and hide out as best they can, staying out of the Rebels' way until the Rebels are captured by the Imperial Navy in the next episode.
If, somehow, the Imperial scouts are all dead, don't worry. Tonth hid the black box (containing the Isis coordinates) on board the Handree. The box has a beacon which can only be picked up on secret Imperial frequencies. The crew of the Star Destroyer Desolator find the black box and the adventure continues.
If the Rebels corner Tonth, she will fight to the death. They will not find the box on her body; none of the other Imperial scouts know where she has hidden it. The Rebels can search the ship from stem to stern, but they will not find it.
Journey's End
After twelve hours of game time, the trip on the Handree ends. The Rebels might have moved the cargo out of the bay, they might have fixed the controls, they might have ignored the problem. The results of their actions are outlined in the next episode.
Go to Episode Five.
Episode Five: Captured!
Summary
This episode begins with the characters arriving in the Bespin system. With little chance to do anything about it, they are captured by the Desolator, an Imperial-class Star Destroyer, and are then shipped down to a newly-constructed Naval base on the planet Miser. They are scheduled for interrogation, but with the timely assistance of a Rebel secret agent, save themselves from a hideous fate.
Arrival
At the end of the twelfth hour of the journey through hyperspace, the Rebels feel a familiar lurch as the Handree drops into sublight speed. If they are near a viewport, read:
You see that the Handree is now drifting toward a barren world orbiting close to the system's sun. In the distance is a pink dot that looks like a gas giant. And then, above you, you notice an Imperial-class Star Destroyer closing in fast.
If the Rebels left some or all of the cargo in the forward hold and did not get the door closed, read:
You also see cargo crates rushing away from the ship, tumbling through space from the bow of your ship.
The barren world below is the planet Miser; the distant gas giant is Bespin. The description above did not name the planets or system because the Rebels may not have repaired the nav computer to find out where they were heading. If they did access the nav comp, they will most likely be able to name the planets themselves. Otherwise, Bespin and Cloud City being rather well-known in this area of space, it takes a Moderate planetary systems roll to figure out the location from the visual evidence.
See Galaxy Guide 2 for more information on Bespin system.
Escaping the Star Destroyer
Escaping the Star Destroyer Desolator is impossible, but the Rebels will probably try anyway. If they repaired the command console of the Handree, they will be able to maneuver at sublight speeds, but remember that no hyperspace jumps are possible until the nav computer is more fully repaired.
If the Rebels attempt to flee the Star Destroyer, read the following:
You appear to be pulling away from the Star Destroyer. However, it has released a cloud of TIE fighters who are flitting about your ship. Suddenly, you are thrown across the bridge as the Handree shakes violently. Apparently, the Star Destroyer has turned its tractor beams on you. A voice comes over your com unit, demanding your surrender.
If the players wish, you can run a few rounds of starfighter combat using either the roleplaying starfighter combat rules or those from Star Warriors. However, the Rebels are badly outgunned by the Star Destroyer; they can be overwhelmed by TIE fighters at any moment the Star Destroyer wing commander chooses to unleash his entire forces; and the Rebels cannot escape into hyperspace.
The Star Destroyer commander wishes to capture the ship unharmed, and he's willing to sacrifice a few TIE fighters to do so if necessary. The ships will block the Handree's movement and take pot-shots at the bridge to keep the pilot's head down, until the Star Destroyer can get a good lock with its tractor beams.
If the Rebels did not repair the ship's control console, the Handree is dragged aboard the Star Destroyer immediately, without a struggle.
Aboard the Desolator
The Desolator drags the Handree into its massive hangar area and then floods the ship with stormtroopers and portable sensor units. No matter where they hide, the Rebels are eventually found and surrounded by lots of stormtroopers — at least 30. Enough so that it is clear that fighting their way out of this one won't work.
If the Rebels start to fight or run, the stormtrooper commander requests assistance over his com unit, engineers flood the ship with gas, and the Rebels are knocked out. In this case, the Rebels wake up in the Desolator's hangar bay as described in the next scene.
Meeting Admiral Grendreef
When the Rebels are finally captured, they are relieved of their weapons, manacled with binders and escorted out of the Handree and into the docking bay.
If they were knocked out with gas, they wake up manacled and lying on the ground. A stormtrooper notices that they have regained consciousness and orders them to get up. Read:
The cavernous bay is filled with stormtroopers and Imperial officers lined up in rigid rows. Standing at the head of the massive array of men is a tall, hunched man with large, grey, bushy eyebrows. You recognize the officer from Alliance holo-files as Admiral Grendreef of the Imperial Navy.
If Captain Tonth is still alive, she comes out of the ship carrying the Wanderer's black box and gives it to the Admiral. Read the following:
You catch snippets of the conversation between Tonth and the Admiral — she seems to be recounting her exploits on Isis. When Tonth finishes, Grendreef looks over at you and smiles. Then he hands the black box to one of his staff officers and says in a deep voice, "Load the last set of hyperspace coordinates listed on this cold storage box into the ship's navigation system — and then delete all information on the box."
He then turns to Tonth and says, "We'll visit this Rebel planet personally. No need for the rest of the Navy to know about it until after the job is finished. Understand?"
Tonth smiles back at the Admiral: "The fewer pieces of the pie, the bigger they will be."
If Tonth and the rest of the scouts are dead, a stormtrooper brings the box out, having found it via the homing beacon Tonth activated. A computer deck with a screen is wheeled up to the Admiral and he plugs the box in. After typing in some instructions, he looks up at the Rebels. Read the following:
The Admiral smiles at you wickedly. Then he hands the black box to one of his staff officers and says in a deep voice, "Load the last set of hyperspace coordinates listed on this cold storage box into the ship's navigation system — and then delete all information from the box. We'll visit this Rebel planet personally. No need to inform the Navy of this until after the job is done, understand?"
The officer smiles and heads off for a turbolift.
After he has finished speaking, the Admiral crosses to the Rebels.
Admiral Grendreef is a very tall man. He has spent so much of his life leaning down to talk to people that his shoulders are permanently stooped. Grendreef seems to be dissecting those around him, looking for the right spot to stick an emotional needle and cause the most pain. Read:
"You are all prisoners of the Empire. You are charged with sedition, treason, murder, theft, smuggling, destruction of Imperial property, and various crimes too numerous to mention."
Grendreef turns to a lead sergeant and says, "Put them in a shuttle. We will continue this conversation down on the base, where I have better ... facilities ... at my disposal."
He then turns to another officer. "Have the ship ready for hyperspace in two hours. Make sure the planetary bombardment ordnance is fully operational."
To the Planet's Surface
Sixteen stormtroopers lead the Rebels to a shuttle, where they are put into individual cells, manacled and left to wait for an hour. The cells are one meter by one meter and are secured in the front by a blue-tinged force field. Escape from here is nearly impossible.
Breaking out of the manacles requires a Strength roll of 25. If successful, the character automatically takes a wound from the cuts and abrasions he causes to his arms and legs (though he can expend a Force point to avoid the wound). Tell the Rebels of the danger of self-injury before any attempt to break their manacles.
Getting out of the cell is as or more difficult than breaking free of the manacles. There are no controls for the field on the inside of the cells; unless the characters can burrow through the walls to get at the circuitry from the inside, they have to pass through the field. This is very unpleasant indeed.
The force field is a neural disruptor. It offers no physical resistance at all; a character can simply step through, but, as he touches the field, a vicious electrical charge burns through his nervous system, paralyzing him with agonizing pain (Difficult stamina roll to resist). At the same time, an alarm rings throughout the ship, bringing the 16 stormtroopers on the run within two rounds.
If, somehow, the Rebels manage to escape at this point, skip the rest of this episode, go to Episode Six and start with the section titled "Elements of the Final Plan."
But most likely, the Rebels will have to sit tight for a while. Admiral Grendreef walks by the cells, smiles at them evilly, and disappears toward the front of the shuttle. A moment later, the engines starts up and the ship is on its way to the temporary Naval base on Miser.
Montage Scene — Shuttle Landing
EXTERIOR: SPACE.
A prisoner transport shuttle glides away from the docking bay of the massive Star Destroyer Desolator. The camera pulls back to reveal the barren world of Miser below.
Wipe to ...
The shuttle approaches Miser's surface. It glides into a hangar bay built on the surface of the world. As soon as the ship enters, the bay's force shield goes up.
Wipe to ...
INTERIOR: DETENTION CELL, MISER NAVAL BASE.
Close up of a sturdy mag-lock manacle. The camera pulls back to reveal the Rebels sitting on a bench against a wall, their hands and feet chained to the floor. The doorway is filled with a blue force field.
Welcome to Miser
Breaking the manacles and their anchors set into the floor is the same Strength difficulty of 25 as were the binders on the shuttle. The force field too is the same as was on the shuttle, except that, as the alarm rings, automatic lasers fire down the corridor (with the equivalent of blaster skill 3D, damage code 4D) for the round it takes for the stormtroopers to arrive.
Let the Rebels stew there for a couple of minutes, coming up with plans, wondering what to do, how they got into this one, and so on. Then the force field comes down and the Rebels realize they have visitors.
Admiral Grendreef enters the cell followed by four security guards dressed in black. Grendreef peers about the room, looking for a suitable victim. Eventually, he decides upon a Rebel (pick the Rebel with the highest stamina) and signals to one of the guards. The guard steps forward and kneels down to unshackle the indicated Rebel.
Read the following to one of the Rebels who is sitting next to the Rebel who has been chosen:
As the security guard releases the mag-lock on your companion, he looks up at you and winks. Then, so none of the Imperials behind him can see, he mouths the numbers "One, seven, six." He slips a mag-key and a small control box into the pile of chains on the floor.
The security guard is actually Ulthar Blaze, a Rebel secret agent. The Rebel singled out by Grendreef is escorted out of the cell and the force field reactivated.
Getting Out of the Cell
Run this scene concurrently with the one immediately following, cutting back and forth between the action.
The Rebel who Blaze signaled to can attempt to reach the mag-lock key. The task requires a Difficult Dexterity roll (the agent was concerned more with hiding the key from the sight of the Imperials than making it easy for the Rebels to get at.) If the Rebels fail the roll, nothing bad happens, but each roll takes five minutes of game time. Remind the Rebels that their companion is probably being tortured now, so each failure may be subjecting him to more agony. Once the Rebel gets the key (or someone uses Force skills to acquire it) he can free himself and then his companions.
The control box deactivates the force field and the automatic lasers without alerting the guards. When the characters get out, go to "Rescue from the Torture Chamber," below.
Gamemaster Map: Prison Area
The map depicts a prison area with various sections labeled:
- Stormtrooper Checkpoint: Located at the top left.
- Rebels' Detention Cell: Positioned near the center-right, adjacent to cell numbers 172-174.
- Grendreef's Secret Passage: A hidden passage leading from a small room (numbered 177) towards the mining area.
- Mining Area: Situated at the bottom right of the map.
The cells are numbered sequentially from 171 to 175, with cell 172 being part of the rebels' detention block. The layout shows a main corridor running vertically through the center, connecting different sections and cells.
Meanwhile...
While the Rebels struggle to break free, start cross-cutting from the events and actions described above to the events and actions described in this section. This means that both scenes are occurring simultaneously, and all the players will be aware of what is going on in both places. Since the two groups will (hopefully) soon be reunited, the players seeing events outside of their characters' knowledge will not effect the logic of the game very much.
Read the following to the character who was singled out by Grendreef for interrogation:
You enter a dark chamber lit only by harsh red lights. The shadows of many odd instruments and tools fill the room, but you recognize none of them. There are six armed stormtroopers here, as well as Grendreef and two security guards.
"Strap him in," says the Admiral, and the stormtroopers grab you and strap you to a cold metal chair. "I would like to introduce you to the IT-O 26 Interrogation Droid. I believe you are destined to become quite good friends."
The Interrogator Droid advances, its twin hypodermic needles targeted for your neck. "There are some things that I would like to know about your Rebellion..."
The Droid does only minimal damage at this point (3D of stun damage), but the injections it gives work to break down a person's will.
At this point you should give the player of the tortured Rebel the Interrogation Information List. Every five minutes of game time, have the tortured Rebel make a Moderate stamina roll. If he fails the roll, it means he gives up one item of information from the list. The player gets to choose what his character gives away, but he must give away something, and never the same item twice.
Sidebar: We Have Ways...
The interrogation scene can provide the opportunity for interesting — if somewhat gruesome — roleplaying. During this action, you should get a strong lamp, aim it directly at the face of the player whose character is being interrogated. Stand up over him, or right behind him, where he cannot see you. Shout questions at him from inches from his face. Call him "Rebel scum!" repeatedly. Don't get too intense — we don't want any nervous breakdowns here — but have fun with it.
Interrogation Information List
The following is a list of information your character might give away while being interrogated by Admiral Grendreef. If you fail a stamina roll, pick one of the items to divulge (against your will) to the Imperials.
- We are Rebel operatives.
- We came to this system from what we call the Isis system.
- Isis is a Rebel colony and an important Alliance Naval base.
- The Isis system is in Fand Sector, near the Bowane nebula.
- The medical supplies on board the Handree are bound for Polmanar.
- The guerrilla war on Polmanar will die out if the medical supplies don't get there soon.
Sidebar: Miser
A Moderate planetary systems roll gains the Rebels the following information:
Miser was mined by the Ugnauhts a long time ago to get materials for the construction of Bespin's Cloud City. Although the surface is inhospitable, the underworld of the planet is a network of thousands of habitable tunnels and chambers.
Because of the planet's high metal content, com-links and other wireless communication devices are nearly useless. The Imperial garrison relies on a com-box system, similar to the one found on Isis.
Rescue from the Torture Chamber
When the Rebels step out of the prison cell, they see there are three corridors they can choose from. The map on this page shows the three corridors and what each one leads to.
Let the characters choose which way they want to go and then see what happens. Remember to keep cutting back to the torture chamber for more divulged information as the Rebels wander around the prison area.
Map Key
Every room in the base is labeled only with a number — no other identification can be found.
- Generator Room: The base does not work on one centralized generator system. Instead, smaller generators are located throughout the base, mutually supporting in case of accident. The generator here supplies power to every room on the map. If the Rebels turn the generator off or destroy it, the entire area mapped will be plunged into darkness for 10 seconds, until power is rerouted from other generators. The Rebels must then pass a Moderate Technical roll to block the power coming from the other generators.
172, 173, 174. Prison Cells: Empty.
- Supply Closet: The closet is locked and requires a Moderate security roll to open. It contains four blaster pistols, 10 medpacs, a vibroblade, three glow rods (two hours each) and six complete sets of stormtrooper armor.
Mining Area: This area was dug out decades ago by the Ugnauhts. See the Mine Maze map for more detail.
Stormtrooper Checkpoint: There are four stormtroopers here before the assault on the Torture Chamber. Once the attack opens, two of the guards go to the Torture Chamber to investigate the sounds of combat, while the other two remain at this post, weapons drawn and on full alert.
- The Torture Chamber: Admiral Grendreef, two security officers, a number of stormtroopers equal to the Rebels plus one, and the tortured Rebel are in this room. One of the security officers is the Rebel secret agent; he will pull his blaster and start shooting at the Imperials as soon as the Rebels arrive.
When the fighting starts, Admiral Grendreef is next to the door which leads to the secret passage indicated on the map. As soon as the Rebels arrive, he opens the door and steps through. He then shuts the door and blasts the controls.
Grendreef's goal is to reach the shuttle and fly up to the Star Destroyer as soon as possible, letting the base's security forces deal with the Rebels. He wants to make sure he gets to Isis before anything else can go wrong.
The repairs on the secret door are Difficult Technical repairs — five minutes elapsed game time for each roll on the first two attempts, half an hour for each roll after that. Twenty-five points of damage must be done to the door to blast it open; however, like the security doors on the Handree, all damage by hand weapons have a die cap of three.
Bad News and Good Plans
After the skirmish with the Imperials, the Rebel agent gathers the PCs together to talk to them, meanwhile ordering one or more of them to repair/blast through the secret door.
The agent introduces himself as Ulthar Blaze. When not posing as an Imperial security officer, he has a warm smile and seems to be in an upbeat mood. Read:
"Quickly, listen to me. Grendreef is most likely running through the mining tunnels to reach the shuttle and get back to the safety of his ship. As long as he is in the tunnels, his com-link is useless and he won't be able to get word out about what has happened. We've got to beat him through the tunnels and get on board the shuttle before he leaves. We can disguise ourselves as stormtroopers."
If they dispatched the stormtroopers cleanly, the Rebels should have a few Imperial uniforms to don. If not, Blaze leads them to the supply closet where they find fresh ones.
Blaze knows that the Desolator is going to be leaving for Isis in forty-five minutes. He also knows that the medical supplies are still on board the Handree, which is docked in the Star Destroyer's hangar (unless the Rebels were unable to save them).
Blaze wants to get up to the Star Destroyer and erase the Isis coordinates from the Desolator's nav computer. Hopefully, afterwards they can then make a getaway in the Handree, seconds before the Star Destroyer makes the jump to hyperspace. If their escape is timed correctly, the Desolator would then have no chance of preventing their escape.
Sounds easy, right?
The characters can discuss the plan with Blaze, but he's sure that, within the short time-frame they've got to work with, this is the only chance they've got. He will immediately begin changing into a stormtrooper outfit while working out the details with the Rebels.
Blaze will make it clear that going through the mines is risky because they could get lost. However, this area will soon be swarming with guards; it will take even longer to evade them or fight their way through the corridors.
The Running Battle
If the Rebels attempt the latter course of action, you should have them make a series of Easy to Difficult hide or con rolls as they slip or bluff their way past the forces seeking to catch them. If they fail any of these rolls, they are engaged by a security team of six stormtroopers, who seek to keep them at bay for 10 rounds until reinforcements of six additional troopers arrive. The Rebels must kill or lose all of the stormtroopers before they can reach the shuttle.
The Mine Maze
As soon as the Rebels enter the area marked "Mining Area" on the Prison Area map, switch to the Mine Maze map.
DO NOT SHOW THE PLAYERS THE MAZE. Instead, as their characters move through the maze, simply tell them what their options are. For example, when the Rebels first enter the maze you would say, "You can go straight ahead, left, or right."
Don't suggest to the players that they keep a map of where their characters are going. If they think of it themselves, great, but don't give them any help. In any case, don't allow them time to make their map clear and precise! They're supposedly running at top speed, not counting paces and judging angles. If the players insist upon making their map in too much detail, let them: however, make sure that they understand that they are in danger of letting their enemy get away while they dally.
Blaze knows that the mine connects to a staircase which leads directly to the shuttle hangar, but he has never actually been in the mines before. He has no sense of direction underground; the Rebels must pick their own path. If they insist on having Blaze do their thinking for them, he does so completely at random.
Grendreef's path through the mines is outlined on the map. He should have a good head start on the Rebels, but if they happen to take a quicker path than he does, and they wind up in the same tunnel as him, they may run into him.
If this happens, Grendreef does not hesitate. He blasts the ceiling above the Rebels, causing a tunnel collapse and cutting off the tunnel so that he can escape (the Rebels take 2D damage from the collapse). PLEASE DO NOT ALLOW THE REBELS TO KILL THE ADMIRAL AT THIS POINT.
Gamemaster Map: Mine Maze
- Stairs Leading to Hangar
- From Torture Area
- Grendreef's Path
The Shuttle
Since Grendreef has had a good amount of trouble getting through the mine maze, it is likely that the Rebels will win the race even though the Admiral had a head start. Use your best judgment here; it should take Grendreef about 20 minutes to work his way through the tunnels.
If the characters get to the stairs leading to the shuttle hangar ahead of Grendreef (and they did not encounter him in the tunnels), read:
As you top the stairs, you find that you are indeed inside the shuttle hanger that you landed in earlier. A stormtrooper stands guard near the entrance ramp to the shuttle which is powering up for liftoff. Another group of stormtroopers is lounging inside a plasteel-enclosed waiting area. No officers are in sight.
If the characters get to the hangar behind Grendreef, but didn't encounter him in the tunnels, read:
As you top the stairs, you find that you are indeed inside the shuttle hanger that you landed in earlier. There are alarms ringing and red lights flashing. Grendreef is panting heavily and talking with a group of stormtroopers whom he sends off down one of the base's corridors at a trot. Grendreef enters the shuttle's entry ramp. A stormtrooper stands guard at the foot of the ramp. Blaze smiles wide and excitedly whispers to you: "He doesn't know we followed him!"
If the Rebels encountered Grendreef in the tunnels and he beat them to the hangar, read:
As you top the stairs, you find that you are indeed inside the shuttle hanger that you landed in earlier. There are alarms ringing and red lights flashing. Grendreef is panting heavily and talking with a group of four stormtroopers whom he sends off in your direction, blasters drawn.
The Rebels have a number of options here. If they arrived before Grendreef, they need only walk up to the stormtrooper guarding the shuttle and say that they have been ordered to board by the authority of Admiral Grendreef. Convincing the stormtrooper of this requires a Moderate con roll. The roll may be attempted as a combined action.
If Grendreef got to the hangar first, but wasn't aware he was being followed, the same situation applies, but the stormtrooper has been placed on alert and the con roll becomes Difficult.
If Grendreef sends the squad of troopers into the tunnels after his pursuers, the characters can hide in a side tunnel and hope the stormtroopers pass them by (a Moderate hide roll from everyone). Or they can try to take out the stormtroopers deep in the tunnels (just run this as a normal combat).
Or, the Rebels can make a major mistake and start blasting away in the shuttle bay, as the stormtroopers approach the stairs, in which case the other squad of troopers emerges from the waiting area and joins in the fray. Once they've done this, the con attempt against the stormtrooper guarding the shuttle is Very Difficult, if not Impossible. Force points (or Force skills, for that matter) are definitely in order.
Once on board the shuttle, the Rebels take seats at the back of the craft with a group of other stormtroopers already aboard. Grendreef is in the command cockpit. Before long, the shuttle leaves the ground and the characters are on their way back to the Desolator.
Go to Episode Six.
Episode Six: Final Gambit
Summary
This episode has two main elements of action. First, the deleting of the Isis coordinates from the nav computer of the Desolator. Second, the escape from the Star Destroyer. The driving force of the episode is the fact that the Desolator will be jumping into hyperspace in 20 minutes — the Rebels are under a lot of pressure.
A Matter of Time
It is vital that the players be kept aware of how much time is left until the Desolator goes into hyperspace. Begin the countdown the moment the read-aloud below says the clock has started.
In this episode, some tasks have very specific time counts; others are be more vague, dependent upon the characters' actions. Your objective is to mesh an illusion of the inexorable passage of time with the reality of elasticity, carefully managing events so that the Rebels get off the ship at the last possible second, just before the Desolator goes into hyperspace.
Arriving on the Desolator
As the shuttle flies up into the Star Destroyer's hangar area, they see the Handree docked in the main hangar opening, with various umbilical attachments leading from the Rebel ship to the Star Destroyer. Flying past the Corellian gunship, the shuttle comes to rest in an adjacent bay. Read:
The shuttle lands. Blaze motions for you all to stay seated as the stormtroopers stand and march out. As the last one leaves, he looks back and asks, "What are you doing? You know that the bay has to be cleared before entering hyperspace."
Blaze replies, "Admiral Grendreef ordered us to conduct a further search of the Rebel ship. We were waiting till everyone left to get to work."
"I didn't hear anything about that," replies the stormtrooper.
The stormtrooper is questioning Blaze because it is Imperial policy to clear and seal all hangar bays that contain hyperdrive-equipped starships when the carrier ship enters hyperspace. Blaze claims that they are supposed to remain in the bay during the jump.
The Rebels may at this point kick in with Force skills and con attempts. If they succeed (Moderate difficulty), the stormtrooper leaves. If they fail, or don't try anything, read:
Through the viewport you see that the rest of the stormtroopers have cleared the hangar bay. The stormtrooper next to you says, "I think I better call this one in." Blaze reaches for his blaster ...
Blaze is about to shoot the stormtrooper to prevent the Imperial from contacting his superior. The Rebels can join in. When the trooper is properly dispatched, Blaze turns to the Rebels:
"We'll wait here a few minutes until the doors to the hangar close. We won't be disturbed after that. In the meantime, we can figure out what we're going to do."
Elements of the Final Plan
Someone who wanted to alter or remove the coordinates from a ship's nav computer would normally go to the bridge and simply punch a few buttons. With the hangar deck sealed and time so short, the Rebels don't have this option. Getting to the bridge of the Star Destroyer and back to the Handree in time to rescue the medical supplies would take far too long.
Under these circumstances, something trickier is required. The Rebels must access the ship's nav computer from a terminal in the hangar bay. Blaze knows that the Isis coordinates exist in two places. The first place is the nav computer's data banks, and the second is in the nav computer's current settings. The Rebels must remove the coordinates from both places. In addition, they must provide the Desolator with a different hyperspace destination.
It is crucial for their survival that the Rebels give the Desolator a new hyperspace destination so that the ship proceeds with its hyperjump. If they simply erase the coordinates, they will have succeeded at their primary mission of saving the world of Isis, but in that case the Star Destroyer's emergency override will cut in and the ship will not make the jump. The Rebels will almost certainly be captured immediately and, even if they escape later, the medical supplies lost for good.
If, on the other hand, the Rebels replace the coordinates, they can escape in the Handree seconds before the Desolator jumps to hyperspace. The Imperials will be far from Bespin system by the time they realize that they have been duped, and the Rebels will have time to fly the Handree to Cloud City to get the nav computer repaired. From there they can take the medical supplies to Polmanar.
In order to escape in the Handree, the Rebels must repair the Handree's command console if they haven't done so already — otherwise, the ship will not be able to leave the hangar. The information on repairing the Handree's command console can be found after the section outlining the rules for getting into the Desolator's nav computer, although the two tasks needn't be tackled in that order. The Rebels may even split up and accomplish both at the same time.
If they do not believe that they can repair the Handree in time, the Rebels can steal one of the shuttles in the hangar bay. The one that they rode in on is a good choice — it's low on fuel, but it is fully warmed-up. Once again, the medical supplies will be lost, but, if sorely pressed for time, they may have no other options.
While they are waiting for the hangar bay to be sealed, the Rebels should discuss what needs to be done and who needs to do what. Use Blaze to remind the players of the problems before them.
Blaze is not a computer whiz. With a paltry computer operation and repair skill of 2D+1, he probably will not be able to help the Rebels access the nav computer. He is aware of his shortcomings here, and will be very eager to have nothing to do with the attempt.
After the Rebels have finished working out their plan, read the cut-away below.
What Blaze Does
Because Blaze is an NPC, you don't want him mucking about in the problems set up for the Rebels. To get him out of the way, you should have Blaze take the watch by the hangar bay door, to guard against any unexpected visitors. If anyone wants to join him, he explains that the rest of them better work together to repair the Handree and get the coordinates out of the Star Destroyer's nav computer.
Doing the Nav Computer
There are several computer terminals within the hangar area. It doesn't matter which one the Rebels use.
To get from an external terminal into the ship's nav computer requires a Difficult computer programming roll. Up to two characters can combine on this action. Like the starship repair rules, keep a running total of the programming roll. When the total equals the Difficulty number, the Rebels have access to the nav computer. Each roll takes one minute of game time. (See how the time is slipping away?)
If, by chance, the Rebels have an Astromech Droid with them, its Difficulty is only Moderate (but no one can combine on the attempt).
After getting into the nav computer, deleting the file with the Isis coordinates stored in it is an Easy task.
The hard part is yet to come.
Re-Programming the Hyperdrive Setting
Because traveling through hyperspace requires navigation of unparalleled precision, every nav computer has several programs running at all times to make sure that the destination of the next hyperspace jump doesn't glitch. After all, if you're off even by a little bit, you could easily fly into a rogue planet and turn a very expensive ship into so much scrap metal.
Thus, if the Rebels were to simply delete the coordinates or replace them with random garbage numbers, the jump would be automatically aborted, an alarm would sound, and the bridge would instantly know that someone had tampered with the computer — and from where.
All of this is relatively common knowledge, available to any navigator, and you should explain it to the players as they try to figure out what to do.
The only way around these failsafe devices is for the Rebels to create their own program — a program that will get past the nav computer's defenses.
But before the Rebels write their program, they must first decide what exactly they want it to do. There are three possible programs they can attempt, and each one of the three programs achieves a better result. However, each is also more difficult than the last.
The three possible programs are provided here, but you should not list them for the players. Instead, listen to what they wish to accomplish, and decide which of our programs theirs most closely resembles.
If the players cannot think up anything on their own and go to Blaze for help, he will suggest the second program — the third doesn't even occur to him. If a Rebel PC comes up with the third program, Blaze think it's brilliant and tells the Rebels that's the one they should write.
Cut Away to the Desolator's Bridge
INTERIOR: THE BRIDGE OF THE DESOLATOR. Officers move hastily about in preparation for the hyperspace jump and the upcoming destruction of Isis. Admiral Grendreef enters the camera frame. He barks orders at no one in particular.
"Seal the hangar bays and prepare to jump in twenty minutes."
"Sealing hangar bays" comes the reply.
Cut to ...
INTERIOR: HANGAR BAY 3672. The hangar bay closes, separating the Handree, the shuttle, and the Rebels on board the shuttle from the rest of the ship.
Cut to ...
INTERIOR: THE SHUTTLE.
The echoing thump of the last blast door coming down brings a grim smile to Blaze's face. "Come on. We've got work to do."
Program One
The simplest program, this will simply take the coordinates of the Isis system out of the computer and leave nothing in its place. It will do this without setting off any alarms. The deletion will not be noticed until the moment the ship attempts to go into hyperspace.
The problem with this program is that it leaves the Rebels trapped in Bespin system with an annoyed admiral and his Star Destroyer. Even if they board the Handree and slip away from the Desolator in the confusion, they will almost surely be recaptured immediately — it would take a pilot with the skill and nerve of Han Solo to make the two successive Very Difficult starship piloting rolls needed to get the Handree out of sight (say by diving into the Velser's Ring asteroid belt) while the Desolator reverses course to come back and stomp them into paste.
Program Two
This program deletes the Isis coordinates and accesses another set of coordinates from the computer's files. This orders the ship to make a jump out of the Bespin system — but to a different system than before. Since the Isis coordinates were already loaded into the nav computer and checked, it is unlikely that anyone on the bridge will re-check the coordinates and notice the "switch" until it is too late. This program is harder than the first.
Gamemaster Prop: Hyperdrive Programming Puzzle
If the players want to write program #1, give them tiles A, C, D, E, F, G & I. The tiles must match the indicated shape.
If the players want to write program #2, give them tiles A, B, C, D, E, F, G & I. The tiles must match the indicated shape.
If the players want to write program #3, give them all the tiles. The tiles must match the indicated shape.
Gamemaster Prop: Hyperdrive Programming Puzzle (Back)
Notes for the GM
- There is a single center tile.
- Tiles touching the center tile are called ring tiles.
- The two tiles that do not touch the center tile are called external tiles.
- This is a correct solution to the puzzle: B A C F E D G I H
The players have 15 minutes of real time to solve the puzzle. If they get stuck, allow them to make a group computer programming roll every three minutes. The difficulty of the roll is Moderate. Give them the following clues for each successful roll:
- On the first successful roll, tell them that tiles B & H are the external tiles.
- On the second successful roll, tell them that tile A is a ring tile.
- On the third successful roll, tell them that tile A touches tile C.
- On the fourth successful roll, tell them that tile E is the center tile.
Program Three
This is the hardest of the three programs. In this program, the Isis coordinates are removed and then replaced with coordinates that will fly the Star Destroyer directly through a rogue star — undoubtedly destroying it.
The Puzzle
When the Rebels begin to work on the program, cut out the hexagons on page 55 and give them to the players. To complete the program, they will have to solve the puzzle. The rules for the puzzle are in the "Notes for GM" box and on page 55 with the puzzle pieces.
The nav computer is accessed through a language based upon "object oriented programming" (O.O.P.), meaning that the programmer manipulates a series of shapes, or "objects," to create his program. The completed program resembles a geometric diagram or sophisticated flowchart, with each shape, size, color, and link between shapes having a specific meaning in the language.
The hexes you give the characters are actually what they see on the computer screen. By manipulating the position of the hexes, they write the program. When the pattern is completed, they have finished the program and can run it.
The puzzle's solution varies depending on which program the characters are writing, so read the instructions carefully.
After the characters decide what kind of a program they want, explain the rules of the puzzle to them, give them the pieces, and let them go at it. You should have a watch or a clock with a second hand available. Make it clear that you are timing their progress, because the real time they spend working on the puzzle counts minute by minute against the game time left before the Desolator's departure.
Repairing the Handree
If the Rebels did not repair the Handree while en route from Isis to Miser, they'll have to do it now — and quickly. However, this is not as difficult as it was before. Because they are in the hangar bay of a well-equipped Star Destroyer, the repairs are substantially easier to make than they were when the ship was in hyperspace. The hangar bay contains replacement control modules which the Rebels can link into the Handree's systems: it won't be pretty, but it will work.
The Rebels still need a Difficult starship repair roll (using the partial repair rules), but now each roll only takes five minutes of game time. This means that if the Rebels start repairing the Handree as soon as the hangar bay door is sealed off, they have four tries (twenty minutes) to repair the ship's controls before the Desolator makes the jump to hyperspace.
Any partial repairs the Rebels might have made previously still apply and reduce the starship repair roll needed while on the Desolator.
A Rebel cannot work on both the puzzle and the starship repair in the time allotted — he must do one or the other.
The Tractor Beams
Once the Desolator's nav computer has been reprogrammed and the Handree has been repaired, it is time to get off of the Star Destroyer. There are three considerations that the Rebels should keep in mind.
The first is that the bay's guidance tractor beams must be turned off. The main tractor beam which drew the captured vessel into the Star Destroyer's hangar bay was automatically disengaged when the ship docked; however, the smaller guidance beams are necessary to keep the ship in position in the bay.
These guidance beams are the same kind which guide TIE fighters and Lambda-class shuttles in for landings. Being quite a bit large than a fighter or a shuttle, the Handree is held fast by an entire bank of guidance beams.
The second consideration is that, as soon as the guidance beams are disengaged, the bridge will be alerted. Although, if properly sabotaged, the bridge can't reactivate the beams, it will know that someone is in the hangar bay and is trying to leave.
Third, the Rebels must time their departure from the Desolator precisely — they must leave the instant before the Desolator goes to hyperspace. If they leave too soon, Grendreef will cancel the jump and swing back to capture or kill them. If they leave too late, they will be stuck in hyperspace inside the Star Destroyer.
The question then becomes: How to disengage the guidance beams and leave the Star Destroyer at the last instant without the Imperials finding out about it?
The answer is to shut off or reprogram the guidance beam indicator lights on the bridge. (If the Rebels don't think of this, Blaze will suggest it.) The wiring to the bridge can be disconnected up in the hangar bay's control tower with a Moderate Technical roll. After that is done, the guidance tractor beams can be disengaged with an Easy Technical roll. Each roll takes one minute of time.
Unfortunately, there is a backup monitoring system in the ship's security center. This system allows the ship's security officers to know instantly if any vessel docks or exits from the hangar. The system is independent of the bridge's monitors, to prevent tampering by bridge personnel (who may be involved in illegal smuggling operations).
The system is well-hidden; a character would have to pass a Difficult security roll to spot the tap on the monitors — and he doesn't get to attempt the roll unless he specifically states that he is looking for something like that.
If the characters find this tap and deal with it — Moderate security roll — they're home free and can escape the Desolator without any further problem. If not ...
As soon as the wiring has been disconnected to the bridge, cut to the scene at Security Control.
Sidebar: Cut-Away to Security Control
Read Aloud:
INTERIOR: DESOLATOR SECURITY CONTROL CENTER. A technician sits before a console filled with lit red lights. One of the red lights winks out. The technician turns to a group of stormtroopers who are cleaning their weapons.
"I've got a light out in the hangar area" the technician sighs. "Should I check it now or after we go to hyperspace?"
"Have the bays been sealed?" asks one of the troopers.
"Affirmative."
The trooper snaps open the safety on his blaster. "Better check it out now. We'll accompany you to the bay."
Cut to ...
INTERIOR: HANGAR BAY 3672.
The Dramatic Departure
As soon as you read the cut-away, the Rebels know that Imperials are going to be showing up very soon. This is done to build tension for the scene — before, no one knew the Rebels were in the bay, and now they might be discovered! Let the Rebels make final preparations for their departure and take up hiding places around the hangar area or get on board the Handree if they so wish.
You should also make the following points clear to whichever Rebel is going to pilot the Handree:
- When the command console is repaired, he can monitor the time until the Desolator jumps. He can also listen in on other bridge chatter on the Star Destroyer's communication system.
- The Handree will need at least 20 seconds (four combat rounds) warm-up time for the engines before it can fly out of the hangar bay.
- Flying the gunship out of the bay at the last instant before the jump requires a Very Easy piloting roll. This assumes that nothing goes wrong. Since things will probably go wrong, the difficulty will get higher.
Cut Away to Stormtroopers
Read Aloud:
INTERIOR: CORRIDOR OUTSIDE HANGAR AREA. Four stormtroopers stand outside the door.
(NOTE: IF ANY OF THE SCOUTS MADE IT TO THE DESOLATOR ALIVE, ADD:) The Imperial scouts from the Wanderer are with them and are describing their adventure on Isis to the stormtroopers. The technician and squad of stormtroopers arrive.
One of the stormtroopers who was guarding the door asks, "What are you doing here?"
"I've got a light out on my board for this bay," replies the technician. "I think I better check it out before we go to lightspeed."
"All right," says the stormtrooper, punching a code by the door, "but this better be good..."
Cut to ...
INTERIOR: THE BRIDGE OF THE DESOLATOR. Grendreef turns to one of his officers. "How long before the jump?"
The officer replies, "One minute Admiral." Grendreef cracks his knuckles impatiently.
Cut to ...
INTERIOR: THE BRIDGE OF THE HANDREE. From the command console's speaker comes Grendreef's voice. "Carry on."
The Last Minute
The climax of The Isis Coordinates takes place in the last minute before the Desolator jumps to hyperspace. The last minute is divided into twelve rounds. Although this isn't very much time, a lot can happen in the last minute — enough to prevent the Rebels from escaping the Desolator.
When the Rebels are all set, read the cut-away to the stormtroopers and then start the countdown. Notice that the arrival of the technician and the stormtroopers is set. Whether the technician's light went out five minutes before the jump or two minutes before the jump, he and the stormtroopers arrive one minute before the jump.
The Rounds
Below is a listing of what the Imperials do if the Rebels take no action and what the Rebels have to do to get off the ship in time. The outline below assumes no interaction on the part of the two groups.
12 Rounds to Jump
The door to the bay opens and eight stormtroopers, one technician, and any of the scouts still alive enter the bay. Any Rebels watching from one of Handree's viewports notice this. The Rebels also see that the technician notices that the bay's guidance beams are down. He points this out to the other Imperials.
11 Rounds to Jump
The technician and two stormtroopers head for the stairs to the control tower. Meanwhile, the other Imperials draw their weapons and start looking around the bay.
10 Rounds to Jump
The technician and the two stormtroopers get to the top of the tower.
9 Rounds to Jump
The technician reactivates the guidance tractor beams, once again holding the Handree within the hangar bay. If this occurs, the Rebels must get to the tower and deactivate the beams again.
6 Rounds to Jump
One of the scouts or stormtroopers attempts to board the Handree (via a Deck Two entryway).
5 Rounds to Jump
At this time the pilot must start up the Handree to have it ready to leave the Desolator in time.
1 Round to Jump
The Rebel pilot must get the Handree out of the bay.
So What Do the Rebels Do?
Now what do the Imperials do if the Rebels shoot at the technician heading for the tower or when they notice the Handree is warming up? What do the Rebels do if the technician succeeds in reactivating the guidance beams?
Well part of the answer to these questions is up to you. In this last minute the variables are the Handree, the guidance beams, the Rebels, the Imperials and Admiral Grendreef's commands from the bridge. There is no way to map out exactly what the Imperials are going to do because we don't know what your players are going to have the Rebels do — we can only give you guidelines for the Imperials. But these guidelines are sufficient for you to finish the last scene.
Just keep in mind that this last scene is very active and subject to many conditions. If the Rebels are very careful they might get out without much difficulty. That's all right. The final piloting roll will have a lot of suspense behind it.
- If the Rebels fire their blasters at the Imperials, the Imperials fire back.
- If the Rebels start shooting with Handree's cannons or start warming up the ship, the stormtroopers immediately combine fire on the ship. Although they are of a different scale than the gunship, there are enough of them there that they might be able to do some damage if they combine fire.
- If the Handree starts warming up or fires at the Imperials, the scouts, if there are any scouts left, rush for a nearby shuttle. Two Rounds later they can fire the shuttle's cannon (2D damage) at the Handree.
- As soon as shooting starts or the freighter's engines warm up, the bridge is alerted. The Rebels can hear Grendreef's voice over the intercom:
"WHAT! I want the jump in ten seconds!"
"But Admiral ..."
"Do it! We'll trap them in hyperspace — their ship has no nav computer. Ten seconds! They're going to regret not accepting the simple torture I offered them earlier."
The Rebel pilot was supposed to have four rounds of warm up for a Very Easy piloting roll to get out of the bay. Leaving in ten seconds (which he now has to do) gives him only one round of warm-up (the second round is spent getting out the door). For every round less than four that the Rebel pilot has to warm up the Handree, add two points to the difficulty of the piloting roll. Thus, if the pilot only has one round to warm up the Handree, add six points to the difficulty.
- The Rebels may wish to use the Handree's cannons to destroy the stairwell leading up to the control tower, or the control tower itself, to prevent the technician from raising the tractor beams. The difficulty of hitting either the stairwell or the control tower is Very Easy. If a hit is made, assume the structure is destroyed. Destroying the tower keeps the guidance beams down, but also alerts the bridge that something is going on in the bay.
Notice that although the countdown begins at one minute, at some point Grendreef is going to order an early jump! The Rebels might have to leave ten seconds early, they might have to leave fifty seconds early, depending on when Grendreef gives the command. This is another situation where things get worse for the Rebels in a hurry — a staple of Star Wars adventures.
Escape!
The only thing you should make sure happens in the end is that at least some of the Rebels are able to escape on board the Handree (some Rebels may end up staying behind in the hangar bay, sacrificing themselves to draw fire from the ship or racing up to the control tower to disengage the beams). Read:
The ship lurches forward as you engage the maneuvering thrusters and drop clear of the Star Destroyer's hangar bay. Before you is the Bespin system and a sea of twinkling stars. Looking back, you see the Desolator vanish as it rushes off into hyperspace. To port is the gas giant Bespin. You can easily make it to Cloud City for repairs on the Handree's nav computer.
Success & Failure
For a complete success, the Rebels must have removed the Isis coordinates from the Desolator's nav computer and still have possession of 80% of the medical supplies bound for Polmanar (that equals 240 of the crates).
If the Rebels failed to remove the coordinates from the nav computer, then the Desolator reaches Isis and lays waste to the world with a bombardment of weaponry. The Rebels are then trapped on board the Desolator and the next adventure should involve them getting off the Star Destroyer.
Epilogue
If the Rebels did manage to send the Desolator on a direct collision course with a rogue star, read the following:
INTERIOR: BRIDGE OF THE REBEL GUNSHIP HANDREE. General Madine's distinctive voice pipes in over the sub-space com channel.
"We've intercepted an Imperial News Bureau bulletin. Thought you might be interested. Ahem.
"The Imperial Star Destroyer Desolator was lost in space today, due to collision with the rogue star G-138. The collision was apparently a result of a hyperdrive malfunction. All hands were lost, including Admiral Grendreef of the Imperial Navy.
"It is not known what the Desolator was doing in the area of the rogue star since it was reportedly on assignment to the new Naval base in the Bespin System. Imperial Navy officials deny any possible link between this disaster and the recent increase in Rebel activity. According to Captain Needa, commander of the Imperial Star Destroyer Avenger, "the idea that the so-called Rebellion could be responsible for the destruction of an Imperial Star Destroyer is completely ludicrous."
Fade to Black.
Roll Credits.
If they set the coordinates for a collision with a rogue planet but fail to get off the ship, the medical supplies are destroyed (along with the ship) and the Rebels again are only partially successful — but wholly dead. This can happen if the pilot misses his piloting roll to get off the Desolator or if the guidance tractor beams remain on.
If the Rebels save the medical supplies, this can be the starting point for another adventure. Because the Handree has been delayed nearly a day, the Rebels might have to fly the ship to Polmanar themselves. This means breaking through the Imperial blockade and then perhaps helping with the final assault against the Imperials.
Awards
Give the players between two and five points each for preventing Isis from being discovered and destroyed.
If they set the nav computer coordinates of the Desolator so the ship was destroyed in hyperspace, give them three extra points.
If they succeeded in keeping 80% of the medical supplies safe (first by foiling Tonth's cargo bay trick and then by getting the Handree off the Desolator) give them three points each.
NPC Templates
Pilia Tonth
Template Type: Imperial Scout
Loyalty: To the Empire
Height: 1.6 meters
Sex: Female
DEXTERITY 2D+2
Blaster 3D+2
KNOWLEDGE 4D
MECHANICAL 3D
Starship piloting 5D
PERCEPTION 2D
STRENGTH 3D
TECHNICAL 3D+1
Computer programming/repair 4D, starship repair 4D
Equipment: Blaster (damage 4D), threm-compact bomb (7D), one week rations, two days water
Physical Description: Tonth is a small but sturdy woman with short black hair and a pixie nose.
Background: Tonth's father served in the Imperial Navy. She got an easy appointment in the scouts through nepotism and is now waiting to get promoted to a position she thinks is more worthy of her ability.
Personality: Tonth is a serious woman who enjoys a puzzle but gets annoyed when stumped. She is not a reckless adventurer, but someone who sees herself doing an important job.
A Quote: "We serve the Empire because the Empire serves us."
Note: Tonth has a Force point that she will spend at a critical moment.
Ishale Meahonon
Template Type: Imperial Scout
Loyalty: To the Empire
Height: 1.8 meters
Sex: Female
DEXTERITY 2D+2
Blaster 4D+2, dodge 3D+1
KNOWLEDGE 4D
MECHANICAL 3D
Astrogation 6D, starship shields 5D
PERCEPTION 2D
Hide/sneak 4D
STRENGTH 3D
Stamina 4D
TECHNICAL 3D+1
Starship repair 4D
Equipment: Blaster (4D), threm-compact bomb (7D), one week food rations, two days water
Physical Description: Meahonon is a tall woman with long red hair that she wears in a braid down to the small of her back. When sneaking around, she keeps the hair tucked into the back of her coat.
Background: Meahonon wanted to see the stars but not get bossed around by anybody else. The ISC fit the bill.
Personality: Meahonon is quite willing to kill anybody who might be a threat to her. She isn't exactly paranoid, but most people notice she doesn't have too many friends.
A Quote: "Enough talking."
Note: Meahonon has a Force point that she will spend at a critical moment.
Sona Lerenga
Template Type: Imperial Scout
Loyalty: To the Empire
Height: 1.8 meters
Sex: Male
DEXTERITY 2D+2
Blaster 5D, dodge 5D
KNOWLEDGE 4D
MECHANICAL 3D
Repulsorlift operation 4D, starship gunnery 5D
PERCEPTION 2D
Hide/sneak 3D, search 4D
STRENGTH 3D
TECHNICAL 3D+1
Security 4D+1, medicine 4D
Equipment: Blaster (4D), threm-compact bomb (7D), one week food rations, two days water
Physical Description: A swarthy looking rogue.
Background: Lerenga had planned to have a career in the Navy, but his father embarrassed the Empire publicly and Lerenga was forced to settle for the ISC.
Personality: Having had his life ambitions frustrated, Lerenga behaves as outlandishly as possible, often taking very silly chances just for the thrill of it.
A Quote: "Don't worry. I'll be right back."
Note: Lerenga has a Force point that he will spend at a critical moment.
Rengor Talke
Template Type: Imperial Scout
Loyalty: To fellow scouts and Empire
Height: 2.1 meters
Sex: Male
DEXTERITY 2D+2
Blaster 3D+1, brawling parry 3D+2, dodge 3D
KNOWLEDGE 4D
MECHANICAL 3D
Starship gunnery 4D
PERCEPTION 2D
STRENGTH 3D
Brawling 5D
TECHNICAL 3D+1
Demolition 5D
Equipment: Blaster (4D), threm-compact bomb (7D), one week food rations, two days water
Physical Description: Large and threatening. His eyes are always focused distantly.
Background: Talke was a slave fighter on a world the crew of the Wanderer found. They picked him up and he's been a valuable member of the team ever since.
Personality: Talke is quiet, methodical, and frightening when enraged.
A Quote: "I WILL KILL YOU!"
Note: Talke has a Force point he will spend at a critical moment.
Iponta
Template Type: Tough Native
Loyalty: To his tribe
Height: 2.3 meters
Sex: NA
DEXTERITY 3D+2
Brawling parry 4D, bastaska 4D+1
KNOWLEDGE 2D
Cultures 2D+2
MECHANICAL 2D+1
PERCEPTION 3D+2
STRENGTH 4D
Brawling 4D+2
TECHNICAL 2D+1
Equipment: Bastaska, a crystal spear (STR+1D+1)
Physical Description: Iponta is a huge, hulking humanoid made of crystal.
Background: Iponta is the strongest member of his tribe and thus has been in many fights for life. Because he has won many of these contests, he knows much about his own world and much about the offworlders who have come to his planet. He respects the Rebels in their struggle.
A Quote: "Come. First we fight, and then we do something you like."
Yustavan
Template Type: Tough Native
Loyalty: To his tribe and the old customs
Height: 2.1 meters
Sex: NA
DEXTERITY 3D+2
KNOWLEDGE 2D
Cultures 2D+2
MECHANICAL 2D+1
PERCEPTION 3D+2
STRENGTH 4D
TECHNICAL 2D+1
Sense 2D
Control 2D
Alter 3D
Equipment: Bastaska, a crystal spear (STR+1D+1)
Physical Description: Yustavan is a bit smaller than the other members of his tribe and his crystal skin is not as shiny.
Background: Yustavan is the shaman of Iponta's tribe. Because the memories of the offworlders have mixed in with the memories of other tribes, his people have seen that there are other ways to live — which has let them grow lax in their holding to the old ways. This bothers Yustavan and he tries as hard as he can to keep the old ways alive.
A Quote: "NO! We dance and THEN eat!"
Ulthar Blaze
Template Type: Rebel Agent
Loyalty: To the Alliance
Height: 1.7 meters
Sex: Male
DEXTERITY 3D+2
Blaster 5D+2, grenade 4D+2, dodge 4D, heavy weapons 4D
KNOWLEDGE 2D
Bureaucracy 3D, survival 4D+2
MECHANICAL 2D+1
Beast riding 3D, repulsorlift operation 3D+1
PERCEPTION 3D+2
Con 4D+2, hide/sneak 5D+2
STRENGTH 3D
Brawling 4D, stamina 4D+1
TECHNICAL 3D+1
Computer programming/repair 4D, security 3D+1
Equipment: Blaster (damage 4D), holo recorder, comlink, datapad
Physical Description: Blaze is a large, strong man with steel gray eyes.
Background: Blaze is a Rebel spy who managed to infiltrate the Imperial Navy. He was assigned to the newly-constructed base on Miser as a security guard.
Personality: Blaze is snappish and grim when undercover as an Imperial, but cheerful and upbeat otherwise.
A Quote: "Just sit tight and let me handle this."
Admiral Grendreef
Template Type: Imperial Admiral
Loyalty: To the Empire
Height: 2.0 meters
Sex: Male
DEXTERITY 3D+2
Blaster 4D+2, dodge 4D
KNOWLEDGE 3D+1
Bureaucracy 4D+2, planetary systems 4D+1
MECHANICAL 3D
Astrogation 4D+1, starship piloting 4D
PERCEPTION 2D+2
Command 5D, con 3D, bargain 4D
STRENGTH 2D+1
Stamina 3D+1
TECHNICAL 3D
Computer programming/repair 4D, security 4D+1
Equipment: Blaster (damage 4D), data pad, comlink
Physical Description: Grendreef is a huge, hulking man with slumped shoulders and bushy eyebrows.
Background: Grendreef is a lesser-known officer who rose rather slowly through the ranks and has recently been put in charge of the new Naval base on Miser. This assignment also put him in temporary command of the Star Destroyer Desolator, until the base is completed. He intends to use the Desolator in some desperate attempt to prove that he belongs in command of her permanently.
Personality: Grendreef is a nasty man who enjoys bringing pain to others. He thirsts to do something drastic.
A Quote: "This ship shall be mine. I swear it."
Note: Grendreef has a Force point that he will spend at a critical moment.
The Isis Coordinates
by Christopher Kubasik
An Imperial Survey Corps vessel emerges from hyperspace above an uncharted planet. The survey team begins its sensor sweeps. The lifeforms indicator crackles to life. Habitations are scanned... a spaceport... power generators... landspeeders... an X-wing fighter... Rebels!
The survey team has stumbled upon a densely-populated Alliance factory world. If they live to reach an Imperial base and report their findings, hundreds of thousands of lives are at peril, and the Alliance will lose over 30 percent of its starfighter manufacturing capacity. Only two things stand between the Imperials and their base — half a galaxy of hyperspace, and a small band of Rebel heroes!
Sidebar: 64-Page Book Features
- Detailed descriptions of the Rebel factory world Isis.
- Deck plans of the Corellian gunship Handree, which is the stage for a dramatic conflict between Rebels and Imperials.
Also includes:
- Cut-apart puzzles which the players must solve to complete the adventure.
- Adventure script and cut-aways which help capture the mood and feel of the Star Wars movies.
A complete adventure for Star Wars: The Roleplaying Game. For gamemaster and one or more players.
West End Games RD 3 Box 2345 Honesdale, PA 18431
40036
For ages 12 and up.
® & © 1990 Lucasfilm, Ltd. (LFL). All Rights Reserved. Trademarks of LFL used by West End Games under authorization.