
Adventures
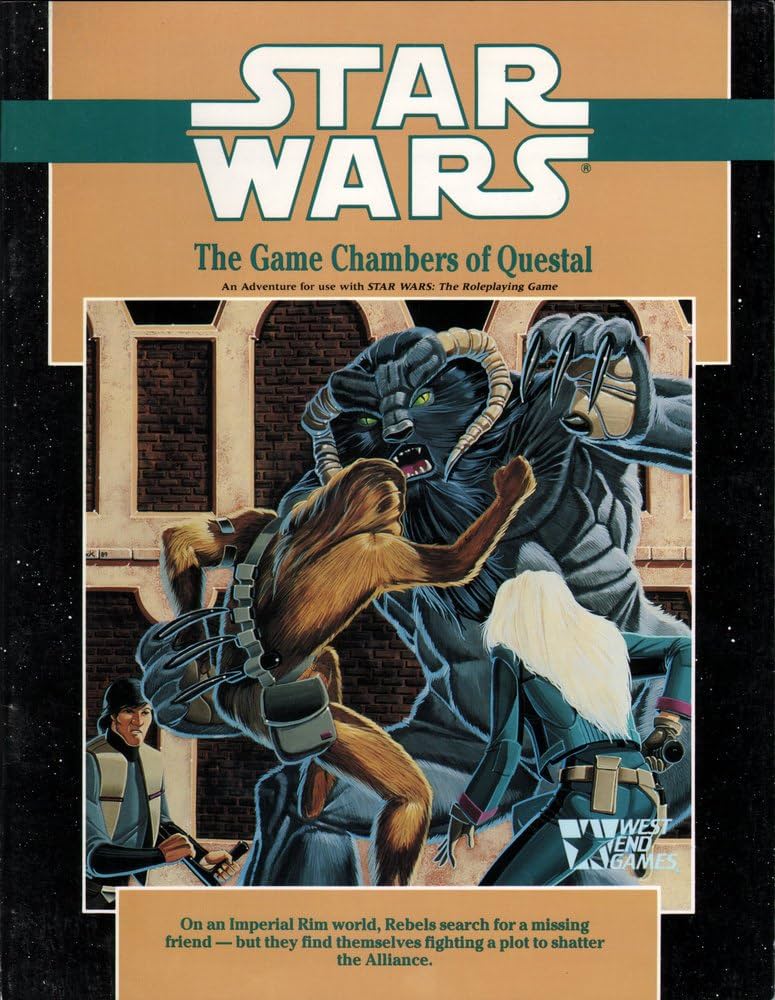
The Game Chambers of Questal
The Game Chambers of Questal
An Adventure for use with STAR WARS: The Roleplaying Game
On an Imperial Rim world, Rebels search for a missing friend — but they find themselves fighting a plot to shatter the Alliance.
by Robert Kern
Development and Editing: Paul Murphy Graphics: Jacqueline M. Evans • Cover Art: David Deitrick Interior Art: Jeff McElroy • Maps: Rosaria J. Baldari
Publisher: Daniel Scott Palter • Associate Publisher: Richard Hawran • Assistant Publisher: Denise D. Palter Editorial Director: Bill Slavicsek • Associate Editors: Greg Gorden, Douglas Kaufman, Paul Murphy Editors: Jonatha Ariadne Caspian, Michael Stern • Art Director: Stephen Crane Graphic Artists: Rosaria J. Baldari, Bernadette G. Cahill, Jacqueline M. Evans, Cathleen Hunter, Sharon Wyckoff Production Manager: Steve Porpora • Sales Director: Martin Wixted • Sales Manager: Fitzroy Bonterre Sales Assistants: Tony DeCosmo, Marla Kammeler • Special Projects Manager: Ronald Seiden • Treasurer: Janet Riccio
RD3 Box 2345 Honesdale, PA 18431
©, ™ & © 1990 Lucasfilm, Ltd. (LFL). All Rights Reserved. Trademarks of LFL used by West End Games under authorization.
Introduction
The Game Chambers of Questal is a Star Wars adventure for four to six players and a gamemaster (GM). The GM should become familiar with the entire adventure before beginning play to ensure seamless play without undramatic pauses. Players should stop reading this book now. The information herein is for the gamemaster only.
In This Adventure...
...Rebel heroes investigate the disappearance of their comrade Tiree on the planet Questal. He went there without orders and without consulting Alliance High Command. Were it anyone else, the disappearance might have been dismissed as a joke or a jaunt. But Tiree is too good a soldier for that ... or was.
The Alliance has regretfully written him off: there are other priorities. Besides, Questal is a planet to be avoided. Rebels there have disappeared. Moff Bandor rules with impunity.
Tiree's friends, though, are not so quick to desert him. They believe he is in trouble, so they go to Questal to investigate. Their unauthorized mission requires them to work undercover and without support. The Alliance does not condone their mission and provides no special equipment or contacts.
On Questal, the heroes find themselves with more mysteries than just Tiree's disappearance. They are faced with an Imperial Moff who holds his planet in a thrall of fear rivaling that commanded by Darth Vader.
Will the Rebels find Tiree? And in what condition? What is the terrible secret behind the Moff's power and how will it affect the Alliance?
Adventure Materials
In addition to the adventure book, The Game Chambers of Questal contains:
The Pullout Section. The eight-page pullout located at the center of this book includes the script used in the adventure, maps, and templates for important non-player characters.
Additional materials you will need to play this adventure include Star Wars: The Roleplaying Game, The Star Wars Rules Companion, pencils, paper and lots of dice. The Star Wars Sourcebook, the Imperial Sourcebook and Star Wars Miniatures Sets are helpful as well, but not absolutely necessary for play.
Difficulty Numbers and Game Balance
This adventure is designed for up to six beginning characters with a wide mix of planetary and city skills (none of the adventure proper takes place in space). As gamemaster, you are encouraged to modify this adventure to fit your particular group of player characters. Refer to the "Difficulty Number Chart" (found on page 78 in The Star Wars Rules Companion).
In this adventure, attributes are always capitalized and italicized (Dexterity), skills are only italicized (dodge).
Adventure Background
Given another million years or so, Questal might have developed its own form of sapient life. But settlers, looking for a planet where they could live in peace, found it and made it their own. They had a quiet existence, cultivating the land and growing crops. Until the day, about 3 years ago, while plowing a new field, an Agri-Droid turned over a large rock imbedded with Ardanium.
Refined Ardanium actually grows stronger in the presence of radiation, forming a nearly impenetrable container for the fuel needed to power large starships. By lining their fuel cells and engines with only a millimeter-thick coating of Ardanium, the Empire was able to create the Super Star Destroyers. With this new supply, the Emperor knew he could almost double the size of his fleet.
Entrepreneurs and miners by the thousands converged on Questal seeking the valuable ore. With them came the greedy and unscrupulous. Intergalactic mobsters established organizations on the planet. Questal became a planet of rivalries and blaster-play.
To restore order, the Emperor assigned Moff Bandor to rule Questal. He arrived with heavily-armed Imperial troops that quelled the minor battles with typical Imperial methods ... wholesale arrests and quick executions.
Though he put an end to the violence, Bandor's rule was anything but benevolent. Bandor did not exterminate the criminals: he gave them positions of power in the government, in fact, letting them rule the very people they had terrorized before he arrived.
Bandor's infamy has spread throughout the galaxy. He had tamed a wild population with limited troops and instilled fear in the hearts of the most hardened prospectors and toughs. There are many wild legends and rumors about his powers; few guess the truth behind the stories.
The Hurlothrumbic Generator
Moff Bandor's source of power is the Hurlothrumbic Generator. The generator produces waves stimulating the base of the brain, causing unexplainable, but perceptible, fear in the victim. Operating at low power, the generator can cause mild anxiety and sweating. On high, it can send any creature screaming for cover.
Bandor tests the generator periodically in the Game Chambers, hidden beneath his palace. There he takes his enemies and toys with them in a hunt before killing them.
Recent Events
The supply of Ardanium on Questal seems to be waning. What new deposits are discovered trigger claim jumps, murder, and bloody fights. The population is dissatisfied and growing edgy. It is the perfect environment to recruit Rebel spies and fighters to bring down the tyranny of the Empire, starting with Moff Bandor.
Rogan, once a farmer, now forced onto a small plot of land that barely maintains his wife and child, set out for Gralleenya, the capital city of Questal, to start a Rebel cell there. Unfortunately, he was captured and brought before Bandor, who threw him into the Game Chambers. After toying with him for a bit and reducing him to a fear-crazed simpleton, Bandor tossed Rogan into the streets as a warning to other Rebels.
After months of searching, Rogan's wife, Tyerle, found him and sent out a distress call to her brother Tiree. Tiree sped to the planet and, after speaking with Tyerle, concluded that there was something more sinister in the palace than just an odious Moff.
Tiree went in to investigate and he has not been heard from since. Tyerle stays in the city, caring for Rogan and waiting for news of her brother. She grows more afraid every day that she will not see him again.
Adventure Synopsis
The Rebels land on the planet of Questal in disguise. Since Moff Bandor's birthday is celebrated with parades, Mardi Gras and costumes, they will have no difficulty keeping their true identities hidden. (But neither will any Imperial spies or bounty hunters.)
Once on the planet, the Rebels will have to locate Tiree, which they think will be easy. Tiree was wearing a pendant that contained a short-range beeper. Right now, though, that pendant is being worn by a member of the Nebula Masters, the Questal chapter of the notorious Dark Star Hellions. He and his cronies found Tiree's hidden X-wing fighter, with Tiree's uniform inside it. They stripped the X-wing of everything of value, including the pendant, and then sold the craft.
Through the local swoop gang member, the Rebels will locate Tiree's Droid. In its memory is the reason he came here and a clue as to where to find him.
The Rebels will discover some secrets about Tiree's family and past, clues suggesting that the Rebel has gone into the palace of Moff Bandor. Then they will have to get into the palace and rescue their comrade from the Game Chambers.
The Main NPCs
Rogan: If it weren't for his marriage to Tyerle, Rogan would have joined the Rebellion with Tiree. But responsibility to his family led him to emigrate to the then-peaceful planet of Questal, where he began homesteading.
With the arrival of Moff Bandor, Rogan has been quietly rallying some of the original settlers into Resistance groups. While recruiting new members, Rogan was betrayed and captured. Moff Bandor threw Rogan into the Game Chambers. Rogan could not withstand the assault of the Hurlothrumbic Generator. His mind has been all but destroyed.
Tyerle: Tyerle is a strong woman, but her priorities are family oriented rather than toward the Rebellion. After Tiree went off to join the Rebellion, she never tried to contact him, fearing she would put him in danger. It would take something very important and frightening to make her call ... and that's just what has happened.
Moff Bandor: If ambition were height, Bandor would stand higher than the mythical peaks of Archais. While many would be satisfied with ruling a rich planet and plundering its wealth, Bandor has greater plans: he wants one day to sit in power next to the Emperor.
For years, it bothered him that he could not manipulate the Dark Side. It appealed to him to have the power to make people cringe just by thinking about it. It no longer bothers him, now that he has the Hurlothrumbic Generator. In fact, many think he can use the Force, which only adds to his legend and the fear he inspires.
Episode One: Welcome to Questal
Summary
The Rebels arrive on Questal with only one slim lead to follow up. Getting through the city, they find out about the Gala being held for Moff Bandor and get some information about the situation on Questal.
Also, they get to tame a wild Trompa.
Starting Out
Keeping in mind that the Alliance is not sanctioning this mission, the Rebels should be limited in what equipment they can bring. They are free to take any personal equipment they own, but very little else.
Knowing what they do about Tiree, they will have certainly brought along a wrist comlink complete with locator to home in on Tiree's pendant. They may carry personal weapons, but must have an Imperial Sanction Card to take them into the city (available at the spaceport for a nominal fee of 30 credits plus security check, or 100 credits under the table and no security check).
Learning the Local Customs
Please read the adventure script before proceeding. This encounter is to give the players the idea that Questal is a corrupt planet where almost anything or anyone can be bought.
The staring gentleman is a Questal customs inspector. Beyond the customs agent are a few unarmored guards. They are ever watchful and very protective of the custom agents ... especially those who share the bribes they take.
The inspector asks the Rebels to hand over their luggage. He sends it through a scanner. If the Rebels have hidden any weapons or equipment in their cases without taking precautions against scanning, it will be discovered. If the inspector spies anything suspicious, he turns to the Rebel and says in a whisper, "It would be a shame to spoil your visit by getting arrested your first day here. Can you think of any reason why I shouldn't call the guard?"
The inspector is looking for a bribe. Resolve the exchange using the bargaining rules on page 36 of the rules book. Since the inspector thinks of himself as a planetary official, the roll for determining the amount of the bribe should be Moderate. If the Rebel just asks how much, the inspector wants 200 credits.
Gralleenya
Gralleenya's political structure:
Planetary government: Moff Bandor rules. No one questions his judgment or decisions. But Moff Bandor cannot handle every little problem that comes along; he has made the city District Commanders judge, jury and, often, executioners over each of the five districts of the city.
District Commanders: Each is free to hire as many Enforcers and give them whatever power he sees fit. This means that one can get a different punishment for the same infraction from district to district. In some cases, the laws aren't even the same. One district forbids gambling while another encourages it. Overall, though, each District Commander is corruptible.
Turf Bosses: Unofficially, the District Commanders have agreements with various criminal bosses to handle minor troubles. For example, in exchange for keeping Rebel activities and insurgency down, the boss can have the gambling concession in the district. The system leaves very little recourse for a citizen who does not have the money or criminal bent to participate in the baksheesh hierarchy.
Gralleenya is not a happy place. And it is framed in by a no-man's land called The Waste. When prospectors came to Questal in search of Ardanium, they started at the very city limits and scorched and blasted their way outwards, leaving behind useless land scarred with mines, caves and pits. The countryside surrounding Gralleenya can barely support a blade or two of plantlife.
Bandor's Birthday
As the Rebels make their way through the city, they are caught up in the Gralleenya Gala. It is Moff Bandor's birthday and he has ordered an entire week of parades, parties and celebration. All citizens are to enjoy themselves ... or else.
The streets are filled with masked and costumed citizens. Some wear extravagant, colorful costumes and dance and carouse wildly. Others wear simple masks and slink along the streets. The difference between the two is striking. The obvious merrymakers are all part of the power structure in some way, while those who try to stay anonymous are ordinary citizens. Read:
Scattered around the city are huge posters featuring the face of Moff Bandor and bearing such slogans as "Long Live Bandor," "The Moff is Tops", "Our Beloved Leader" and the like. As you make your way through the city, you see a young humanoid defacing one of the signs to read "Die Soon Bandor." The police swoop in quickly and, after a short chase, stun the humanoid with blasters and cart him off while the crowd watches in silence and fear.
Curiosity aroused, The Rebels may ask what was going on. What answers they get (if any) depend on who they ask. Roll a die to see who is available, or just select from the list below.
1-2. Merrymaker: This person should be the opposite sex of whoever is asking, and of a race attractive to the player character. The Rebel may attempt a Moderate Perception roll to see if a friendly relationship can be established. If the Rebel can stop the Merrymaker from dancing for a second, the NPC explains that "certain malcontents are forever trying to besmirch the image of Moff Bandor. They're party-poopers trying to ruin the Gala."
3-4. Civilian: This person tries not to be noticed and is quite afraid when asked questions. It takes a Difficult Perception roll to get the following answer: "Moff Bandor has made many people unhappy with his tactics. Look, I don't want to get involved. Leave me alone!"
- Pickpocket: Same reactions as a Merrymaker, but, while the Rebels are talking, the NPC's accomplice tries to steal one of their items. Use the Opposed Rolls rules, pitting the thief's Dexterity against the Rebel's Perception.
Pickpocket
DEXTERITY 4D
Dodge 4D, pickpocket 4D
KNOWLEDGE 3D+2
MECHANICAL 2D
PERCEPTION 3D
STRENGTH 3D
TECHNICAL 2D
- Swooper: This member of the Nebula Masters is surly and rude. If asked any questions, he starts poking the Rebel in the chest and shouts, "who do you think you are talking to, Rancor-face? I'm gonna hit you so hard you're gonna wind up in some Space Slug's gut."
If the Rebel gets tough back, the swooper pulls out a vibroblade and starts combat. If the character backs off, the swooper snickers, gets on his swoop and takes off, plowing through the rapidly parting crowd. (See the section on Bim Maldeen and the Nebula Masters later in this book for a description of a typical swooper.)
Search and Restore
The first thing the Rebels may try is to call up Tiree on their comlink. But there will be no answer. Tiree removed his comlink when he adopted a disguise. It is now in the secret compartment of his speeder.
The Rebels must start asking clever questions to get a lead on their friend and learn about the planet. The characters will have to go with the one lead they have: a place called Shilley's. Beyond that, all they can do is hope that their locator will pick up Tiree's homing signal.
The Parade
One of the highlights of the Gala has everyone abuzz. Kersh Lauskner's Traveling Animal/Acrobatic Arcadium will be performing in the courtyard of the Moff's palace over the next few days. One of the clowns from the circus hands out leaflets:
"Come one! Come all! The greatest show in three quadrants! Exotic animals! Death-defying stunts! Beautiful females! Kersh Lauskner's Traveling Animal/Acrobatic Arcadium! Bring the family! Entry 1 credit." Read aloud:
The troupe is serving up a preview with a parade. Your way is blocked as it passes. There are tumblers, jugglers, laser-eaters, clowns and trained creatures. The colorful speeders and skiffs float by. Music blares from speakers. It is the first time you have detected real joy since you entered the city.
As the characters watch, a hush falls over the crowd. Approaching is the Amazing Alonzo and his trained Trompa. This distant cousin to the arctic Wampa of Hoth has adapted to temperate climates. Its mien is fierce and Alonzo carries an electric prod (similar to a Gaffi stick, but with an electrical supply to give a jolt), just in case.
Alonzo puts the creature through several routines involving bending metal beams, walking on its front paws and lifting the Amazing Alonzo's pretty assistants into the air.
Have the Rebels make a Moderate Perception roll. If successful, they notice that, beneath his smiles, Alonzo looks quite worried and that the Trompa is balking at commands. The crowd thinks this is part of the act, but perceptive Rebels know better. Read aloud:
There is a couple across the way. He looks very passive and uninterested; the woman is beautiful with jet-black hair. She delights in the parade and tries to fire some enthusiasm in her partner. Suddenly, a small child pushes past a couple out into the street, brandishing a laser pinwheel. He rushes forward, all smiles and giggles, waving it at the Trompa. A look of absolute panic crosses Alonzo's face.
The Trompa attacks the child. While the Rebels push their way through the crowd, Rogan, the passive man across the street, sees the child in danger and darts forward, pushing the child out of the way. The Trompa swats him as if he were a bug. He crashes into a wall and lays there.
Read aloud:
The screaming begins. Soft at first, but growing as people begin to realize that the Trompa's rampage is not part of the act. The circus people scatter, dropping their equipment and scurrying for safety.
The Rebels are the only ones in the crowd brave enough to subdue the Trompa. Everyone else panics and starts scurrying around. If the Rebels do not handle the emergency, lots of people and property will be destroyed.
There are several pieces of equipment lying nearby that the characters can use to stop the Trompa. By commandeering a skiff or speeder, they can confuse or ram the Trompa, going for a kill or knockout. By grabbing a fallen lashing line, the Rebels can attempt to bind or trip the Trompa.
One character can go for Alonzo's electric prod and try to subdue the Trompa. This is a series of Opposed rolls between the character's Dexterity and the Trompa's Strength of 5D. The Rebel must achieve two successes to calm the creature back into a docile, trained state. Or the Rebels could just use their blasters.
During the battle, Tyerle leads Rogan away.
If the characters have managed to stop the rampage without killing the Trompa, Alonzo will be grateful and start directing the workers to bring up the force-cage. If they were forced to kill the beast, Alonzo will not blame the characters.
Either way, he will talk about how the Trompa never made any trouble until they reached Questal. "They're very touchy and can almost sense danger coming. He's been itchy since we landed. I guess he was picking up on the fear in the people. I've never seen so many people so afraid."
The Trompa has been reacting to random waves from the Hurlothrumbic Generator. While humanoids cannot feel it at such low intensities over the distance from the palace, the Trompa's highly developed senses were affected.
Trompa
Adults stand almost three meters tall. The arms of this biped hang almost to its knees and the six-inch claws are formidable looking indeed. The creature's face is a cross between a gorilla and a Tyrannosaurus, with sharp teeth and quick eyes.
In its natural environment the Trompa has no predators. It is sovereign over all it surveys. The Trompa can move very quietly and strike with a swiftness that belies its size. Death is usually instantaneous. The Trompa is not very fussy about what creature it kills for food.
DEXTERITY 2D
PERCEPTION 2D
STRENGTH 5D
Speed Code: 4D
Damage: 7D+3
Episode Two
Tiree's Trail
Summary
After the excitement of the Trompa's rage, the Rebels will be interested in going somewhere restful for a quiet drink and sophisticated conversation. Unfortunately, they will go to Shilley's. They will meet some informative NPCs, find Tiree's locator pendant, and discover that a Droid in hand can make one bushed.
Shilley's
There must be seamier places in the galaxy than Shilley's, but one doesn't come to mind immediately. In comparison, the Mos Eisley Cantina is a country club. The inside is dark with a bar lining two walls and curtained booths lining the other walls. Shilley's is a favorite place for the illegal to meet. It is neutral ground and the owner pays a hefty sum to keep it that way.
Behind the bar, Gor'telp the four-armed, three-eyed Kler'terrian, keeps the drinks flowing while constantly scanning the bar for the slightest sign of trouble. He is a cagey creature with, literally, one eye in the back of his head. If he thinks a patron is about to start trouble, he signals the bouncer, Snufftalon.
Standing well over two meters in height, the Wookiee Snufftalon earns his keep nightly by intimidating the patrons. When called upon to break up a fight, he is just as likely to break up the fighters. Though he carries a blaster, he prefers to use his fists and feet to keep order. It gives the other patrons an entertaining show.
Gor'telp
DEXTERITY 2D
KNOWLEDGE 2D
MECHANICAL 2D
PERCEPTION 3D+2
Bargain 4D+1, con 4D+2
STRENGTH 2D
Brawling 3D+2
TECHNICAL 2D
Equipment: Three blasters (damage code 4D) hidden under the bar, set to stun
Snufftalon
DEXTERITY 3D
Blaster 4D+2
KNOWLEDGE 3D
MECHANICAL 3D
PERCEPTION 3D
STRENGTH 5D
Brawling 6D+2
TECHNICAL 3D
Equipment: Blaster pistol (damage code 4D) in holster, set to kill
Patrons
Tormax Ardellian: A Corellian sits in the back booth, nursing a drink and trying not to be noticed. He doesn't move his head much, so it will take a Difficult Perception roll to notice that he has a fresh wound on the right side of his face, a very nasty and hastily attended to one. He is part of a Corellian pirate raiding party that was smuggling in some Rebels and equipment to Questal.
The pirates were found out and the Rebels were put to death in a public execution. His comrades are now all locked up in the palace. He knows nothing about Tiree.
Sleeping Twi'lek: In one corner, a Twi'lek snores softly. He has been there since left by a party the night before. He will remain asleep for another three days. Even when he wakes, he will have nothing important to add.
The Poker Game: At a table near the back sit a Gamorrean, an Ithorian, a Quarren, an Ugnaught and a humanoid playing sabacc. Their gambling skills are all 2D+2, so no one is really ahead. In fact, the game is an ongoing one ... for the last several months.
The participants are always arguing about cheating, but nothing ever comes of it. They can answer most questions about the planet and the Ugnaught knows about the Nebula Masters.
The Swoopers: When the Rebels first arrive, they see four swoopers (male and female) sitting at a table. They are noisy and annoying, but not violent ... yet.
Add any other patrons you see fit.
Meeting Shilley
Though Shilley's is a place where people come for information, strangers are treated with some suspicion. Shortly after they start asking questions, the Rebels will feel a heavy weight pressing down on their shoulders. It is the hairy paw of Snufftalon. He gives the best imitation of a smile he can and gestures toward the back of the bar.
If the Rebels are reluctant to go along, he grabs one or two in a bear hug and drags them along, using them as shields against attack by the rest of the Rebels. He never loses his smile.
When the Rebels are in the back room, a weak-looking door will slide open and Snufftalon nods the Rebels through. Once the Rebels are inside, Snufftalon leaves. Read aloud:
The room is spotless, well-decorated and stylish. The weak-looking door is a facade; this side is very durable metal. There are plants and avian life allowed to roam freely. There is a large desk and office chair. Standing behind the chair is a slender Morganian. Like most of her race, her skin is very fair, almost white. She is quite attractive.
This is Tan Shilley, owner of Shilley's place.
Tan Shilley
DEXTERITY 2D
KNOWLEDGE 4D
Streetwise 5D
MECHANICAL 2D
PERCEPTION 3D
Bargain 4D, con 3D+2, gambling 4D
STRENGTH 2D
TECHNICAL 2D
Shilley could be quite useful to the Rebels. If the relationship is friendly, she will be able to give the Rebels information and answers they could not get otherwise. If friendly, Shilley explains in detail the mood of the city and planet, confirming the Rebels' observations. She hints at some "power" that Moff Bandor wields. "Some say he was granted occult powers by Lord Vader himself. I have seen strong, nasty men taken to the palace and come back broken. But not a mark on their body. No burn points from being put on a scan grid. No synaptic disruption. Nothing."
If you decide that a mutual sense of trust and interest has been established between Shilley and the Rebels, she confides that there is dissension on the planet, fired by the few Rebel elements that have survived Bandor's attentions. There was recent talk of one man who was once a farmer who came to town to recruit allies to rebel. But he disappeared and nothing more was heard of him.
If the Rebels are not suitably polite and friendly to Shilley, she will tell them nothing without getting well-paid for the information. Threats are all but useless against her: she's got a lot of muscle in the local underworld. If the Rebels damage her or her establishment, they'll wish they hadn't.
Swooper Trouble
Toward the end of the conversation, sounds of an argument and struggle can be heard coming from the bar. The monitor screen on the wall will show Snufftalon tussling with five swoopers who are making a lot of trouble. The swoopers aren't quite drunk enough to draw weapons in Shilley's (a very foolish thing to do), but they are drunk enough to try to take out a Wookiee in close combat. Someone, apparently the swoop gang's leader, stands near the door, egging his men on.
Bim Maldeen (Swoop Gang Leader)
DEXTERITY 3D
Dodge 3D+2, melee parry 3D+2, melee 4D
KNOWLEDGE 2D
MECHANICAL 3D
Repulsorlift operation 5D
PERCEPTION 2D
STRENGTH 1D
Brawling 3D
TECHNICAL 2D
Repulsorlift repair 4D+2
Equipment: Vibroblade (damage code 3D+2)
Swoop Gang Members (5 or more)
DEXTERITY 2D+1
Dodge 3D, melee parry 3D, melee 3D
KNOWLEDGE 2D
MECHANICAL 3D
Repulsorlift operation 4D
PERCEPTION 2D
STRENGTH 2D
Brawling 3D
TECHNICAL 2D
Repulsorlift repair 4D
Equipment: Vibroblades (damage code 3D+2)
When the Wookiee or Rebels seem to be getting the upper hand, the leader will make a rapid exit. At that point, the Rebels will notice that the locator signal on the Rebels' wrist comlink is beeping. Tiree's pendant is somewhere close, but according to the signal, moving away rapidly.
The pendant is around the neck of Bim Maldeen, leader of the Nebula Masters ... who, at this moment, is zooming away in his skiff. If they move quickly, the Rebels can zip out the front door and grab swoops from the beaten gang members and take off after Maldeen.
Obstacles
Bim knows the city well, and will zip down the streets at perilously rapid speeds, using all of the available terrain — pedestrians, bridges, open buildings, more pedestrians — to throw off pursuit. It is impossible to track his progress from high in the air; if the Rebels wish to keep up with him, they will have to follow at nap-of-earth.
This is very dangerous, indeed.
Use the following obstacles during any chase through Gralleenya.
Holo-Rancor
Read aloud:
They certainly build some of these streets very narrow. Not conducive to an easy chase. All the people and vehicles and the Rancor ... The Rancor? From around a corner comes the huge head, teeth agleam with dripping saliva, waiting to engulf the oncoming vehicles.
The Rancor is a holo-projection for a parade. The operator wears the keyboard control on a strap that goes around his neck. Because of the speed of the chase, give the Rebels Difficult Perception rolls to see if they recognize it as a hologram. If successful, they can go right through the image. If they think it is real, they must make Moderate Repulsorlift Operations rolls to get around it, failure indicating that they crash right into the image ... look grim, roll dice, ask for Strength rolls from the unfortunates, then tell them that they are unharmed: it is an image.
Swoop
Craft: Mobquet Asteroid-3 Swoop Racer
Crew: 1
Passengers: None
Cargo Capacity: 2 kilograms
Speed Code: 4D
Maneuverability: 3D
Body Strength: 1D
Weapons: None
Flight Ceiling: 35 meters
TraffiDroid
Read aloud:
Gralleenya uses the latest technical advancements to keep traffic flowing. That round object with the four arms is the latest TraffiDroid model, designed to register vehicular flow and tell it when to move through crowded interstices. Right now it's telling you to stop.
The problem isn't so much the Droid as the traffic moving across the intersection. The Rebels must make Moderate Repulsorlift Operations rolls to skim over the traffic, flying very close to the TraffiDroid. This upsets the Droid's gyros, sending it spinning. The Droid's sensors will record the numbers of the swoops going by.
Sail Barge
Read aloud:
During the gala, owners of sail barges are making a fortune carrying small parties around the city. The captain provides food and drink and anything else his passengers require and then cruises over the lower buildings in the city so the passengers can enjoy the Gala while remaining safe from the dangers of the street.
Have the Rebels make Difficult Repulsorlift Operations roll to avoid the barge. If their roll fails as a Difficult but would have been successful a Moderate difficulty, the Rebel missed hitting the hull but ripped through a sail, carrying a portion of the sail with him around his head.
SqualSpinner
Read aloud:
Remember when you were young and the star carnivals came to town? You'd line up for hours to get tossed into the SqualSpinner. Once in the spinning column of air, you could spin and turn and tumble to your heart's content. Well, there's one in your path.
The SqualSpinner sets up a controlled tornado. Patrons are put into it and they have a great time doing gymnastics. It's safe — except when maniacs on swoops fly through it. Then the patrons can be scattered to the winds.
It takes only an Easy Repulsorlift Operation roll to avoid crashing into the column. Note, however, that Bim tore right through the Spinner, sending several riders straight up into the air (how many is up to you). Make it clear to the Rebels that if they do not rescue the hapless victims, deaths will ensue. It takes a Moderate Repulsorlift Operations roll followed by a Moderate Strength roll to save each patron.
Police Speeder
Read aloud:
After all you've avoided, it looks like you might be gaining on the swooper. But what is that wailing sound? Uh oh. A quick look behind shows a speeder cop on an Aratech 74-Z Military Speeder Bike. And he looks very determined.
The last thing the Rebels want is the police involved. They will now have to lose the police bike before they capture Maldeen. Too easy? Well, the officer can start firing his medium laser cannon.
Maldeen Speaks
Assuming the Rebels capture Maldeen, they will want to interrogate him.
Maldeen got Tiree's pendant out of an X-wing that they found stashed in a burned-out building. "We was takin' blaster practice when a wall collapsed, and there she was under a plasti-shroud. Boy, we thought we had it made. We could've been top swoop gang in the quadrant!
"We just couldn't get the flaming thing running! Every time we tried to get it started, that Droid inhibited the system! 'N we couldn't take out the Droid without blowing the wing's comsystems, you know? So we slapped some paint on her and dragged it to Honest Ellam's speeder lot. If anyone can get past that Droid, he can."
Maldeen took the pendant because it "looked nift, ya know?" He knows nothing else about Tiree or why he came to Questal.
Whether Maldeen informs the authorities about the Rebels is up to you. But keep him in mind. If the adventure looks like it is becoming too easy, you can always send gang members or local hoods after the Rebels or decide that Maldeen tipped off the Moff to their presence.
If the Rebels fail to overtake and capture Maldeen during the swooper chase, you will have to improvise their attack on the swoopers' headquarters. (The Ugnought back at Shilley's will be able to give them the general location.) There are about 20 of the gangmembers there, and they have about a dozen blaster pistols (damage code 4D).
Honest Ellam's
"Turn your speeder into credits!" "Is your cloud car the pits?" "Soaring vehicles, not prices!"
These are just some of the signs placed around Honest Ellam's Used Speeder Lot. Parked throughout the lot are speeders, cloud cars, swoops, skiffs and other repulsorlift craft in varying condition and prices.
Overall, Honest Ellam lives up to his name when representing the condition of the vehicles he sells. He's not that honest about their histories, though; he will cheerfully purchase a stolen speeder and change the numbers and programs to eliminate tracing it to the rightful owner.
Unless running from the law, the Rebels can arrive openly at Ellam's. Shortly after they begin looking at the vehicles, a friendly voice booms out:
"You're just in time, friend. I was going to put that baby on sale: 25 percent off. You can't pass up a deal like that."
A quick look around reveal nobody in sight. You look puzzled; above you, you hear a chuckle. An anti-grav chair slowly settles to within about a meter of the ground. Sitting on it is a small, blue-skinned humanoid less than a meter high with a large head and four arms which appear much too long for his body. His solid-red, large eyes glisten with good humor and the V-shaped mouth is in a perpetual smile.
Ellam
DEXTERITY 2D
KNOWLEDGE 2D
MECHANICAL 2D
PERCEPTION 3D
Bargain 4D+2, con 3D+2
STRENGTH 2D
TECHNICAL 2D
When confronted about the honesty of his establishment, he will cry in an astonished, hurt voice: "Hey, do I look like a Jawa to you?" Ellam's home planet is much smaller than Questal and he finds the heavier gravity here uncomfortable, hence the chair.
Gamorrean Bodyguards
DEXTERITY 3D
Blaster 3D+2
KNOWLEDGE 1D
MECHANICAL 1D
PERCEPTION 2D
STRENGTH 4D
Brawling 4D+2
TECHNICAL 2D
Ellam will be all smiles as long as he thinks the Rebels are there to buy a speeder. If they try to strong-arm him, Ellam signals his Gamorrean bodyguard to deal with the Rebels. If he begins to suspect the Rebels are after more than just a new vehicle, he becomes cagey, though he is always open to an "inducement" to talk.
Once a relationship of trust or greed is established, Ellam shows the Rebels the X-wing. It is in the back of the lot, hidden among some skiffs and cloud cars in disrepair.
On the way back to the X-wing, a mouse Droid (see below) rolls up. The Droid's retractable manipulator arm extends a datapad, which Ellam looks over and then punches in a few numbers. As the black, box-like Droid drives off, Ellam boasts, "Great little things. Not only are they good for running errands, but they help keep the place safe at night. Them and the caniphants."
He gestures over to a force cage where three creatures can be seen. They are four-legged, with high shoulders and large muzzles. Their noses are like tapered snouts.
The X-wing is partially covered with a plastishroud, more to protect it from discovery than the elements. And it has been painted a horrendous shade of dark green. When Ellam shows the X-wing, he will start his spiel.
Read aloud:
"You won't find anything like it for sale anywhere else in the system! We've refurbished the entire interior, wiped out the old programming. We'll install whatever naviprogram you want. All you need is an astromech Droid and you're set to go."
Ellam's expert technicians were able to deactivate the links between Tiree's Droid and the X-wing to remove the Droid. But they haven't the knowledge or expertise to deprogram the Droid, so they removed its legs and keep it in a storage room where it can chirp and whistle to its motivator's content without annoying them.
Ellam is asking 150,000 credits for the X-wing, cash only, please. In reality, he's selling it rather cheap, but he doesn't really have the contacts to move this kind of specialty item. If the Rebels wish to dicker over the price, he'll go down to 125,000, but that's his final offer. (Of course, we don't actually expect a player character to have enough money to buy the X-wing, but clever Rebels may wish to pretend to be interested in buying it to gain Ellam's confidence.)
An added large "inducement" or bit of persuasion will get the Rebels access to the Droid; Ellam will throw it free into any deal to purchase the X-wing.
Caniphants
These four-legged creatures make excellent guard animals. They are dog-like with tapered snouts that are very sensitive to smells. They are not friendly at all. The only way past them is by combat.
DEXTERITY 3D
PERCEPTION 3D
STRENGTH 2D
Size: About .75 meters high; 1.2 meters long.
Combat: The Caniphants attack with a bite, doing 2D+1 damage.
Skulking About Ellam's
If they have not gotten the information they are looking for openly, the Rebels can sneak into the lot after hours. They will have to contend with some dog-like guard creatures and small mouse Droids that regularly patrol.
The mouse Droids are modified MSE-5 general purpose Droids, similar to the ones used as messengers on Star Destroyers. They scurry among the vehicles constantly searching for intruders. If they detect anything larger than rat-sized, they signal the Caniphants and a beeper on Ellam's wrist comlink. Ellam will arrive with his Gamorean bodyguard to investigate within about ten minutes.
The Droids can be jammed, but the jamming device takes time and equipment to build. The equipment is available through a patron at Shilley's, or the Rebels can make their own contacts (Moderate streetwise roll). Once they have the proper equipment, the builder must pass a Difficult Technical roll to build the jammer.
MSE-5 General Purpose Droid
DEXTERITY 3D
KNOWLEDGE 2D
MECHANICAL 2D
PERCEPTION 3D
Search 4D
STRENGTH 2D
TECHNICAL 2D
Security 3D
Equipped With:
Electrophotoreceptor
Auditory sensor
Holorecorder
Retractable fine manipulator with stun attachment (damage code 1D, stun damage only)
R2-D0, I Presume
In the storage room, Tiree's astromech R2-D0 (Artoo-Deo) chirps and whistles his protests over being demobilized and his concern over Tiree. He will recognize the Rebels from their previous encounters, and his dour and urgent chirps will turn to whistles of delight over being found.
Deo (as the Droid is called) lies on its side after an unsuccessful attempt to move using only its retractable tractor leg. Its other legs lean up against the wall of the storage room and must be reattached.
The Rebels can put Deo into the X-wing and take off, but it must be done carefully lest they alert the city authorities. They can fly to the burned-out section of the city and hide it in one of the buildings. Now they must extract the information from Deo to find Tiree.
At your discretion (and especially if the Rebels have had an easy time of it up till now), you can have the Rebels attacked in the lot. The offenders can be the Nebula Masters, police, or Ellam's Gamorean guards, whichever are more logical.
Episode Three
Tiree's Tale
Summary
With Deo in hand, the Rebels follow a line of clues back through Shilley's, eventually leading to the small Rebel band on Questal who live in fear of their very lives. There they finally get to meet Tyerle and hear the tale of Tiree's arrival and his adventures on Questal.
The Deo Tapes
The Rebels may hope to get a record of Tiree's actions by activating Deo's memory. When requested, Deo chirps excitedly. His lights flash and he spins his top — and then he falls silent.
Ellam's mechanics have jumbled Deo's memory circuits, erasing many of them. If a Rebel makes a Difficult Droid programming and repair roll, he will diagnose the problem and retrieve what Deo still remembers. After several minutes' work, the following holo-images appear:
-
An attractive Morganian woman sitting behind a desk looking very businesslike. (Shilley.)
-
An attractive humanoid woman with very dark hair and eyes. She appears very worried and sad, but suddenly looks up and a radiant smile breaks on her face. She starts to rise with arms extended, when the image sputters and fades out. (This is Tyerle and her reaction upon first seeing Tiree. If the players don't recognize her as the woman their characters saw at the parade, give the Rebels a Moderate Perception roll to remember.)
-
A rag-tag group of people assembled in a dimly-lit area, some faces fade in and out. In the foreground at one point is the image of the back of a man dressed in a Rebel uniform: Tiree; he is having an argument with another man ... flicker ... fade out.
The Rebels can replay these scenes as often as they like, but the Astromech Droid cannot change, augment or intensify the images because of the damage to his memory. After a few moments of this, Deo will begin beeping impatiently. He is annoyed at his inability to remember; he also wants to go out and find Tiree as quickly as possible.
Deo's personality hasn't changed much since the "Rebel Breakout" adventure. Refer to the guidelines on page 103 in the rules book. Deo's attributes and skills are detailed in the pull-out section. In this adventure, Deo will be obsessed with finding Tiree. The symbiotic relationship between them is strong and Deo does not want to have to break in a new master. But, being a Droid, he does not understand subtlety. Left on his own, he would travel from building to building throughout the city, pushing open doors and scanning the premises — completely oblivious to the protests of the inhabitants.
First Things First
The Rebels have three choices: they can attempt to find the black-haired woman, find the group Tiree was speaking with or go back to Shilley's. The last is the most likely (or at least the easiest).
Back at the bar, the Rebels can pick up their interrupted conversation with Shilley. The Morganian immediately recognizes Deo; the Droid accompanied Tiree when he came to the bar looking for information about the Imperial Palace. Shilley never went to the palace; as much as it pained her to lose a commission, she suggested that Tiree try to deal with Turf Boss Mosh Pelkan.
If Shilley and the Rebels are getting along, she tells them about a party Pelkan is giving that night and offers to take them on her invitation. She doesn't want to know what the Rebels are after, but they might like to know that Pelkan's parties attract a wide variety of people ... including members of the Imperial Security Bureau. She will also suggest that the Rebels do something about their outfits.
"It is a costume gala, darlings."
If the Rebels haven't established good relations with Shilley, they will have to cross her palm with some cold hard credits before she will give them the information. It will take quite a bit of money to get her to bring them in on her invitation; otherwise, they will have to find their own way in.
Partytime
Mosh Pelkan lives in the large round penthouse of the luxury hotel he operates in his district. Entry is via lifter platform, a small round repulsorlift that moves only vertically. The Gamorean bodyguards check invitations on the ground and the guests rise to the penthouse.
Once in the lobby, more armed Gamorreans scrutinize the guests, subjecting any suspicious-looking ones to a scan for blasters or other weapons. The Rebels will have to make Easy con rolls to avoid the scan; if anybody fails, the guards will scan the entire party. If they find any weapons, the Gammoreans will be annoyed; it will take a Moderate con to convince them to let the party in (without weapons, of course).
Gamorrean Guards
DEXTERITY 3D
Blaster 3D+2
KNOWLEDGE 1D
MECHANICAL 1D
PERCEPTION 2D
STRENGTH 4D
Brawling 4D+2
TECHNICAL 2D
The smooth, 150-meter trip to the penthouse will give the Rebels a chance to admire Pelkan's headquarters. The luxury dwelling is a diamond in a junk heap, and the buildings surrounding it pale in comparison. Shaped like a crystal mushroom, the transparent walls allow for maximum view and maximum protection (they are made of the same material as Star Destroyer viewports).
The mushroom cap of the building is Pelkan's private dwelling, literally a mansion in the sky. Pelkan does himself very well. The multi-floored dwelling sports the finest artworks from at least 16 sectors, including a rare Bespin gas gem with its constantly shifting interior.
When the Rebels arrive the party will be in full swing. There are creatures from at least a hundred planets in all shapes and sizes.
The Guests
The party is filled with minor NPCs and local toughs and gangsters. You may play them any way you wish. Some include:
Underworld Recruiters: They come in all shapes and sizes. Some are looking for new blaster talent and will approach any Rebel who handles himself well. Others seek attractive members of any race to entertain clients.
Self-Important Toadies: These are gangster lieutenants and bodyguards who try to impress members of the opposite sex with their importance. They also try to show how tough they are by trying to intimidate people larger than they.
Golddiggers and Gigolos: Usually very attractive and charming, but not too bright, these people live by attaching themselves to rich and/or powerful people. The are experts are flattery and con-artistry.
Important Personages
There are three NPCs the Rebels should meet during the party:
Mosh Pelkan
Anyone who visits Pelkan's home planet of Mephitis will understand why the race never developed noses. Mephitis has the major distinction of being the only planet whose ambient atmospheric aroma is offensive to all races save its own. Mephitisians have two horn-like projections coming out of their heads that are sensitive to air movement and vibrations.
These purple-tinged humanoids are very dextrous and can use their four-arms simultaneously. Their black eyes are very small and covered with clear lids, to restrict exposure to Mephitis' obnoxious air, and their upper lips flap over to protect their mouths.
When he arrived on Questal, Pelkan's planned to become a prospector, but soon found that he could turn a better profit importing certain contraband items for other prospectors. His well-established powerbase earned him a district of the city when Moff Bandor came to the planet.
Though greedy, Pelkan likes his luxurious lifestyle and will do little to endanger it. He will sell the Rebels information about the Moff, if they can convince him that they are not undercover Imperial Security Bureau agents.
Mosh Pelkan
DEXTERITY 4D
KNOWLEDGE 3D
Bureaucracy 3D+2, streetwise 4D
MECHANICAL 2D
PERCEPTION 3D
Bargain 5D, con 4D+1
STRENGTH 2D
TECHNICAL 2D
Ref Mawber
The Imperial Security Bureau is everywhere. Moff Bandor learned from the Emperor's example: have spies everywhere. Bandor has a network of spies throughout the planet. At this party, it's Ref Mawber.
Mawber uses his facile tongue and good looks to infiltrate and report on the Turf Bosses. When Tiree showed up at Pelkan's looking for information, Mawber recognized him from reports filed by his friend Mar Barezz (see "Rebel Breakout" in the rules book for details). He informed the Moff's security officers; when Tiree entered the palace, they were there waiting for him.
Since the Rebels are strangers on Questal, Mawber will be interested in them. He introduces himself as a rich merchant's son who hasn't got time for the family business. He happily imparts useless, mildly treasonous-sounding rumors and information to them, hoping to provoke an equally treasonous response. If they bite, he will report details of the conversation to the Moff.
Ref Mawber
DEXTERITY 3D
Blaster 3D+2
KNOWLEDGE 2D+2
Bureaucracy 4D, streetwise 3D+2
MECHANICAL 2D+2
PERCEPTION 2D+2
Con 4D
STRENGTH 2D
Brawling 3D
TECHNICAL 2D+2
Lanni Peggann
Ref Mawber is not the only undercover operator at the party. Lanni Peggann, posing as a servant, noses around for the Alliance.
If the Rebel characters are well-known throughout the Rebellion, you can give Peggann a Perception roll to see if she recognizes them. Determine the difficulty of the roll by your estimation of the Rebels' fame. Even if she does recognize them, Peggann knows how important and difficult maintaining a cover can be, so she will not blow her cover unless absolutely necessary.
Lanni Peggann
DEXTERITY 3D
Blaster 3D+1
KNOWLEDGE 2D
MECHANICAL 2D
PERCEPTION 3D
Con 3D+2
STRENGTH 2D
Brawling 3D
TECHNICAL 2D
Chit Chat
A steady flow of hors d'oeuvres, drinks, and chatter in about 16 alien tongues provide an undercurrent to the music of Mirt Alpitt and the Dust Storms (their name belies the soft, almost classical repertoire they feature).
The party will be in full swing when the penthouse takes off. The entire mushroom cap detaches from the tower, and powerful repulsors lift the penthouse into the air, where it begins a stately tour of the city. The mansion will stay aloft until the wee small hours of the morning, coming back to dock just before dawn. This cuts off any easy escape route for the Rebels (though they can't yet see anything to escape from).
In addition to the information gleaned from conversations with Pelkan and Mawber, the Rebels can pick up rumors and information by mingling with the other partiers.
-
"Moff Bandor is one of the greatest leaders, life-quality on Questal has so improved." (False, except for those who started out rich and played along to stay that way.)
-
"The Moff wields the Force as well as the Emperor." (False, but the person will describe how they saw Bandor "melt an assassin." They never saw it and they shouldn't believe things they read at the market check-out scanners.)
-
"The Rebels have been wiped out on Questal and are surrendering all over the Empire." (False, but the Rebels would be unwise to get involved in a debate about it.)
An Evening's Entertainment
There are a lot of rooms in the floating mansion for the Rebels to investigate. (See the map in the pull-out section.) They will find nothing untoward, just a lot of jewels, credits, objets d'art. Nothing about Tiree or where to find him.
If they spend too much time snooping about, throw a couple of drunken guests, servants, Droids, and security guards at them, requiring con, hide/sneak, or other skills to fool or avoid.
When they tire of the unsuccessful search, or if they seem content to stay at the party without searching, read:
A few hours into the party, Pelkan takes over the microphone and announce that the evening's entertainment is about to begin. An excited buzz runs through the crowd; Shilley gives a small shudder.
Pelkan continues: "During this time of celebration for our magnificent Moff, the city is alive with entertainment. We are here to drink to his health and wish him well ... even if he can't be here to join us. But when he is here, the Moff delights in our little tournaments."
The crowd starts to move to the perimeter of the large dance floor.
"And tonight we have a special match-up, just for all of you, my special friends!" Cheers ring out, as the furniture in the center of the room rises to the ceiling and the floor irises open.
The main attraction of the evening is a battle to the death between Pelkan's champion, Cromag, and two challengers. The fight takes place in the round arena, with floating metal discs ranging in size from one to two meters across. At some point during the evening, one of the Rebels will enter the arena to do battle with Cromag. To give them a chance to evaluate their opponent, read to them the following description of the fight, embellishing where necessary.
The lights dim in the rest of the room and come up on the arena. Pelkan speaks. "Right here — tonight — we have a battle royale." The discs on the bottom of the arena begin to float in the air and move slowly around the arena.
Suddenly part of the arena wall moves aside and in walks a humanoid. He is two-and-a-half meters tall and shaped like a "V", with overdeveloped shoulders and arms. He walks with grace to the center of the arena. Though he is dodging the discs, he makes it appear that they are getting out of his way. The audience murmurs "oohs" and "aahs" of appreciation. "My friends," continues Pelkan. "Cromag!"
The giant raises his hands in the air, bringing forth a loud round of applause from the throng.
Two more doors slide open and in walk a Gamorrean and a Wookiee. Even the Wookiee is dwarfed by Cromag. All three combatants are dressed in abbreviated costumes, and carry no obvious weapons. Wall panels in the arena slide back, revealing a variety of weapons: gaffi sticks, vibroaxes, vibroblades, blaster pistols.
The match begins. The battle is fought from the repulsor discs. No one touches the floor.
The reason becomes apparent when, while hanging off the side of a disc, the Wookiee's foot brushes the floor. He gives off a pained scream as a loud "crack!" sounds and the whiff of burned fur wafts through the air. The floor is electrified.
The first victim is the Wookiee. Cromag leaps onto a rising disc and then backflips off onto the Wookiee. He pinions the Wookiee's head between his legs and, with a seemingly effortless flex, snaps the Wookiee's furry neck.
The Gamorrean grabs a blaster off the wall and fires, but it is empty. He then grabs a gaffi stick and jumps across the discs to Cromag. Cromag nimbly leaps out of range onto another disc and then another. With powerful legs, he pushes the first disc into the Gamorrean, who is forced off the disc, just managing to catch onto the edge at the last second. He hangs there while Cromag approaches. With deliberate slowness, Cromag stomps on the Gamorrean's fingers. The creature falls to the floor with a shriek, crackle, rising smoke and then death.
The crowd loves it.
Rebel Challenge
There are two action scenes likely to occur at the party: one or more of the Rebels end up in the arena and battle Cromag, and, following that, the Rebels escape from the mansion.
The question arises: Why would the Rebels get into the arena? The short answer is, because you force them in, or con them into wanting to go in. Here are some examples:
- Pelkan will not give them any information or help unless they can defeat Cromag.
- The Rebels are recognized, captured and thrown into the arena for the delight of the party.
- The Rebels, thinking they are in danger from Pelkan or Mawber, offer a challenge in hopes of getting their hands on a few weapons.
- In defending Shilley's honor, the Rebels insult another guest and are put in the arena.
- The Rebels want to get into the arena.
While the Rebels are watching the fight, give each a Moderate Perception roll. Anyone who is successful will notice a blaster with an ornate handle: it is Tiree's.
The Battle in the Arena
Combat starts out as hand-to-hand. Cromag has absolute confidence in his ability to kill anyone with his bare hands, so he does not go for weaponry unless his opponent does so first. Besides which, grabbing at weapons is not necessarily a good tactic: not all of the weapons are operational.
To make the game "more interesting," Pelkan has arranged that half the blasters have no power packs, half the vibroaxes and vibroblades are inoperable, and half the gaffi sticks cannot be removed from the wall.
The battle in the arena involves a lot of jumping, leaping and brawling.
- Jumping from one disc to another takes an Easy climbing/jumping roll.
- Getting into position to jump on an occupied disc takes a Moderate Dexterity roll.
- Jumping onto an occupied disc takes a Moderate climbing/jumping roll. Afterwards, the two combatants make opposed Dexterity rolls. The loser must make a Difficult climbing/jumping roll to jump onto an empty disc; if he fails, he falls to the floor.
- Grabbing a weapon off the wall takes a Moderate Dexterity roll. Which weapon is available at a given moment depends on the roll of a six-sided die:
3-4. Vibroblade 5. Vibroaxe 6. Blaster
After the first roll, roll again: on a roll of 1-3, the weapon is inoperable. If the Rebel makes a Difficult Dexterity roll, he has managed to get to the gun suspected to be Tiree's. He may then retrieve it off the wall with an Easy Dexterity roll. This weapon is operational.
- Falling: The floor of the arena is electrified (damage code 3D+2). Each round a character is in contact with the floor, he takes the damage listed above; in addition, he must pass a Moderate Perception roll to avoid being paralyzed by the current. Even if unparalyzed, any actions a character takes while on the floor suffer a -1D penalty due to the shock.
- Getting Out: Activating the exit doors from the bottom of the arena takes a Moderate Mechanical roll and one uninterrupted combat round to perform.
Cromag
DEXTERITY 4D
Melee 4D+2
KNOWLEDGE 2D
MECHANICAL 2D
PERCEPTION 2D
STRENGTH 5D
Brawling 5D+1, climbing/jumping 5D+1
TECHNICAL 2D
Victory
If the Rebel manages to defeat Cromag, Pelkan flies into a rage and sends for his guards. They are humanoids (Gamorreans can put such a damper on a swanky party) and armed with standard blasters.
Guards
DEXTERITY 2D
Blaster 2D+2
KNOWLEDGE 2D
MECHANICAL 2D
PERCEPTION 2D+2
STRENGTH 3D
Brawling 3D+1
TECHNICAL 2D
Game Chambers Adventure Script
The following script opens the adventure. Your gamemaster will tell you which part (or parts) to read.
GM: Crowds of people mill around the spaceport, but none seem to have pierced your disguises.
1st Rebel: Do you want to tell me again why we're wearing these stupid outfits?
2nd Rebel: Because we have to get on planet undetected.
3rd Rebel: Couldn't we just fly in?
4th Rebel: With what? You heard what the General said when we asked for a shuttle: "I'm sorry gentlemen. While we can't stop you from going on this wild Mynock chase, we won't give you any equipment. The Alliance can have no part in this."
5th Rebel: Right. He couldn't give us anything to bring.
6th Rebel: He had good reasons. Tiree disappeared some days ago after flying off on his own "wild Mynock chase." No one knows why. He might even have been captured by the Empire. High Command can't afford to send a rescue party after every Rebel who takes it into his head to go off on a mission of his own...
3rd Rebel: That's why we're here.
4th Rebel: Right. To rescue a guy who's more trouble than he's worth.
3rd Rebel: That's not fair.
4th Rebel: Oh no? Have you forgotten our little debacle on Bothan's Planet? We hadn't even joined the Alliance yet and he almost got us killed.
2nd Rebel: It wasn't his fault. The Imperial Security Bureau had his name; he had to go under cover.
1st Rebel: Does he still have that stupid R2 unit with him?
4th Rebel: Last report had Deo with him. And the Droid wasn't stupid. He had enough sense to lead us to Tiree.
1st Rebel: You obviously have a selective memory about what happened. The Droid also got us into a lot of trouble.
4th Rebel: Well, if you want to be technical...
1st Rebel: I do.
5th Rebel: Pipe down, you two. This mission's going to be hard enough without your bickering. We had better hope that Tiree is wearing his locator pendant or we'll never find him.
6th Rebel: If he's not, we'll have to try a bar called "Shilley's." A friend in Intelligence tells me that's the place to buy info on Questal.
3rd Rebel: Is that the same friend who promised you there'd be only light resistance when we raided Pyros? I still have the bite marks I got during that fiasco...
2nd Rebel: Shhh. We're coming up on Customs. Somebody's staring at us. Try to act like tourists.
3rd Rebel: I left my plaid pressure suit back at Headquarters.
Pelkan's Mansion
Level 1 Party Area
![Level 1 floor plan diagram]
Level 2 Guest Quarters
GQ - Guest Quarters
![Level 2 floor plan diagram]
Side View
![Side view diagram of mansion levels]
Level 2 Executive Level
![Level 2 Executive Level map]
Level 1 Office Level
![Level 1 Office Level map]
Level -1 Security Center
![Level -1 Security Center map]
Level 3 Bandor's Private Quarters
![Level 3 Bandor's Private Quarters diagram]
Bandor's Palace
Side View
![Bandor's Palace side view diagram]
Level 3
Pelkan's Private Quarters
- Arena
- Private Compressed Steam and Massage
- Dining/Bar Area
- Bedroom
- Lounge/Living Room
- Data Retrieval Station
- Walk-in Security Vault
- Office
- Armory
- Guards' Lounge
- SQ: Servants Quarters
- Waste Reclamation Center
- Apparel Cleaning and Repair Center
- Food Synthesis Center
Level 4 Engine Level
- Arena
- Repulsor Engines
- Windows
- Emergency Room
- Escape Hatch
- Docking Bays (Skiffs and Speeders)
- Retractable Blast Door
- L. R.: Locker Room
- Med-Center
- Windows
- Fighters' Warm-up and Ready Room
Pull-Out Templates
Moff Bandor
DEXTERITY 2D
Blaster 3D+2, brawling parry 3D, dodge 2D+2, melee parry 2D+1, melee 3D+1
KNOWLEDGE 2D+1
Bureaucracy 4D, streetwise 2D+2, survival 3D, technology 3D
MECHANICAL 2D
PERCEPTION 2D
Bargain 2D+2, command 4D+1, con 3D, gambling 2D+1, hide/sneak 3D, search 3D+1
STRENGTH 4D (5D for resisting damage)
Brawling 4D+1
TECHNICAL 2D+2
Computer programming/repair 3D, security 4D
Description: A vital man with a weightlifter's physique and gruff good looks. Blue eyes and close-cropped black hair.
Equipment: Heavy blaster; Imperial uniform; wearing equivalent of stormtrooper armor under uniform (already accounted for in stats).
Background: Worked his way up the ranks through hard work, bootlicking and treachery. Now he has the power he wants ... almost.
Personality: Rough around the edges; very physical; sadistic, power-hungry and ambitious.
Quote: "Those strong enough to take it deserve the power."
R2-D0
DEXTERITY 2D
Electroshock prod 4D, dodge 3D
KNOWLEDGE 2D
Planetary systems 7D, survival 5D, technology 6D
MECHANICAL 4D
Astrogation 8D, starship gunnery 4D, starship piloting 5D, starship shields 4D
PERCEPTION 2D
STRENGTH 3D
Lifting 4D
TECHNICAL 4D
Computer programming/repair 7D, droid programming/repair 5D, repulsorlift repair 4D, security 6D, starship repair 6D
Physical Description: Has the typical shape of the R2 series: domed head, cylindrical body, two side legs and one retractable center leg.
Equipment: Infrared receptor, electromagnetic-field sensors, holographic projector, computer link-up jack, auditory receivers, grasping claw, laser welder (1D+2 damage code), electroshock prod (3D damage code, stun damage only).
Personality: Stubborn, obsessive, devoted to Tiree and will do anything to be reunited with him.
Tyerle
DEXTERITY 2D
Blaster 3D+2, dodge 4D
KNOWLEDGE 3D
Survival 3D+2
MECHANICAL 2D
Repulsorlift operation 3D
PERCEPTION 2D
Bargain 2D+2, search 3D
STRENGTH 2D
Lifting 3D, stamina 3D+1
TECHNICAL 1D
Medicine 3D, repulsorlift repair 2D+2
Physical Description: Attractive, healthy woman. The work on the farm has made her once trim figure more sturdy, but her face is still breathtaking.
Equipment: None.
Background: Sister of Tiree; married Rogan and came to Questal to homestead; lost farm during the Ardanium Rush.
Personality: Practical; not given to fanciful flights; first priorities always go to family.
Quote: "Leave the business of the Rebellion and the fight against the Empire to others. We have crops to harvest."
Tan Shilley (Template)
DEXTERITY 3D+1
Blaster 3D+2, dodge 4D
KNOWLEDGE 2D+2
Alien races 3D, bureaucracy 3D+2, cultures 3D, languages 3D, streetwise 3D+2, survival 3D+1
MECHANICAL 2D
Repulsorlift operation 2D
PERCEPTION 4D
Gambling 5D, hide/sneak 4D+1
STRENGTH 2D
Brawling 2D+2, climbing/jumping 3D
TECHNICAL 2D
Medicine 3D, security 2D+1
Physical Description: Attractive Morganian woman, slim, lithe, pale skin and bright eyes.
Equipment: None.
Background: Left her home planet to become a travelling entertainer/dancer. She came to Questal to run a saloon during the boom years of the Ardanium strike, has been here ever since.
Personality: Intelligent but cagey. Appears to be stupider than she is, but never reveals more than she chooses.
Quote: "There's no such thing as an unhappy customer at Shilley's."
Defeat
If the Rebel(s) appears to be losing, the other Rebels can jump in to try to help him. The result is much the same: Pelkan will alert the guards.
If the Rebels are helpless, they will get help from a surprise guest. Peggann has one grenade and a hold-out blaster hidden in her uniform. If she is impressed with the Rebels' performance, she will lob the grenade at Cromag. Even if she misses, the resulting explosion will cause a lot of confusion and panic, giving the Rebels a chance to try for an escape. Having blown her cover, she will attempt to accompany the Rebels.
The Chase
The guards will chase the Rebels through the mansion until capture is effected or the Rebels get out. There are several ways the Rebels can get off the mansion:
- Get to the repulsorlift station and perform a Difficult Mechanical roll to quickly modify the lift to lower them to the ground.
- Make it to a emergency station and grab a Repulsor vest. The vest will slow down a fall for a safe landing.
- Jumping into thin air. If it looks like the Rebels are about to be captured, you can have another vehicle (like a skiff or sail barge) pull up, the passengers and crew curious about the activity on the floating mansion. The Rebels will have to smash or shoot their way through the window and then make a Difficult jumping roll to make it from the floating mansion to the other vehicle.
Remember Me?
As Shilley was the one who brought them into the party, she's in a bit of jeopardy herself. When, after a long, harrowing chase or running gun-battle, the Rebels reach their objective — the repulsorlift, the escape station, whatever — Shilley is standing there waiting for them. She asks "What took you so long?" sarcastically, and then calmly begins shooting at anyone chasing them (she "borrowed" the gun from a guard who was paying too much attention to her torso and not enough to her fists).
If Peggann does not accompany the Rebels, you can arrange for her to escape and meet them on the ground.
What a Waste!
Once safely away, Peggann will introduce herself to the Rebels and offer to take them to a Rebel hideout. If the Rebels are suspicious or reluctant to go with her, she will remind them that Pelkan is a special friend of Moff Bandor and that word will be out to pick them up ... or have them shot on sight. They need a place to hide.
Shilley will insist that they go with Peggann. Shilley is more than a little annoyed at the Rebels; she knows that there is probably a warrant out on her and she is going to have to get off-planet quick. If the Rebels left Deo at Shilley's, she will send word to a trusted employee to meet them with the Droid.
Once out of the city, Peggann will lead the Rebels through the Waste to a cave hidden by some sparse brush. They will descend into a cavern where the Rebels have established a sanctuary. The Rebels will recognize the cavern as the scene from Deo's holo-projection.
The Rebels will also find a woman with lustrous black hair accompanied by a passive-looking man. These are the same people they saw at the parade: Tyerle and Rogan.
Tyerle's Tale
Once introductions are made, Tyerle will tell her tale. Read aloud:
"We have lived in fear of Moff Bandor for years now. Our land was taken and friends arrested ... or just disappeared.
"We took to these caves to save ourselves and try to keep the spirit of the Rebellion alive. Peggann here was the most active among us. We have often thought of just giving up: we hear every day about how Rebels throughout the galaxy are surrendering to the Empire.
"My husband," her hand strays to the hair of the passive man, "Rogan also tried to keep our spirits up. He felt he needed one major stand to prove that Bandor was not all-powerful. He planned to break in to the Imperial palace and destroy the computer records of Rebel activity on Questal and in the rest of the quadrant. With those records destroyed, we could move about freely and help the Alliance.
"When he didn't come back, I panicked and did the only thing I could. I called on my brother Tiree. He came, of course. By the time he arrived, Rogan was found wandering the street as you now see him. Tiree felt he had to find out what did this to my husband.
"Please, won't you help find Tiree and whatever did this to Rogan?"
The Rebels don't have much choice, do they? They came to find Tiree and the only place to look is the palace.
Episode Four: Bandor's Palace
Summary
The Rebels get in and explore the Imperial mansion. It is heavily guarded, full of high-tech defenses. The Rebels discover that Bandor promised a powerful weapon to the Emperor to fight the Alliance; they also learn that, to find Tiree, they must face the Game Chambers.
Bandor's Gala
In the center of the city, a giant crown of ebony spikes shoots skyward over the rest of the buildings. Moff Bandor had his palace designed in the style of Imperial City. Thin, sharp spires, almost needle-thin in proportion to their height, may resemble the graceful towers of the Emperor's palace, but they are miniatures in comparison.
The palace is surrounded by a 15-meter high wall. Anyone planning to blast through this perimeter will find it as tough as the hull of the Millennium Falcon (Very Difficult demolitions test with at least two thermal detonators). The wall is not impossible to scale, but will take a Difficult climbing roll if someone attempts it unaided. If the Rebel has special climbing equipment, you can adjust the Difficulty downward.
The palace serves as Bandor's home, as well as the seat of government on Questal. On a normal business day, people are always moving in and out. Two officers man the gates, checking all visitors for weapons and verifying their appointments. There are six Imperial stormtroopers armed with heavy blasters in an alcove near the gates, ready to join in against intruders.
A garrison of 100 standard stormtroopers occupy the palace, providing security and an intimidating presence. They patrol the interior of the perimeter wall and man the look-out towers around the clock.
Stormtroopers
DEXTERITY 1D
Blaster 3D, brawling parry 3D, dodge 3D
KNOWLEDGE 2D
MECHANICAL 2D
PERCEPTION 2D
STRENGTH 3D (for damage, 2D otherwise)
Brawling 3D
TECHNICAL 2D
Weapon: Blaster (damage code 4D)
Skills and attributes already adjusted for armor.
The courtyard area is also monitored by heat-sensitive cameras. The cameras are wall-mounted and rotate constantly, scanning the entire courtyard. The Rebels can attempt to slip past the cameras; this requires three Easy hide/sneak rolls. In addition to the sensors, any infiltrating Rebel will have to sneak past or neutralize at least three stormtroopers on patrol.
But there is another way in.
The Courtyard Carnival
On the day following Pelkan's party, Kersh Lauschner's Traveling Animal/Acrobatic Arcadium will perform in the courtyard of the palace. The carnival is open to the public; it is one of the few chances the people of Questal will have to see the palace that their tax credits built up close.
The Arcadium's performance provides an excellent opportunity for infiltrating the palace. There will be a lot of civilians wandering around the courtyard, making the guards' jobs very difficult indeed. In addition, many of the workers from the palace will be at the carnival, leaving the building almost deserted. Even Moff Bandor himself will be attending the carnival all day, with his usual entourage and six stormtrooper guards.
Ingenious Rebels may strike a deal with Lauskner to pose as performers in the carnival. It would normally take a Very Difficult Bargain or Con roll to convince Lauskner to let the Rebels join the Arcadium. However, Lauskner is a secret Rebellion sympathizer; if the characters admit to being Rebels, the Difficulty is only Moderate.
If they convince Lauskner, let the players decide what role their characters take on in the carnival. The following descriptions of a few of the featured performers may help them decide.
Thew Marstan: Every carnival must have a strong man. In a galaxy where creatures with Strengths of 5D are not uncommon, Marstan is a hit because of his size. Just under one meter in height, he has a Strength rating of 7D. His act consists of bending metal bars in a knot, lifting a platform with members of the audience on it over his head, and so forth. No one has an explanation of Marstan's strength and he never talks about it.
Madame Suwajda: No one is sure whether this attractive fortune teller can actually look into minds or is just a good guesser, but her readings of people and their thoughts are very accurate. Actually, she has a remarkably high Perception (5D; all other skills and attributes 1D), and she can read people's expressions like a book.
Sheneel: There may be no more graceful creature in the universe than Sheneel. The spotlights on her turquoise iridescent skin mesmerizes an audience while her long silver hair moves in tandem with her body. If persuaded, she can distract guards for the Rebels.
The Flying Delmarijes: This group of lithe humanoids perform acrobatics, leaping from floating disks and swinging from anti-grav rods like trapezes. A dextrous Rebel could become part of this act, or use it to swing over some guards to the main door of the palace.
Chirloff: As head clown, Chirloff hires and fires the funnymen of the carnival. While Chirloff is humanoid, the clowns come from all races. They get into make-up and garish costumes and meander around the carnival ground, performing juggling, sleight of hand, and slapstick.
This Must Be the Palace
The front door to the palace is recessed and guarded. Someone will have to divert the two stormtroopers to give the Rebels a chance to get near the door and try to activate the controls. If one of the Rebels provides the diversion, they will have to make an appropriate Difficult roll for it to work. For example: A Rebel could attempt to juggle four vibroaxes to keep the guards interested. That Rebel would have to make a Difficult Dexterity roll.
It takes a Moderate Security roll to override the electronic lock and get the door open. The Rebels can make the attempt several times, but the diversion described above must be kept up or the guards get Easy Perception rolls to notice the lockpickers.
Once inside the palace, the Rebels may roam around and investigate to their hearts' content. Sensor alarms are noted on the floorplans in the pull-out center of this book. They can be bypassed with Moderate hide/sneak rolls, or each deactivated with Moderate security rolls. If the Rebels deactivate six or more sensors, the guards in the security room will raise the alarm and stormtroopers will begin searching the palace.
During the Rebels' tour, you should roll each ten minutes of playing time to see if they have any encounters. First, roll a six-sided die. If the result is a six, there is an encounter. Re-roll the die to determine what kind. You can either roleplay out the encounter or just have the Rebels make the roll indicated.
-
Stormtrooper (Difficult con roll): The trooper is on routine patrol.
-
Messenger/File Droid (no roll): From around the corner comes a protocol Droid modified to carry memory discs in a tray attached to its waist. The Droid greets the Rebels with a nod. It will answer questions if the Rebels can produce identidiscs. If they can't, the Droid announces that they are unescorted in a restricted area; it will have to report them. With another polite nod, it moves on. When it becomes convenient, the Droid will report the Rebels' presence, unless, of course, they deactivate it (Moderate Droid repair roll or more violent methods).
-
Bureaucrat (Moderate con roll): This fussy humanoid pours over a data storage pad while traipsing from office to office. If they fail their con roll, the Bureaucrat will demand to see the Rebels' identidiscs. If the Rebels cannot produce them, he will rush to the nearest emergency station (located at most corridor intersections) to raise the alarm. If they dispatch the Bureaucrat, the Rebels can take his indentidisc, allowing access to the Executive and Office levels.
-
Worker (Easy con roll): This Maintenance Worker is hunting down a defective Droid. If the Rebels' con roll works, the Worker will buy their story, whatever it is. If not, he will try to get away and raise the alarm. This worker's identidisc allows her access to the Executive, Office, and Security levels of the palace.
-
Secretary (Very Easy con roll): The Secretary is trying to finish some filing and get down to the carnival. The Secretary is very friendly (almost flirtatious) and will assume the Rebels belong. She has only the most superficial information about the palace; her indentidisc allows her access to only the Office level of the palace.
-
Minister (Very Difficult con roll): This pompous twit immediately demands to see the Rebels' identidiscs. He is not friendly. The Minister carries a wrist comlink with an emergency alarm button on it (Difficult Perception roll to notice). If the Minister presses the button, alarms sound immediately, and six Stormtroopers arrive in 4-8 rounds.
Office Level
The area descriptions below describe activity for a normal business day at the palace. On the day of the carnival, however, the interior is almost deserted, save for the occasional guard or dedicated bureaucrat.
Reception Area: Visitors check in at the main desk in this large open area. Their appointment is verified and a page is called over to escort them to the appropriate office. In a locked desk (Easy security roll to unlock) are a supply of visitor identidisks, allowing access to the Office level only.
Clerks' Offices: These are the cubicles where the minor officials sit at their compudesks, inputting the steady stream of useless numbers and facts that keep every bureaucracy spinning in circles.
Under-Ministers' Offices: The first line of red tape on Questal are the under-ministers, who spend most of their time listening to complaints and nodding sympathetically, while checking the computer tapes for rules they can use to pass the decisions on to someone else. The under-ministers are responsible for Geological Claims, Transportation, Planetary Relations, etc. If the Rebels wish to make an appointment with one of the under-ministers on some pretext or other, the Difficulty of the con roll is normally Moderate, and Difficult on Carnival Day.
Executive Level
This floor contains the offices of the Ministers, the men and women directly answerable to Bandor for the running of the planet.
Ministers' Offices: Nothing here of specific interest to the Rebels, just the usual files about quotas, budgets, junkets, and so forth.
Roll a D6 for each Minister's office they enter. On a 1-3, no one is in the office; on a 4, a Secretary is there; on a 5, a Bureaucrat; on a 6, a Protocol Droid. Use the guidelines above to handle these encounters.
It takes a series of three successful Difficult con rolls to arrange appointments with the Ministers; they are not working at all on Carnival Day.
Bandor's Outer Office
Of course, the largest, most elegant office belongs to Bandor. The Moff's name is boldly embossed on a plaque next to the sliding doors.
The outer office has a Protocol Desk-Droid always in service (since it is built into the desk, it can't move even if it wanted to). The Droid's six arms are always busy operating control panels, inputting data, storing memory discs, and answering incoming signals and calls.
Unless they have somehow managed to gain an appointment (three Difficult con rolls followed by two Very Difficult con rolls, or a number of very expensive bribes); the Rebels arrive here uninvited and unescorted. They have to work very quickly indeed to keep the Desk Droid from raising the alarm.
It is Very Difficult to con the Droid into letting them into the Moff's office: he's not in, and they do not resemble in the slightest the Maintenance Droids who normally clean up around here. It is somewhat easier to simply blast the Droid into slag. The Droid's metal body gives it a Strength of 3D; however, if the Rebels fail to destroy the Droid in the first round, it automatically sounds the alarm in the second, and six Stormtroopers will arrive in four rounds.
Bandor's Private Office
Bandor's desk is completely barren with a mirror-like shine. The chair behind the desk is plush and comfortable; the chairs facing the desk are not.
Allow anyone investigating the desk a Moderate Perception roll. Success reveals a hidden control panel. The panel's buttons activate the usual office equipment — comlink; hidden bar; a data storage pad that pops up out of a compartment on top of the desk; and so forth.
There are three other buttons on the panel which will interest the Rebels more. One swings open a panel in the wall, revealing Bandor's safe. Locating the alarms to the safe takes a Moderate Perception roll. Deactivating the alarm takes a Moderate Security roll. Cracking the safe itself takes a Difficult Security roll; if you don't mind the noise and have access to explosives, it takes a Moderate demolitions roll, but six Stormtroopers automatically arrive four rounds later.
Inside the safe are Bandor's personal memory discs. Most are filled with the Moff's ordinary day-to-day business, but one disc is labeled "Most Secret" and is security-locked, requiring a Moderate computer programming and repair roll to access. The disc contains records of the Moff's communications with a Dr. Lorenz Hurlothrumb about a "wave machine." Apparently, Dr. Hurlothrumb was working at the Imperial Medi-Center, Encephalo-Research Division; the Moff was negotiating with Hurlothrumb to come to work for him. When the Moff promised to allow the Doctor to work with sentient beings, Hurlothrumb accepted. No further information is available.
The second interesting button activates a communication center hidden in the desk. There is no roll needed to operate the center. The latest memory disc can be activated with a Very Easy Technical roll. The disc contains message from Imperial City. The first holo-figure to appear is a middle-level bureaucrat, judging from his dress.
His message deals with getting a message from Bandor through to the Emperor himself. The next message will be of more interest.
Read aloud:
The image of the bureaucrat flickers and dies. A new flicker appears and grows into a large, pale, drawn face. The evil of the Emperor infects everyone around him, and Imperial Advisors soon take on the appearance of cadavers. The slash of a mouth breaks into a hideous grin. "I have looked over the reports you have sent. They are impressive. The Hurlothrumbic Generator could indeed be a powerful weapon. I will bring this to the attention of the Emperor."
In the next message, the Advisor looks almost pleased. "Greetings, Moff Bandor" — his smile is even more hideous than his grin — "the Emperor is most interested in your machine. I will be in your quadrant soon. Please have all information and the prototype ready to transfer to my Star Destroyer. If it is all you claim, the Rebellion will be crushed even sooner than anticipated."
A third button opens the sliding doors to the repulsorlift that travels to his private chambers and down to the security area.
Throne Room: The room is huge to accommodate the large crowds when Bandor holds court. The ceiling is three storeys high, but the dark decor makes it look like it goes on up forever. On the far side from the main doors is an elevated dais, rising up over three meters, upon which stands a single chair. The dais and chair appear to have been carved out of a single piece of black marble. Anyone investigating the dais should try a Difficult Perception roll. If successful, he will notice some hairline cracks forming a rectangle at the back of the dais. Further searching of that area and a Moderate Technical roll will find the catch to the concealed door. The door leads to an auxiliary transmitter of the Hurlothrumbic Generator.
Read aloud:
The dais is hollow, filled by some kind of exotic machine. Light-tubes and what appear to be transmitting dishes point out in all directions, except straight up. The top of the dais is heavily shielded, though the walls are not.
The machine itself is covered with connections, blinking lights and digital gauges, but no apparent controls.
A Moderate Technical or Mechanical roll will reveal that this is some kind of transmitter. Apparently, this machine gets some kind of signal from another machine through cables and light tubes; it sends out the signals through the transmitting dishes. Nothing more is discernible without hours' study.
Bandor's Chambers
Bandor's chambers are designed for ultimate comfort. There is nothing special about the chambers — no secret safes or hidden memory discs — just a decor that speaks about a man who indulges in his own comforts.
Security Level
With most of the guards on duty in the courtyard, only a skeleton crew is on duty here. There are five stormtroopers standing ready, while three technicians watch the monitors. Once summoned, it takes 10 or more rounds for stormtroopers in the courtyard to reach this area.
Communications Room
All communications to the palace come through here and are unscrambled, except for the one marked "private" for Bandor. (If the Rebels did not discover the communiques from the Imperial Advisor in Bandor's private office, then have copies here for them to discover.)
Barracks
The stormtroopers and security personnel live here (Bandor wants to have armed allies nearby at all times). There is nothing special here, other than a half-dozen extra stormtrooper outfits and a few heavy blasters.
Cells
Arrested traitors, suspected Rebels and criminals against the Empire are imprisoned here. At the moment, the only ones incarcerated are some Corellian pirates, compatriots of the pirate back in Shilley's Place. The pirates were already imprisoned when Tiree was brought in. If asked and given a promise of freedom, they will tell the story to the Rebels.
The pirates' leader, complete with eye-patch and outrageous accent, is one Rake Corsail. He tells the tale. Read aloud:
"We was just bringing in some necessities, don't ya know? We wasn't expectin' no trouble; we had made this run a couple dozen times and we had a sweet deal with the docking supervisor at port — 'struth, his men would help us unload the bloody stuff!
"What we didn't know was that there was now a new docking supervisor. See, the last guy had offered us a deal — said he needed money fast, if we paid him in advance, he'd cut 25 percent off the cost of doing business in Questal. Last trip, I forked over enough creds to take us into the next four cycles.
"Stupid of me, wasn't it? What he did was shake down a lot of smugglers for advance payment and then took off for parts unknown.
"Anyway, we were caught. I explained our arrangement to the new guy, but he's one o' them straight-shooting dweebs and he decided to make an example of us. So here we are.
"We had been in stir for a couple of days when your friend was dragged in. There was a lot of talk about how he tried to break in to the palace. Then they took him down through that door. I've seen a couple of people taken in there. None of them ever come back.
"Including your friend. Sorry. I guess he's probably dead, or worse."
Once freed, the pirates will want to leave immediately. How easily the pirates escape depends on the players' decisions. If, after the pirates leave, they are reluctant to investigate the door at the end of the cells, you can have the alarms go off. This leaves them with the choice of fighting their way out or trying the door.
Chases
It is quite likely that, at some point in the palace, the Rebels will become involved in a chase, possibly after tripping an alarm or not killing somebody quickly enough. The front doors will automatically lock and stormtroopers, in groups of five, will comb the palace.
The stormtroopers are out to capture the Rebels, not kill them. They will give fair warning to surrender before they open fire, and their heavy blasters are set to stun. (Bandor's orders: he likes his prisoners alive and kicking.) If a chase ensues, the stormtroopers will try to herd the Rebels into the Game Chambers.
Episode Five
The Game Chambers
Summary
In the Game Chambers, the Rebels become the prey in Moff Bandor's latest hunt. The episode is filled with action, suspense, and danger as the Rebels try to stay alive and foil the Moff's game. If the Rebels are successful, they find Tiree, left to die in some dark corner of the chambers.
Getting Here Is Half the Fun
This is the climax of the adventure—to test the Rebels' mettle in the Game Chambers. There are a number of ways to get the Rebels into the Chambers:
- The Rebels are captured: Moff Bandor, always on the lookout for new prey, has them thrown into the Game Chambers.
- The Rebels are chased into the chambers by stormtroopers.
- The Rebels walk in on their own, to search for Tiree.
Of course, no one can predict what resourceful players will do. It is possible that they will do something completely off the wall—refuse point-blank to enter the palace or possibly even raise a revolt and lead the planet's populace against the Moff (it's happened). In a case like that, you may have to change the entry point of the Chambers, or move the Chambers to an entirely new location (perhaps to the Waste), and come up with a way to lure the Rebels into the trap.
Commencement Address
If the Rebels are herded into the Chambers by stormtroopers, they may well be expecting the traditional Big Speech from the Villain, telling them his evil plans and chortling evilly over their impending doom. Villains do this sort of things all the time—heroes expect it. However, if the Rebels sneak into the Chambers on their own, they will probably be surprised to be immediately captured and subjected to the Big Speech—but such is the fortune of heroes.
When the last Rebel passes through the door, it slams shut. Then a blast door descends from the ceiling, blocking the way back to the Security Level. Then another one descends ahead of them, blocking off the corridor to the Chambers. There are no controls for these blast doors, and the entire room is magnetically sealed—any blaster shots will bounce around alarmingly, just like in the compactor scene from Star Wars IV: A New Hope. The heroes are trapped here.
After a suitable interval, the Rebels hear the Moff's oily voice coming to them through speakers hidden in the ceiling.
Read aloud:
"Greetings, welcome guests. You have been some trouble since your arrival on my planet, but I am happy you are here, none-the-less. I appreciate resourcefulness and courage in an opponent. It's rare to meet such fine specimens.
"I'm a hard-working official and I need relaxation. Hunting is my passion, but there's precious little game here, especially since the prospectors began turning the planet into slag. So I built myself a private preserve, where I can hunt the most exciting game of all—sentient beings, such as yourselves.
"But, I'm afraid to say, even this sport grows tiresome after a while: there is hardly anyone around who can offer me any challenge at all! So I had to make the Chambers more of a challenge.
"You see, the Game Chambers themselves will be trying to kill you as I hunt you down. I have placed creatures, assistants, Droids and... well... special friends in the Chambers. All of them will do their best to kill you before I do. If they succeed, they get their freedom. If they fail, well, let's just say that they are punished.
"As for you... if you reach the end of the Chambers before I catch up with you, you will win. Perhaps there is a way back into the palace from there. Perhaps you can escape. Perhaps not. I make no promises.
"However, I can assure you, if I catch you in the Chambers, you will most assuredly die.
"You can start now."
The far blast door opens. The room you are in begins to fill with a noxious, mustard-like gas, driving you into the Game Chambers.
The Hurlothrumbic Generator
On the map of the Chambers you will see the location of the Hurlothrumbic Generator. At the start of the chase, Bandor will have it turned on. The closer the Rebels move towards the Generator, the more they will feel terror. It will increasingly disrupt their ability to think and act; they will be all but paralyzed by the time they reach the Generator Room.
If you examine the map, you will see concentric circles radiating out from the Generator. Each circle has a number assigned to it. Add this number to the Difficulty Number of any Rebel's action in that area. For example, a Rebel lines up a short-range blaster shot in the area marked "+2". The normal Difficulty for the shot would be 10; because of the effects of the Generator, the Difficulty is increased by +2 to 12.
Note that Bandor can increase or decrease the power of the Generator at will; you can alter the Difficulty Number modifiers shown if you feel Bandor would think the Rebels warranted a greater or lesser challenge.
The Helmets
There is protection against the generator. The hunters Bandor placed in the Chamber wear close-fitting silver helmets. The helmets block the waves of fear altogether. If a Rebel puts on a helmet, he will not be affected either.
The Force and the Generator
After a few moments' exposure to the Generator, any Rebel sympathetic to The Force can attempt a Sense roll; if successful at a Moderate level of Difficulty, he will realize that the feelings of uneasiness are not coming from within the Rebels, but that some external power is projecting them.
A Rebel can also try to block off the effects of the generator using the Force of Will power (see the Star Wars Rules Companion, page 65). The base Difficulty for the attempt is 10, modified by the Generator's Difficulty Modifier. The Rebel must make a new attempt each time he moves into a circle of greater effect. If the Rebel ever fails a Force of Will attempt, all subsequent attempts incur an additional penalty of +5.
Rebel Equipment
What kind of equipment the Rebels have with them in the Chambers depends upon how they got there. If they were captured and thrown into the Chambers, they will be supplied with a Gaffi stick each and a single blaster pistol between them. Rebels who sneak into the Chambers, or who are chased there, have whatever equipment they were carrying when they entered. If the Rebels are heavily armed, you may wish to increase the firepower or number of the hunters.
Tympanic
Template Type: Merc
Loyalty: Self
Height: 1.7 m
Sex: Female
DEXTERITY 3D+2
Blaster 4D, dodge 4D+1, melee 4D
KNOWLEDGE 2D+2
MECHANICAL 2D
PERCEPTION 2D+1
Con 3D+2, hide/sneak 3D+1, search 4D
STRENGTH 2D
Brawling 3D, climbing/jumping 3D+2
TECHNICAL 2D
Weapon: Blaster carbine
Description: Humanoid female, attractive, moves like a dancer/athlete; short-cropped red hair.
Modus Operandi: Tympanic tries to convince the Rebels that she is also a prisoner of Bandor forced into the Chambers. (This may be difficult to put over if the Rebels have discovered the reasons behind the silver helmet she wears, but she will try anyway.) She asks to accompany the Rebels, offering to lead them to safety in return for their protection. If they agree, she will lead them into traps, hoping to attack them when they are helpless.
Hunters of the Chamber
Bandor has arranged for some of the most fierce, most bloodthirsty killers in the quadrant to inhabit the Chambers.
Roll a D6 every time the Rebels enter a tunnel or corridor with a star in it. If the result is 1-3, no encounter occurs; on a 4-6, pick a hunter from the boxes scattered throughout this section.
Miscellaneous Traps
Scattered throughout the Chambers are a few simple traps. They are meant more to frighten the Rebels than do them injury.
Lasertag: A Difficult Perception roll detects the trap's pressure plate and allow the Rebels to avoid it. Otherwise, the Rebels walk into a barrage of low-level automated lasers (blaster skill 2D+1; Damage code: 2D+1). There are two blasters targetted on each Rebel as long as they are in the trap area.
Earthquake Corridor: A Difficult Perception roll avoids the pressure plate that activates this trap. If the lead Rebel's roll fails, he trips the trap. The floor and walls start to rumble and move; rocks and boulders fall from the ceiling and bounce around alarmingly. The Rebels must make Moderate dodge rolls every two meters to stay on their feet and avoid the rocks. If a Rebel fails the roll by 3 or less, he is hit by a rock; if he fails by 4-6, he is hit by two rocks; by 7 or more, the Rebel falls and is hit by D6 rocks. The rocks do 1D+2 damage; combine the damage if a Rebel is hit by multiple rocks.
NIL-8 Assassin Droid
Template Type: Assassin Droid
Loyalty: To Bandor
Height: 2 meters
DEXTERITY 3D
Blaster 4D
KNOWLEDGE 3D
MECHANICAL 2D
PERCEPTION 3D
Hide/sneak 4D+1, search 3D+2
STRENGTH 5D
TECHNICAL 2D
Weapon: Blaster carried in right hand; left hand is a heavy blaster.
Description: Coated with non-reflective black metal, this Droid has a humanoid form, though the "head" looks like a pair of macrobinoculars. The Droid's voice comes out of a speaker in its chest.
Modus Operandi: NIL-8's high Strength and sturdy construction make it almost impossible to stop: ignore Stun results against the Droid. Its favorite tactic is to walk straight out into the open and start blasting.
HASH-19
Template Type: Assassin Droid
Loyalty: To Bandor
Height: 75 centimeters
DEXTERITY 3D
Melee 4D
KNOWLEDGE 1D
MECHANICAL 1D
PERCEPTION 3D
Hide/sneak 3D+2, search 3D+1
STRENGTH 2D
TECHNICAL 1D
Weapon: Whirring vibroblades (damage code 5D).
Description: A gold-chrome metal ball, 75 centimeters in diameter.
Modus Operandi: A featureless floating metal ball about 75 centimeters in diameter, similar to many commercially-available surveillance devices (known as "spy-eyes"). Once it spots its prey, HASH-19 sprouts six arms; the end of each arm is capped by four vibroblades. HASH-19 advances upon its prey, spinning rapidly, ready to turn any organic being into mince meat. Use the Droid's Dexterity for its Speed code, its melee skill for its attack.
Yulcris
Template Type: Merc
Loyalty: To Bandor
Height: 2.3 meters
Sex: Male
DEXTERITY 3D+2
Blaster 4D, dodge 4D, melee 4D
KNOWLEDGE 2D+2
MECHANICAL 2D
PERCEPTION 3D
Hide/sneak 3D, search 3D+1
STRENGTH 4D
Climbing/jumping 4D+2
TECHNICAL 2D
Weapon: Blaster, vibroaxe
Description: A muscular humanoid, Yulcris is ape-like, with a lot of hair and long arms. His eyes are set low in his head, and his nose is almost completely flat.
Modus Operandi: Yulcris will shadow the Rebels, letting the Chambers do his work for him. When there are only one or two healthy Rebels left, he will issue a challenge, offering to fight a single Rebel in close combat, using only his hands or vibroaxe. If the Rebels win, they live. If they lose, they die. He is especially interested in pitting his axe against a lightsaber.
Cralliard the Hunter
Template Type: Bounty Hunter
Loyalty: To himself
Height: 1.95 meters
Sex: Male
DEXTERITY 4D
Blaster 4D+2, melee parry 4D+1
KNOWLEDGE 2D+2
MECHANICAL 2D
PERCEPTION 3D
Hide/sneak 3D+2, search 3D+2
STRENGTH 3D
Brawling 4D, stamina 4D
TECHNICAL 2D
Weapon: Hunting blaster
Description: Well-built humanoid with bald head and deep-set, dark eyes. Dresses in furs and skins.
Modus Operandi: He attempts to pick off the Rebels one by one. He tracks them from behind and then fires from cover, just as they are entering a chamber or trap corridor. If the Rebels turn and give chase, he retreats and comes up on them from another direction. When Cralliard is getting in position, make opposed rolls — hide/sneak roll for him versus search rolls for the Rebels. Subtract 1D from the Rebels' search skill if they are not actively looking for him.
Trap Rooms
Aside from the minor traps and the hunters, to reach the center of the Chambers and the Generator, the Rebels will have to deal with one or more of the Trap Rooms. These are special rooms that test the Rebels' skill and resourcefulness. Each Trap is unique; each provides a different kind of challenge. When the Rebels enter a Trap Room, a blast door slams shut behind them, shutting off their retreat. The Rebels have to pass through or solve the Trap to escape.
The computers controlling the Trap Rooms are programmed not to activate when everyone in the room is wearing the silver helmets.
Props
One of the rooms, the Lasermaze, requires props: a chess or checkerboard and 16 pieces divided into two groups of eight each (black and white pawns or checkers are perfect).
You will also need something to represent the Rebel heroes; Star Wars Miniatures are recommended, but you can also use scraps of paper.
Lasermaze
This room requires the use of the props described above. When the Rebels are ready to enter, set up the board. Place a black and white piece in each of the squares shown in Diagram 1.
The Rebels enter at the two squares marked on the diagram; the exit from the room leads from the two squares directly opposite. Read aloud:
This room is square. The floor appears to be covered with some kind of grid; there are 12 columns running from the floor to the ceiling. Parts of the walls are blackened, as if by laserfire. As you enter, a pleasant voice, probably computer-generated, greets you.
"Welcome to the lasermaze. Each of the columns contains lasers: four sets, to be precise, pointing in four directions, running parallel to the lines on the floor. Watch, please."
Diagram 1:
ENTRANCE
Four rows of holes suddenly open on a column off to your left. A sharp burst of light, as laser-fire shoots out of all of the holes. The voice continues.
"Your job is to reach the other side of this room without being killed. The lasers fire in a pattern, two at a time. Watch carefully, now."
Suddenly, all of the columns shoot out lasers, two at a time.
The pattern of the laser-fire is shown on the diagram above. Point at the two columns labeled '1' and say, "these fire." Then point at the columns labeled '2' and say, "then these fire." Go through the rest, in sequence, pausing about five seconds between each set, to give the players a chance to memorize the sequence. Do not repeat the sequence once you are through: the players have one shot at this.
Continue reading:
Once the sequence is complete, the voice resumes. "I should warn you, there is a tangle-foot field in here. It's only on low intensity, but I suggest that you move rather cautiously — we wouldn't want anyone to fall down in front of one of those laser barrages, now would we?
"In exactly one minute and thirty seconds, all of the lasers will flare on simultaneously. You may wish to be out of this room by then.
"Good luck. You may begin now."
The Rebels move through the grid, attempting to reach the other side without being skewered. Because of the tanglefoot field (a police device; a low-intensity force field designed to slow the movement of rioters), the Rebels must make a Very Easy Dexterity roll to move one square; a Moderate Dexterity roll to move two squares; and a Difficult Dexterity roll to move three squares. Failure indicates that the Rebel moves one square in his intended direction and then falls down in the new square. It takes an Easy Dexterity roll to get up; a Moderate roll to get up and move one square; and a Difficult roll to get up and move two squares. Failure indicates that the character does not get up at all.
Diagram 2:
Two or more Rebels cannot occupy the same square; the Rebels cannot enter the squares with the columns in them. The Rebels can move diagonally or straight, or a combination of both during the same move.
After all of the Rebels have moved, one pair of columns fire. The lasers do 4D damage to anyone caught in their fire line. The laser-fire does not pass through other columns; anyone with a column between him or her and the firing laser is safe. As stated above, the columns shoot out lasers in four directions, running parallel to the grids on the floor. For example, when the second columns in the sequence fire, the lasers shoot through the square shown in Diagram 2.
A Rebel caught in a lasered square may attempt to dodge the shot; he must make a Moderate dodge roll, minus 1D to his dodge skill because of the field. If successful, he ends up down in any empty adjacent square of his choice.
In a minute and thirty seconds, or 18 rounds, all of the lasers in the room will fire continuously for ten seconds. Anyone caught in this fire will almost certainly perish.
Lonchan the Protrean
Template Type: Protrean
Loyalty: To himself
Height: 2.1 meters
Sex: Male
DEXTERITY 3D
Brawling parry 3D+2, melee parry 3D+1, melee 4D
KNOWLEDGE 1D
MECHANICAL 1D
PERCEPTION 4D
Hide/sneak 6D
STRENGTH 3D
Brawling 5D
TECHNICAL 1D
Weapon: None
Physical Description: Lonchan looks like a crude clay statue of a humanoid. Almost as wide as it is tall, Lonchan has no fingers and no visible features on his grey, sagging head. Its body seems to flow and change constantly.
Modus Operandi: Protreans can alter the color and texture of their skin to resemble whatever surface they are next to. A Protrean standing against a rock wall can assume the features of that wall, appearing, under cursory examination, to be a lumpy outcropping (opposed roll, Lonchan's hide/sneak against the Rebels' Perception). Lonchan will flatten itself against a wall and wait for the group to pass. If there are any stragglers, Lonchan will strike, enveloping the victim in its skin, preventing the victim from crying out (Lonchan's melee skill against the Rebel's dodge, subtracting 1D from the character's skill if the Rebel is surprised by the attack). After striking, it turns back to the wall and resumes its disguise, smothering its victim. The victim can attempt Difficult Strength rolls to break free; if the victim fails the roll three times, he is smothered and later eaten.
Space Simulator
Read aloud:
The walls of this hemispherical room are perfectly smooth and slightly reflective. The room is empty except for what appears to be a stripped-down speeder in the center.
There are three banks of seats in the speeder, each capable of holding three people. The three front seats are equipped with what appear to be standard starship controls: a pilot's, gunner's, and shield operator's station.
A pleasant voice, probably computer-generated, greets you.
"Welcome to the playroom. Today, we are going to test your ability to operate a starship. Would your best pilot, gunner, and shield operator please take their seats at the appropriate controls, and the rest of you sit in any of the seats behind them. Thank you."
Let the Rebels decide who will take the controls. If they refuse, a nasty yellow, mustard-like gas seeps into the room. In the first round, the gas acts as a Strength 1D poison. It increases every round up to Strength 5D until the Rebels get into the craft or everyone is wounded, at which point it quickly disperses. Once the Rebels get in to the craft, read:
"That's good. Passengers, please watch your arms." Metal bands shoot out from the armrests, pinning the passengers to their seats. The three seats up front with the controls do not lock in their occupants. The voice continues.
"Struggling is futile, I assure you. If you actually manage to break one of the bands, a shaped charge in the seatback will blow your spine to bits. Just relax, and enjoy the ride."
The room grows dark and filled with stars. It is a hologram of space; ahead of you are four TIE/In starfighters, preparing to attack.
The room is a three-dimensional video game, but with a special penalty. Whenever a hit is scored against the Rebels' craft, an electric shock doing 2D+2 damage courses through the passengers, but not the three Rebels at the controls.
Simulation TIE/In
Sublight Speed: 5D
Maneuverability: 2D
Hull: 2D
Fire Control: 2D
Weapons: Two laser cannons (fire linked); Combined Damage: 5D
Shields: None
Simulation Y-Wing
Sublight Speed: 3D+2
Maneuverability: 2D
Hull: 4D+1
Shields: 1D
Weapons:
Two laser cannons (fire linked); Fire Control: 2D; Combined Damage: 5D
Two proton torpedo launchers; Fire Control: 2D; Combined Damage: 9D
Two light ion cannons; Fire Control: 1D; Combined Damage: 4D
Before combat begins, one of the TIE/Ins fires and hits, causing a shock (but no actual damage) to the passengers, letting them know what they are in for.
Resolve the battle as if it were a real space combat, using either Star Wars: The Roleplaying Game rules or Star Warriors rules. The Rebels' ship has the flight characteristics of a standard two-man Y-wing fighter, except that the controls are split up between three different stations. Remember that the Rebels' vessel fires only holo-images of lasers; they cannot use them to blast their way out of the room.
Note that the ship itself is never damaged and will continue to fly no matter how many times it is hit; but the passengers will suffer each time a shot gets through the vessel's shielding. The enemy vessels take damage as normal.
The simulation continues until the four TIE/Ins are destroyed or half the passengers are dead or unconscious.
Short Cut
When the Rebels reach the base of this corridor, read:
Up ahead is a large, wide corridor. It is straight and smooth, and heads upwards at a slight angle. The floor of the corridor is smooth and slightly slick, making your footing uncertain. That could be dangerous, because thin, razor-sharp spikes are imbedded in the floor, facing up. Falling here would not be a good idea...
Above the corridor is a sign which reads: "SHORTCUT".
This is, in fact, a shortcut, bypassing the Pit of Wind and the Stairs. However, it is also quite dangerous indeed. The slope of the floor increases as one moves up towards the Puzzle Room, and there are no hand-or footholds. If you slip, you will slide back down to the bottom of the corridor, getting slashed by the spikes as you go.
To make it up safely, each Rebel must make three Dexterity rolls: the first is Easy, the second is Moderate, and the third is Difficult. If the Rebel fails the first roll, he slips down to the bottom, taking 1D damage from the fall. If he fails the second, he takes 2D+1 damage and falls to the bottom. If he fails the third, he takes 4D damage.
Another Rebel may attempt to stop a falling Rebel; this is a Dexterity roll one level more difficult than the roll the Rebel failed. If the Rebel fails that roll, he, too, plunges to the bottom.
Rebels armed with lightsabers can carve footholds out of the corridor's floor, in which case no Dexterity rolls are required.
If you want to be really nasty, you can have a bounty hunter waiting at the top of the corridor...
Pit of Wind
Read aloud:
Before you is a 50-centimeter-wide walkway leading across to another door. There are other planks across the room at varying heights below the one in front of you. Below the planks you see shining spikes pointing up.
It looks easy, but the Rebels should know better. As they move across the walkway, a rush of wind starts up; the Rebels must make a Moderate Strength roll to stay on the beam. Any Rebel knocked off gets three Moderate Dexterity rolls to grab onto a walkway below the one he fell off.
Once aware of their peril, the Rebels can crawl along the walkways and make it safely to the other side. Any Rebels knocked off the original walkway, though, must make as many Moderate climbing rolls as the number of Dexterity rolls it took to stop their fall.
A Rebel who misses all Dexterity checks falls to the spikes below (Damage code: 3D+2).
Equipment Chamber
This room contains a variety of weaponry for the Rebels. Unfortunately, it is inoperable. Read:
The room is perfectly round, with a closed blast door on the opposite wall. In the middle of the room is a table, upon which sit three blasters and blaster packs, two grenades and two vibroknives.
The weapons don't work. If the Rebels simply take them without checking them out, they are in for a rude shock when they try to use them.
The blasters work fine for one shot, but their barrels are slightly mis-aligned; that one shot burns them out. It takes a Moderate blaster roll to spot the defect (and the Rebel must state that he is checking the weapon out). Without proper equipment, it takes a Difficult Technical roll to repair a blaster, failure indicating that the weapon is ruined. The power packs are fine.
The grenades' time-delay systems are broken. The grenades explode immediately upon triggering them, making the center of impact the Rebel throwing the missile. It takes a Moderate grenade roll to spot the defect (only if the Rebel is checking the weapon out). It takes only a Moderate Technical roll to repair the weapon, but, if the roll fails, there is a fifty-fifty chance that the grenade detonates immediately.
The vibroknives simply don't work at all. There is no way to fix them.
The Stairs
These are standard, straight-forward stairs leading up to the Puzzle Room. However, the Moff has placed gravity generators under the stairs; it gets increasingly more difficult to climb the higher one gets.
The players must make a series of three Stamina rolls to make their way up the stairs. The first roll is Easy; the second is Moderate; the third is Difficult. Failure of any of these rolls indicates that the Rebel is fatigued — he suffers a penalty of minus 1D to all further actions until he can rest for an hour.
A Rebel who fails two rolls simply cannot go on without an hour's rest. If the Rebels decide to rest for an hour before continuing their journey, roll three times to see if they encounter a Hunter of the Chamber.
Puzzle Room
Read aloud:
This natural rock room seems bare, but burned and blackened. The metal floor is smooth; there is nothing in the room save a black sphere hanging from the rock ceiling and a complicated sunken control panel directly below it. As you enter, a blast door slams shut behind you.
The room stays quiet for a moment, then a voice fills the air. "Congratulations. Very few have ever gotten this far. You proven yourself physically able. But what about your other skills?"
With that, the sphere begins to spin faster and faster. Then one, two, three and more laser beams shoot out from it horizontally. The sound of the rock face splintering fills the room. The sphere begins to lower.
"Can you figure out how to turn off the lasers before the sphere reaches ground level and turns you into cinders?"
"Good luck."
Only one Rebel can man the control panel at a time. The hero must try to figure out the plethora of controls and indicators. It takes a series of three Technical rolls to fully deactivate the sphere. The first roll is Difficult, the second Moderate and the last Easy.
The combined damage from the spinning lasers is 9D. Every time the Rebel at the control panel makes a successful roll, this damage is reduced by 3D (a successful roll means the Rebel has managed to turn off a third of the lasers).
In the time it takes for nine rolls, the sphere will have reached the floor, decimating everyone and everything in room. The speed at which the ball spins makes the lasers Difficult to dodge. Once the lasers have reached the floor, they will continue to fire for three rounds.
The Rebels can attempt to shoot at the ball to disable it (a Difficult shot because of its small size), but it is completely coated with a highly reflective mirrored surface, giving it a Strength of 6D to resist damage from lasers or blasters (but only a 3D to resist damage from projectile or explosive weapons). Stun results have no effect; wound results knock out one laser (reducing the damage the ball inflicts by 1D); an incapacitate result knocks out two lasers.
The Quarry Room
Read aloud:
This area is huge. The walls and ceiling are made of natural rock, the floor metal with some rock outcroppings and sculpted geometric shapes scattered about. You are ready for anything when a voice comes through the speakers.
"You have proven yourselves well. Now it is time to meet me."
Bandor is a liar and a coward. He never had any intention of hunting the Rebels through the Chambers. Instead, he watched their progress through hidden cameras and waited for them here.
By the time they reach this room, his victims are usually tired and probably injured. They may also be frightened out of their wits. He never expects anyone to figure out about the Generator and the helmets, so he will be quite surprised to see the Rebels wearing them. All he usually has to do is walk out and deliver the coup de grace.
However, Bandor has never come up against people of the caliber of the Rebels. If the Rebel party is still strong, Bandor will signal for hunters to come to his aid, promising them freedom once the Rebels are killed. The result will be a cat and mouse battle among the stones.
Bandor is armed with a heavy blaster and under his clothing wears the equivalent of stormtrooper's armor. Of course, he also wears a metal helmet on his head. If the helmet is ripped off, he will be overcome by raw terror. He will immediately fall to the floor and beg for mercy.
If Bandor is ever wounded, he will rush through the doors to get to the Generator.
Bandor's Revenge
Bandor is a poor loser. If faced with death or loss of his power, he will activate the Generator's Doomsday programming. The Generator builds up to maximum output, and then explodes.
How he does it depends on you. If he manages to escape into the generator room, he starts the sequence from there. If he is hurt or dying in the Quarry Room, he activates the program from a small control panel on his wrist.
The generator will explode, taking out the palace, but before it does, it will bathe the planet with intense fear waves, sending people into paranoid mania. The result will be a worldwide riot and wholesale madness and slaughter.
Episode Six
Freeing of Questal
Summary
The Rebels must destroy the prototype weapon before it drives them and the entire population of the planet mad.
The Generator Room
Read aloud:
This room appears to be tall enough to reach the surface of the planet. In the center of the room is a huge device that disappears into the cavernous heights of the room. Lights flash, circuits hum, power surges. Four dish transmitters face in all directions from the device. The control panel is at the machine's base.
Off in a cranny formed by a fold in the rock wall, you can see the huddled form of Tiree. One of his legs juts out at an impossible angle; he is unconscious.
If Bandor escaped the Rebels in the quarry room, he will be at the controls of the machine, locking in the Doomsday programming. When finished, he gives a mad triumphant laugh and turns his blaster on himself.
The Rebels have to stop the generator. Once the Doomsday countdown begins, they have ten combat rounds to turn the machine off before it starts transmitting the heavier waves. The waves will bathe the entire planet, driving countless thousands mad with fear. The wholesale slaughter which will then occur will be exceeded in history only by the destruction of Alderaan. Ten rounds after that, the Generator will overload and explode.
Turning off the Generator
To stop the Generator, the Rebels must succeed at a series of Technical rolls. The first roll is to determine how to disable the machine; its success determines the Difficulty of the second roll. If the first roll would beat a Very Difficult level, the second roll is Very Easy; if the first beats a Difficult level, the second is Easy; if the first beats a Moderate level, the second is also Moderate; if the first beats an Easy level, the second is Difficult; and if the first beats only a Very Easy level, the second roll is Very Difficult. Up to three Rebels can combine on this roll.
For the second roll also, up to three Rebels can combine their Technical skills. It will take three rounds to disable the Generator; at the end of the three rounds, the Rebels can make their roll. If the Rebels wish to hurry the sequence, they can subtract one round of time for each additional level of Difficulty they add to the second roll. The Rebels can keep trying until the Generator explodes.
Getting Away
Once the Rebels have disabled the Generator, they will probably want to make their escape. On the sides of the machine are maintenance ladders going all the way up to the top of the Generator. No roll is necessary to spot them: they are in plain sight.
If they choose the correct ladder, the Rebels will reach a bank of machinery just below the throne room. They can blast through the ceiling with relative ease, ending up in the small chamber beneath the throne. From there, they can easily get away in the confusion.
Quitting Questal
The Rebels have little trouble getting off the planet. They can hitch a ride with the Corellian pirates if they helped them escape, or, for a small fee, they can arrange transport through Shilley.
Aftermath
The Empire will not re-establish a Moff on the planet. With the Ardanium almost depleted and the Generator project deemed a failure, the planet has nothing of real military or political value. The Imperial forces will evacuate the planet, returning it to the hands of its citizens. They will rise up and depose the Turf Bosses, and, while pledging loyalty to the Empire, they will open secret negotiations with the Alliance.
Tiree, free of the Generator's power, eventually returns to normal, as does Rogan.
Alliance Command congratulates the Rebels for rescuing Tiree and destroying the Generator; they are completely forgiven for disobeying orders.
Awards
Award the Rebels between five and eight skill points for successfully completing this mission. They receive an additional point if they stopped the Generator before it began sending out the powerful rays of fear.
Back Cover
by Robert Kern
Defying orders, Rebel agents launch a desperate search for a missing friend. What they find could shatter the Alliance forever.
Rebel Agent Tiree is missing. He never made it to the rendezvous point. Alliance Command cannot spare the men to launch a full-scale search; Tiree is on his own. But one group of heroes owes Tiree more than they can ever repay — and they vow to find him.
Retracing Tiree's trail, the Rebels go to the planet Questal. Tiree was on an unsanctioned mission there, hot on the trail of a rumored weapon of fearful proportions. Then he disappeared.
Now something is hunting the Rebels.
Can they avoid Tiree's fate, rescue their friend — and save the Alliance?
40-Page Book Features
- An exciting adventure script that hurls the players right into the action.
- Extensive descriptions of the Game Chambers of Questal, a hunting preserve where the Rebels are the prey.
- Detailed information on the planet Questal, its Imperial government, and its inhabitants.
Also includes:
- Diabolical puzzles, tricks and traps to test the Rebels' mettle.
- New monsters and alien races.
- Gamemaster guidelines to help re-create the excitement of the Star Wars movies.
A complete adventure for Star Wars: The Roleplaying Game. For game-master and one or more players.
West End Games RD 3 Box 2345 Honesdale, PA 18431
For ages 12 and up
©, ™ & © 1990 Lucasfilm, Ltd. (LFL). All Rights Reserved. Trademarks of LFL used by West End Games under authorization.